this process may take a long time on slower internet
connections.
NOTE: if a map update is too large for the internal storage of
the device, the software may prompt you to install a microSD
®
card in your device to add storage space (Installing a
memory card for maps and data, page 16).
8
Follow the on-screen instructions during the update process
to finish installing updates.
For example, during the update process, the Garmin Express
application may instruct you to disconnect and reconnect
your device.
Installing Garmin Express
The Garmin Express application is available for Windows
®
and
Mac
®
computers.
1
On your computer, go to garmin.com/express.
2
Select an option:
• To view the system requirements and verify the Garmin
Express application is compatible with your computer,
select System Requirements.
• To install on a Windows computer, select Download for
Windows.
• To install on a Mac computer, select Download for Mac.
3
Open the downloaded file, and follow the on-screen
instructions to complete the installation.
Device Care
NOTICE
Avoid dropping your device.
Do not store the device where prolonged exposure to extreme
temperatures can occur, as it can cause permanent damage.
Never use a hard or sharp object to operate the touchscreen as
this may result in damage.
Do not expose the device to water.
Cleaning the outer casing
NOTICE
Avoid chemical cleaners and solvents that can damage plastic
components.
1
Clean the outer casing of the device (not the touchscreen)
using a cloth dampened with a mild detergent solution.
2
Wipe the device dry.
Cleaning the Touchscreen
1
Use a soft, clean, lint-free cloth.
2
If necessary, lightly dampen the cloth with water.
3
If using a dampened cloth, turn off the device and disconnect
the device from the power.
4
Gently wipe the screen with the cloth.
Avoiding theft
• Remove the device and mount from sight when not in use.
• Remove the residue left on the windscreen by the suction
cup.
• Do not keep your unit in the glove compartment.
• Register your device using the Garmin Express software
(garmin.com/express).
Restarting the Device
You can restart your device if it stops functioning.
Hold the power key for 12 seconds.
Removing the Device, Mount and Suction
Cup
Removing the Device from the Mount
1
Press the release tab or button on the mount.
2
Tilt the bottom of the device upward, and lift the device from
the mount.
Removing the Mount from the Suction Cup
1
Turn the device mount to the right or left.
2
Apply pressure until the socket on the mount releases the
ball on the suction cup.
Removing the Suction Cup from the Windscreen
1
Flip the lever on the suction cup towards you.
2
Pull the tab on the suction cup towards you.
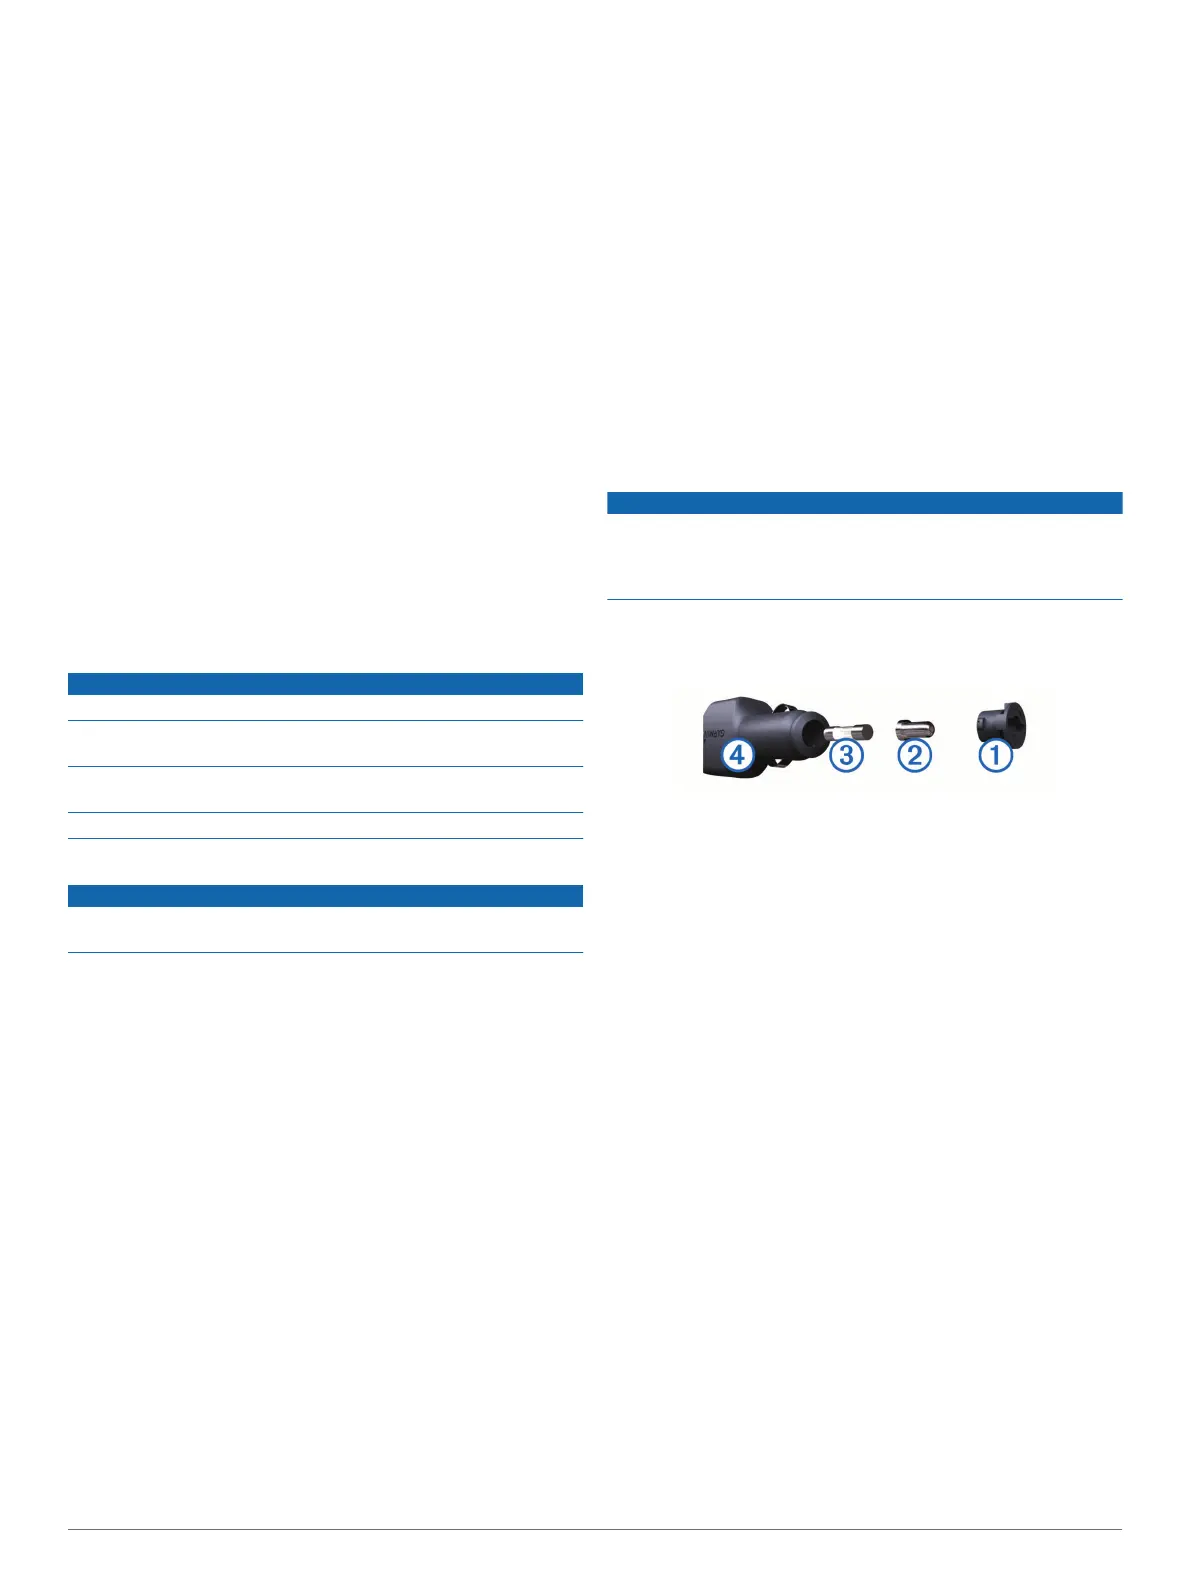
Changing the Fuse in the Vehicle Power
Cable
NOTICE
When replacing the fuse, do not lose any of the small pieces
and make sure they are put back in the proper position. The
vehicle power cable does not work unless it is assembled
correctly.
If your device does not charge in your vehicle, you may need to
replace the fuse located at the tip of the vehicle adapter.
1
Rotate the end piece
À
anti-clockwise to unlock it.
TIP: you may need to use a coin to remove the end piece.
2
Remove the end piece, the silver tip
Á
, and the fuse
Â
.
3
Insert a new fast-blow fuse that has the same current, such
as 1 A or 2 A.
4
Place the silver tip in the end piece.
5
Push in the end piece and rotate it clockwise to lock it back
into the vehicle power cable
Ã
.
Troubleshooting
The suction cup will not stay on my
windscreen
1
Clean the suction cup and windscreen with surgical spirit.
2
Dry with a clean, dry cloth.
3
Mount the suction cup (Mounting and powering the Garmin
Drive device in your vehicle, page 1).
My device is not acquiring satellite signals
• Verify the GPS simulator is turned off (Navigation settings,
page 12).
• Take your device out of car parks and away from tall
buildings and trees.
• Remain stationary for several minutes.
The device does not charge in my vehicle
• Check the fuse in the vehicle power cable (Changing the
Fuse in the Vehicle Power Cable, page 15).
• Verify that the vehicle is turned on and is supplying power to
the power outlet.
Troubleshooting 15
 Loading...