Flush Mounting the Device Using Nut Plates
Before you can secure the device to the mounting surface using nut plates, you must cut an opening for the
device and confirm or mark the locations of the mounting holes.
1 Using a drill bit according to the table below, drill the larger holes for the nut plate as indicated on the
template.
Device Drill bit size
GPSMAP 7x3, GPSMAP 9x3, and GPSMAP 12x3 3.5mm (
9
/
64
in.)
GPSMAP 16x3 6mm (
1
/
4
in.)
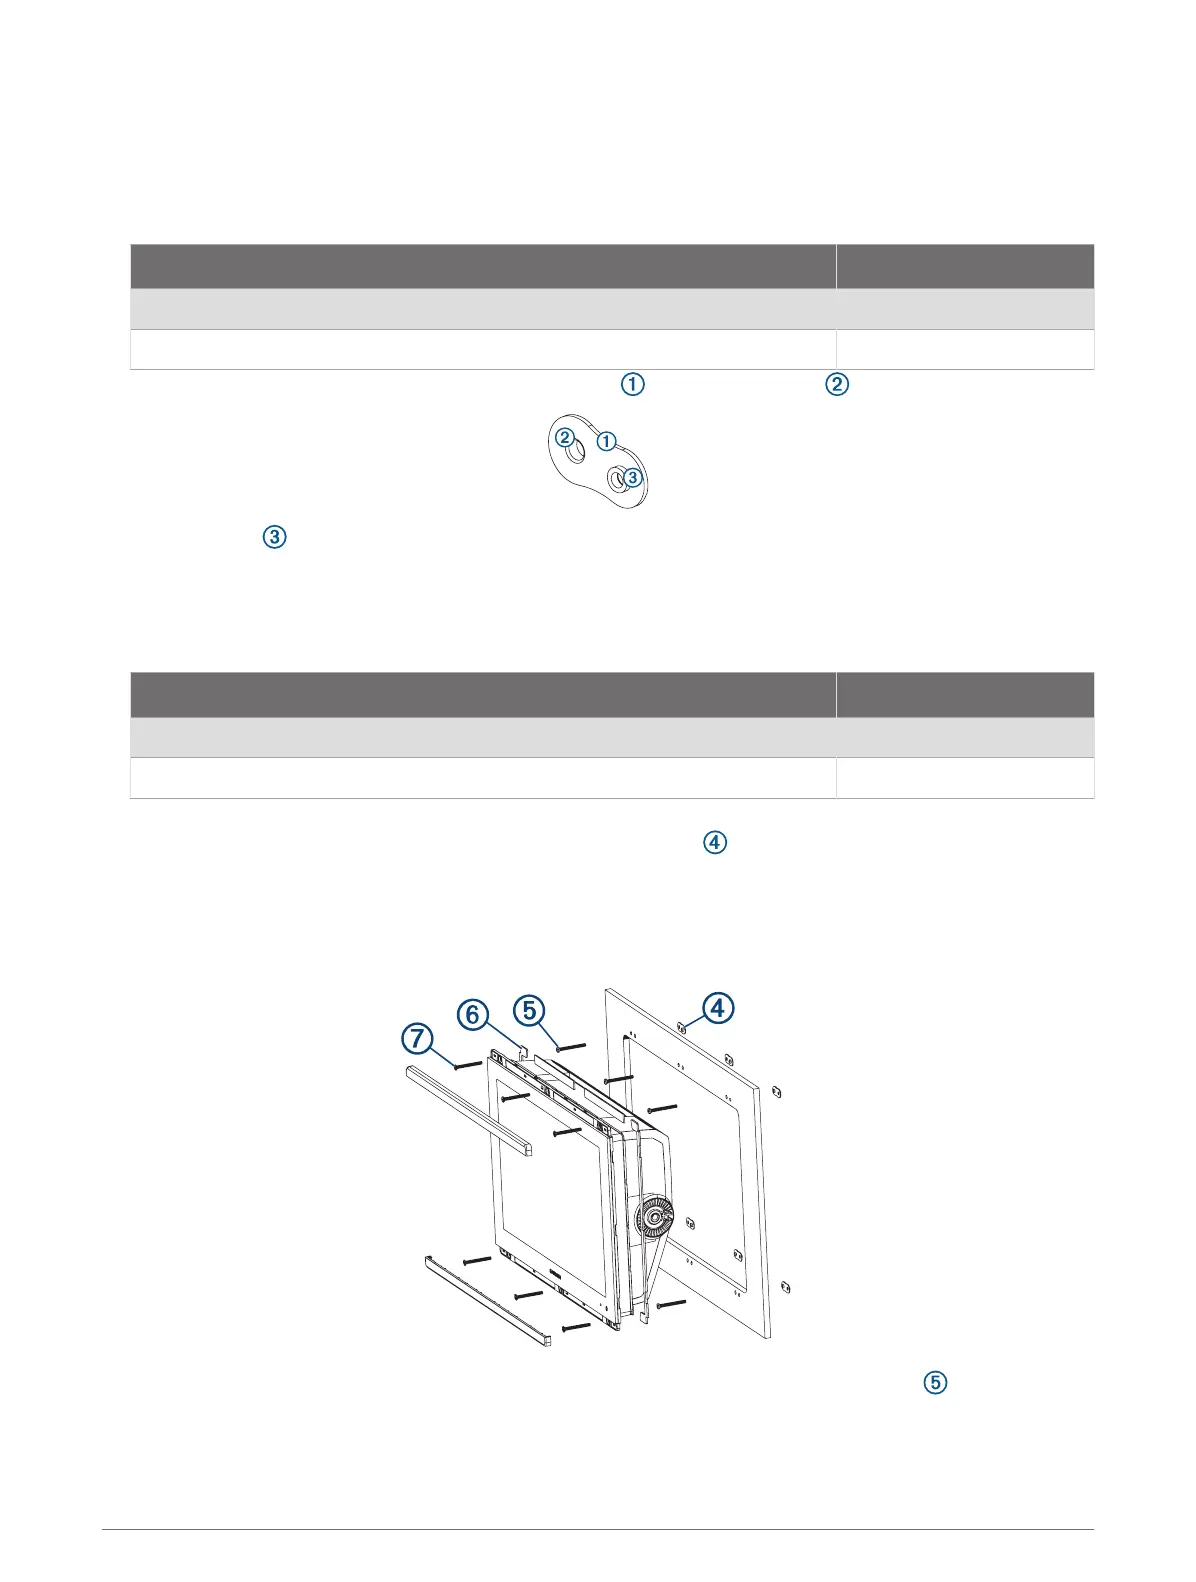
2 Starting in one corner of the template, place a nut plate over the larger hole drilled in the previous step.
The other hole on the nut plate should line up with the smaller hole on the template.
3 If the smaller hole on the nut plate does not line up with the smaller hole on the template, mark the new hole
location.
4 Repeat to verify placement of the remaining nut plates and holes on the template.
5 Using a drill bit according to the table below, drill the smaller holes for the nut plate.
Device Drill bit size
GPSMAP 7x3, GPSMAP 9x3, and GPSMAP 12x3 3mm (
1
/
8
in.)
GPSMAP 16x3 3.5mm (
9
/
64
in.)
6 Remove the template from the mounting surface.
7 Starting in one corner of the mounting location, place a nut plate on the back of the mounting surface,
lining up the holes.
On GPSMAP 7x3, GPSMAP 9x3, and GPSMAP 12x3 devices, the raised portion of the nut plate should fit into
the smaller hole.
On GPSMAP 16x3 devices, the raised portion of the nut plate should fit into the larger hole.
8 Secure the nut plates to the mounting surface by fastening the pan head machine screws through the
holes with the raised portion of the nut plate.
8