EasyManua.ls Logo

Garmin PANOPTIX LIVESCOPE LVS32 - User Manual

Garmin PANOPTIX LIVESCOPE LVS32
14 pages
Print Icon
To Next Page IconTo Next Page
Loading...
PANOPTIX
LIVESCOPE
INSTALLATION INSTRUCTIONS
Important Safety Information
WARNING
See the Important Safety and Product Information guide in the chartplotter product box for product warnings
and other important information.
You are responsible for the safe and prudent operation of your vessel. Sonar is a tool that enhances your
awareness of the water beneath your boat. It does not relieve you of the responsibility of observing the water
around your boat as you navigate.
CAUTION
Failure to install and maintain this equipment in accordance with these instructions could result in damage or
injury.
To avoid possible personal injury, always wear safety goggles, ear protection, and a dust mask when drilling,
cutting, or sanding.
NOTICE
When drilling or cutting, always check what is on the opposite side of the surface to avoid damaging the vessel.
To obtain the best performance and to avoid damage to your boat, you must install the Garmin
®
device
according to these instructions.
Read all installation instructions before proceeding with the installation. If you experience difficulty during the
installation, go to support.garmin.com for more information.
Software Update
You must update the Garmin chartplotter software when you install this device. For instructions on updating
the software, see your chartplotter owner's manual at support.garmin.com.
Tools Needed
Drill
4 mm (
5
/
32
in.) and 3.2 mm (
1
/
8
in.) drill bits
Masking tape
#2 Phillips screwdriver
Marine sealant
32 mm (1
1
/
4
in.) hole saw (optional)
Cable ties (optional)
GUID-8ABE5659-3192-4519-8A48-66421E004620 v5March 2021

Questions and Answers

  • Д
    ДинарDec 17, 2025
    Почему на экране гармин паноптикс 32 датчик не видит датчик?

    Summary

    Important Safety Information

    General Warnings

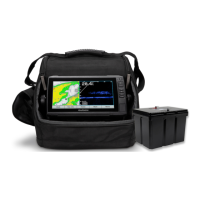
    See the Important Safety and Product Information guide for product warnings and other important information.

    Cautionary Notes

    Failure to install and maintain equipment could result in damage or injury.

    Drilling and Cutting Notice

    Check opposite side of surface when drilling or cutting to avoid vessel damage.

    Software Update

    Chartplotter Software Update

    Update chartplotter software after installing the device for proper function.

    Tools Needed

    Required Installation Tools

    List of tools required for installation: drill, bits, tape, screwdriver, sealant, hole saw.

    Mounting Considerations

    Transducer Mounting Location

    Angle transducer correctly, ensure module ventilation, avoid jarring and turbulent water.

    Transom Mounting Guidelines

    Mount transducer near centerline; deadrise may affect sonar beam and detection.

    Sonar Module Mounting

    Mount sonar module where LEDs are visible, cables connect, and device is not submerged.

    Cable Considerations

    Cable Management and Protection

    Avoid over-tightening zip ties; use tape and service loops for cable protection.

    Routing the Transducer Cable

    Cable Routing and Looping

    Allow loose gaps for rotation, use tape, test full rotation to prevent cable strain.

    Installing the Transducer on a Trolling Motor

    Trolling Motor Barrel Mount Assembly

    Align transducer with bracket, attach using shoulder screw, rubber, and flat washer.

    Securing Transducer Cable to Shaft

    Secure transducer cable to shaft/location using hose clamp and tape to prevent damage.

    Cable Routing Precautions

    Route cable away from interference, avoid pinching, use extension cables if needed.

    Transducer Angle Adjustment

    Position transducer to desired angle as per 'Trolling Motor Mount Orientation'.

    Trolling Motor Mount Orientation

    Mounting Orientations

    Select orientation based on side of motor and desired view (forward/down).

    Installing the Transducer on a Trolling Motor Shaft

    Trolling Motor Shaft Bracket Orientation

    Orient shaft bracket arrow and narrow end upwards to reduce barrel interference.

    Shaft Mount Assembly

    Attach transducer to shaft bracket using hex wrench, shoulder screw, and washers.

    Securing Transducer Cable to Shaft

    Secure transducer cable to motor shaft or location to prevent damage.

    Cable Routing and Positioning

    Route cable away from interference, avoid pinching; position transducer to desired angle.

    Trolling Motor Shaft Orientation

    Shaft Mount Orientations

    Select orientation based on motor shaft side and desired view (forward/down).

    Installing the Transducer on a Transom

    Optional Spray Shield Accessory

    Install optional spray shield to reduce spray from transducer.

    Assembling the Transom-Mount Hardware

    Attach transducer bracket to transducer and then to transom mount bracket.

    Transom Mounting Procedure

    Mark, drill pilot holes (with countersink), apply sealant, and attach transducer mount to transom.

    Securing Transom Mount Corners

    Ensure all four corners are secured to prevent bracket bending or breaking at speed.

    Cable Routing via Transom

    Route cable through transom or over top, avoiding interference and pinching.

    Mounting the GLS 10 Black Box Device

    Black Box Mounting Procedure

    Mark pilot holes, drill, loosely fasten, check marks, drill remaining holes, and secure device.

    Installation Diagram

    System Components

    Diagram shows chartplotter, sonar module, cables, fuse, and transducer connections.

    Fuse Warning

    Do not remove the fuse; doing so may cause malfunction and void the warranty.

    Power Cable Extensions

    Extension Wire Gauges

    Use appropriate AWG wire for extensions up to 36 ft (11 m).

    Blink Codes

    LED Status Indicators

    Interprets LED colors (Green, Red, Orange) and blink patterns for operational status.

    Transducer Settings and Operation

    Calibrating the Compass

    Calibrate compass on shaft/transom away from interference, rotate boat 1.5 times.

    Specifications

    Panoptix LiveScope LVS32 Specifications

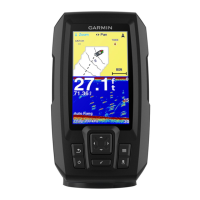
    Details dimensions, weight, frequency, temperature, depth, and field of view.

    Panoptix LiveScope GLS 10 Sonar Module Specifications

    Details dimensions, weight, temperature, power, and data output.

    Cleaning the Transducer

    Transducer Cleaning Procedure

    Remove aquatic fouling with a soft cloth and mild detergent, then wipe dry.

    Garmin PANOPTIX LIVESCOPE LVS32 Specifications

    General IconGeneral
    Frequency530 - 1, 100 kHz
    Power500 W
    Beam Width20° x 135°
    Cable Length20 ft (6 m)
    Storage Temperature-4°F to 158°F (-20°C to 70°C)
    Voltage Range10-32 V
    Operating Temperature0°C to 40°C
    Compatible UnitsGPSMAP
    Maximum Depth200 ft

    Related product manuals