Dismantling
Reference numbers in brackets are those used on diagrams 2-6.
To remove the chassis
from
the cabinet
1.
Turn the power switch to 'Off' and disconnect the module
from
its power supply. Unplug any input, output or signal
ground
leads from their sockets at the back of the module,
noting locations for reassembly.
2. Turn the module upside down, place it on a protective
surface and remove four screws (44) from the isolator feet
(42),
being careful not to lose the associated bushes (43).
Remove
both remaining screws (41) and washers (40) from
the bottom of the cabinet and turn the module the right way
up again.
3. The chassis can now be withdrawn from the front of the
cabinet, taking care not to damage the top of the
transformer (36) in the process. Lift the front of the chassis
to
ease
its rear flange out through the cabinet. Do not use
force
and take care to avoid tension on the power supply
lead as the chassis emerges.
When
refitting the chassis,
ease
the transformer and wiring
iooms under the front edge of the cabinet.
To remove the printed circuit board
(P.C.B.)
(27)
CAUTION:
When
handling the
P.C.B.,
take care not to bend it.
1.
Dismantle the chassis from the cabinet as already described.
2. Unplug all connectors from the
P.C.B.,
noting their locations
for
reassembly.
3. Eight 'Rokut' rivets (26) or five rivets and three nuts - secure
the
P.C.B.
to the chassis.
Remove
the rivets, by driving
their central spigots upwards through the
P.C.B.
until they
can be withdrawn from the top of the board. (A small
screwdriver is a convenient tool.)
Remove
any remaining
fixing nuts and washers from the bottom of the chassis.
Finally,
press the rivets up through the chassis to release the
P.C.B.
Note:
When
refitting the
P.C.B.
check that all spacer
washers (38) are in place. To refit the rivets, press them back
down through the
P.C.B.
and chassis, then push the central
spigots down until they are flush with the top of the domed
rivet head.
To remove the power supply lead (2)
1.
Dismantle the chassis from the cabinet as already described.
2. Unsolder the lead from the power switch terminals (30).
3. The lead is secured to the back of the chassis by means of a
moulded 'Heyco' bush (1). To release the lead, compress the
top
and bottom of the bush inside the chassis, using a pair
of pliers, while pushing the bush out through the back of the
chassis.
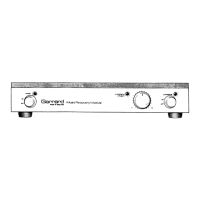
To remove the fascia panel (28)
1.
Pull
off the small power switch and suppressor control
knobs (23) and the large suppressor sensitivity knob (24).
2.
Take
the nuts off the three control spindles and remove the
fascia panel, taking care to retain the spacers (29) fitted
between the panel and the chassis. Do not scratch the
aluminium panel.
To dismantle the fader assembly (13)
1.
Remove
the chassis from the cabinet.
2.
Take
out the screw (15) securing the two black housings.
3. Unwind the black tape or release the black light-proof band
from
around the housings and lift off the top housing. The
components are all now accessible.
it
is most important for correct operation that the backs of the
light
dependent resistors and
L.E.D's
are all seated flat against
their respective faces in the cavities in the bottom housing.
To remove an indicator lamp
(L.E.D.)
(22 or 25)
1.
Dismantle the chassis from the cabinet.
2.
Lever
the collar off the mounting bush (20) -
away
from the
chassis flange - and withdraw the lamp.
3. Carefully cut
away
both heat-shrink insulated
sleeves
and
unsolder the lamp connections, noting which lead is nearer
to
the flat on the
L.E.D.
mounting flange.
4.
When
reassembling, insulate both connections again using
replacement
sleeves
or
P.V.C.
tape.
Press
the lamp fully into
the mounting bush, before refitting the collar.
To replace a mounting bush it will be necessary to take off
the fascia panel, remove the collar and lamp and press the
bush out through the front of the chassis flange.
To remove power supply switch, sensitivity
control
or suppressor switch
1.
Dismantle the chassis from the cabinet and take off the
fascia panel (28) - see previous paragraphs.
2. Unsolder the connecting leads, after noting their positions
on the control terminals, and withdraw the
control.
When
reassembling note that all controls
have
spigots which
must locate in corresponding holes in the chassis. Refit the
three spacing washers behind the fascia panel.
Test
Procedures
Instruments required
(a)
Dual
channel oscilloscope, with timebase accuracy better
than 5% (preferably better than 3%).
(b)
Toneburst generator, capable of a single cycle toneburst -
1.6kHz
fundamental,
IQHz
repetition rate,
or
Pulse
generator, capable of generating a doublet pulse
of 600ps duration, 10Hz repetition rate.
(c)
Sinewave
oscillator, producing
20Hz,
1kHz and 20kHz.
(d)
DC voltmeter, to measure 25V ± 2V.
(e) AC millivoltmeter, to measure from 9V rms to
20mV
rms,
20Hz
to 20kHz, better than 0.5dB.
(f)
AC microvoltmeter, to measure
50pV
rms to
200μV
rms,
bandwidth 20Hzto 20kHz.
(g)
Counter/timer, to measure up to 100kHz.
(h) Distortion factor meter, to measure less than 0.01%
distortion.
(i) Low-distortion oscillator, less than
0.01%
distortion at .
1kHz.
Tests
1.
Indicator lamp polarity and operation
Conditions: Connect the MRM to a power supply of
appropriate AC voltage - as shown on its back
panel.
Short circuit both input channels.
Switch the power on and suppressor in.
Check:
Power
and suppressor indicators are
operative.
2.
Transformer and loading
Instrument: DC voltmeter.
Conditions: As for
Test
1.
Check: DC voltage on both main power supply
capacitors (C115, C215) to be 21V ± 3V.
3.
Channel balance and output
Instruments:
Sinewave
oscillator, oscilloscope, AC
millivoltmeter.
Conditions: Switch suppressor out. Apply 1kHz
sinewave
signal to input terminals in
turn.
Check: Channel balance must be better than ± 1dB.
Maximum output before visible clipping to be
greater than 7V rms.
J
12
 Loading...