EN EN
12 13
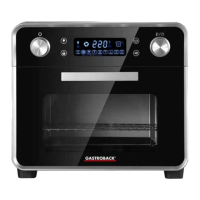
KNOWING YOUR NEW OVEN
1 PROGRAM DIAL – Turn this dial for selecting the program.
2 SETTING DIAL – Turn here for selecting temperature and time.
3 DISPLAY AREA – Shows the time (minutes or seconds) and temperature (°C or °F).
4 OVEN COMPARTMENT
5 NON-SLIP RUBBER FEET
6 6 HEATING ELEMENTS 4 at the top and 2 at the bottom of the oven compartment. Can be activated separately for getting the desired heat distribution.
7 OVEN LIGHT – May be switched on and off at will via the light button.
8 SPIT HOLDER – For hanging in one end of the rotisserie spit
9 ROTOR DRIVE – Insert the rotisserie spit into this opening for coupling it to the motor.
10 3 SHELF SLOTS – For positioning your food within the oven compartment.
OVEN COMPARTMENT
1
2
5
3
4
6
7
8
9
10
6
11 LIGHT BUTTON – For switching the oven light on or off.
12 ON/OFF BUTTON – For switching the oven on or off.
13 CHILD LOCK BUTTON – Use this button for locking or unlocking the operating elements.
14 START/PAUSE BUTTON – Use this button for starting or interrupting the selected program.
KONSOLE
OPERATION ICON TOAST ICON
PIZZA-ICON
DEFROST ICON
FRIES-SYMBOL
UPPER HEAT AIR FRY ICON
AIR FRY ROTISSERIE ICON
UPPER HEAT ICON
LOWER HEAT ICON
UPPER AND LOWER HEAT ICON
NORMAL ROTISSERIE ICON
11 12
13 14
REMOVABLE CRUMB TRAY, GRILLING RACK, WIRE BASKET AND ROTISSERIE SPIT are dishwasher safe.
 Loading...