EasyManua.ls Logo

GE AEC12 - User Manual

GE AEC12
32 pages
Print Icon
To Next Page IconTo Next Page
Loading...
Write the model and serial
numbers here:
Model # _________________
Serial # _________________
Find these numbers on a label on
the side of the air conditioner.
GE is a trademark of the General Electric Company. Manufactured under trademark license.
Owner’s Manual
and Installation
Instructions
AIR CONDITIONERS
49-7770-1 04-17 GEA
AEC10
AEC12
AED10
ENGLISH/ESPAÑOL
ROOM
SAFETY INFORMATION .........3
OPERATING INSTRUCTIONS ....4
CARE AND CLEANING
Grille and Case ........................6
Air Filter ..............................6
Outdoor Coils .........................6
Installing Remote Batteries .............6
INSTALLATION ...................7
TROUBLESHOOTING TIPS ......12
APPLIANCE
COMMUNICATION .............13
WARRANTY ......................14
CONSUMER SUPPORT ..........16
Question and Answer IconNeed help?

Do you have a question about the GE AEC12 and is the answer not in the manual?

Overview

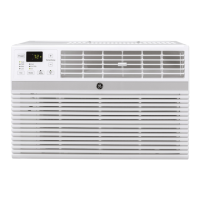
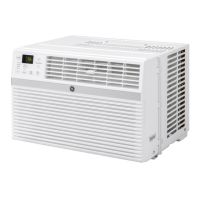
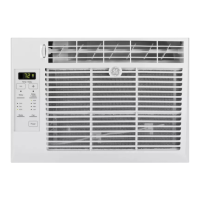
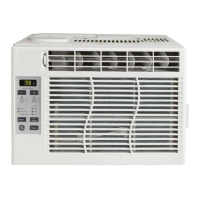
This document is an owner's manual and installation instructions for GE Appliances Room Air Conditioners, specifically models AEC10, AEC12, and AED10. It provides comprehensive information on the safe operation, installation, usage, and maintenance of these units.

Function Description

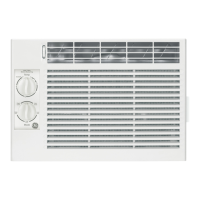
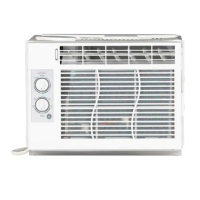
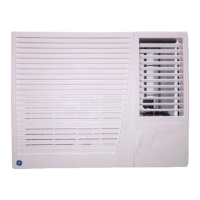
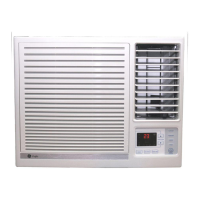
The GE Appliances Room Air Conditioner is designed to cool a room, filter the air, and provide various operational modes for user comfort and energy efficiency. It can be installed in a window and comes with a remote control for convenient operation. The unit also features Wi-Fi connectivity for remote control via a smartphone app.

Important Technical Specifications

  • Electrical Requirements:
    • Some models require 115/120-volt AC, 60-Hz grounded outlet protected with a 15-amp time-delay fuse or circuit breaker. These models utilize a 3-prong grounding plug to minimize electric shock hazards. If the wall outlet is a 2-prong type, it must be replaced with a properly grounded 3-prong wall outlet.
    • Other models require 230/208-volt AC, 60-Hz grounded outlet protected with a time-delay fuse or circuit breaker. These models should be installed on their own single branch circuit for optimal performance and to prevent overloading house or apartment wiring, which could lead to fire hazards from overheating wires.
    • The power cord includes a current interrupter device with a TEST and RESET button. This device should be tested periodically.
  • Refrigerant: The air conditioners contain R410A refrigerant. Special tools and safety standards approved for R410A are required for servicing.
  • Remote Control Batteries: Uses 2 "AAA" (1.5 volt) alkaline batteries. Rechargeable batteries should not be used. Batteries should be removed if the remote is not used for a long time, and old and new batteries, or different types of batteries, should not be mixed.
  • Window Dimensions (Minimum):
    • AEC08: 13-1/2" (A) x 24"-38" (B)
    • AEC10, AED10, AEC12: 18-1/6" (A) x 24"-36" (B)
    • These dimensions refer to the height (A) and width (B) of the window opening.

Usage Features

  • Control Panel and Remote Control: The unit can be operated using the control panel on the air conditioner or the included remote control. Both display the current temperature set mode and Wi-Fi connection status.
  • Power On/Off: Turns the air conditioner on or off.
  • Display: Shows the room temperature and the set temperature. The set temperature light illuminates when in Cool or Energy Saver modes.
  • Temperature Adjustment: Up/Down arrows or buttons allow setting the desired temperature between 64°F and 86°F in 1°F increments.
  • Mode Pad: Selects between Cool, Energy Saver, or Fan Only modes.
    • Cool Mode: Provides cooling at Low, Med, High, or Auto Fan Speed. The electronic thermostat maintains the set temperature by cycling the compressor on and off.
      • Normal Cooling: Cool mode with High or Med fan speed and a medium set temperature.
      • Maximum Cooling: Cool mode with High fan speed and a lower set temperature.
      • Quiet/Nighttime Cooling: Cool mode with Low fan speed and a medium set temperature.
    • Energy Saver Mode: Optimizes power usage for energy savings. The fan cycles on and off periodically to maintain the set temperature. This is the default mode.
      • Energy Saver ON: Fan cycles on and off.
      • Energy Saver OFF: Fan runs continuously, and the compressor cycles on and off.
    • Fan Only Mode: Circulates and filters air without cooling at Low, Med, or High fan speeds. A set temperature cannot be entered in this mode; the ambient room temperature is displayed.
  • Fan Speed: Selects fan speed (Low, Med, High) or Auto. In Auto Fan Speed, the unit automatically adjusts the fan speed to maintain optimal comfort based on the set temperature.
  • Wi-Fi Connect: Enables connection to the home Wi-Fi network for remote control via the GEAppliances app.
  • Reset Filter: A light illuminates after 250 hours of operation as a reminder to clean the air filter. Pressing the Reset Filter button resets the counter.
  • Temperature Display Unit: The display can show temperature in Fahrenheit (°F) or Celsius (°C). Pressing the Temperature Increase and Decrease buttons simultaneously for 3 seconds toggles between the units.
  • Power Outage Recovery Feature: The unit automatically restarts with the last used settings after a power interruption.
  • Air Direction: Levers allow adjusting the airflow direction left and right.
  • Normal Operating Sounds: Users may hear a metallic sound from water hitting the condenser on rainy or humid days (for humidity removal and efficiency), and a clicking sound from the thermostat when the compressor cycles on and off. Water accumulation in the pan during rainy/humid days is normal and may drip from the outside. The fan may run even when the compressor is off.

Maintenance Features

  • Grille and Case Cleaning: Turn off and unplug the air conditioner before cleaning. Use water and a mild detergent; avoid bleach or abrasives.
  • Air Filter Cleaning: The air filter, located behind the front grille, should be checked and cleaned at least every 30 days or more often. To remove, pull the tab on the right side of the unit or open the inlet grille by pulling down the tabs at the top upper corners. Clean the filter with warm, soapy water, rinse, and let it dry before replacing. Do not clean in a dishwasher. Operating the unit without a filter can lead to dirt and lint clogging and reduced performance.
  • Outdoor Coils: The coils on the outdoor side should be checked regularly. If clogged with dirt or soot, they may require professional cleaning.
  • Troubleshooting Tips: The manual includes a comprehensive troubleshooting guide for common issues such as the unit not turning on, not cooling properly, freezing up, remote control not working, and water dripping.

Installation Instructions

The installation process requires basic mechanical skills and approximately 1 hour for two people.

  1. Window Requirements: Instructions are for standard double-hung windows. Specific dimensions are provided for different models. All support parts must be securely fastened to metal, masonry, or wood. The electrical outlet must be within reach of the power cord.
  2. Storm Window Requirements: If a storm window frame prevents proper tilting for drainage, a piece of wood (2" wide, long enough for the window frame, and 1/2" higher than the storm window frame or vinyl frame) should be adhered to the sill.
  3. Attach Top Mounting Rail Seal Strip: Remove the backing and adhere the seal strip to the bottom of the top mounting rail along the front edge.
  4. Prepare the Air Conditioner:
    • Install the top mounting rail with 4 Type A screws from the outside of the case.
    • Remove the backing from the two short accordion seals and stick one on each side of the accordion panels.
    • Slide the free end of the accordion panels into the side panel rails and then down, ensuring enough space for the top and bottom frames to slide into the cabinet rails.
  5. Prepare the Window: Cut two long window seal strips to the proper length. Peel off the backing and attach one to the underside of the window sash and one to the sill.
  6. Install the Air Conditioner in the Window:
    • Place the air conditioner on the sill with the bottom mounting rail against its back edge. Center it and close the window securely behind the top mounting rail. The unit should be level or slightly tilted to the outside (about a 1/3 bubble slant).
    • Extend the left and right accordion panels to the vertical window sashes and attach 3 screws through the holes in the upper panels.
    • For AEC10 and AEC12 models, install the frame locking brackets between the bottom of the accordion panel and the window sill with 2 screws. Pilot holes should be drilled to prevent splitting the window sill.
  7. Install Support Bracket and Foam Top Window Gasket:
    • Attach the window locking bracket to the window side jamb with one screw to prevent glass damage on vinyl or similar windows.
    • Cut the foam top window gasket to the window width.
    • Stuff the foam between the glass and the window to prevent air and insects from entering the room. If the supplied gasket doesn't fit, obtain appropriate material locally.
  8. Install Foam Insulation:
    • Measure the length of the accordion for both sides (L1 and L2).
    • Cut the foam insulation to the measured lengths of the left and right side accordions.
    • Remove the adhesive backing and stick the foam insulation onto the left and right accordions and inside the frames, ensuring the entire accordion is covered.

Safety Information

The manual emphasizes several safety precautions:

  • Use the appliance only for its intended purpose.
  • Install correctly according to instructions.
  • Never unplug by pulling the cord; always grasp the plug firmly.
  • Immediately replace damaged power cords with new ones from the manufacturer. Do not use damaged cords.
  • Turn off and unplug the unit before cleaning.
  • Servicing should only be performed by a qualified technician.
  • Do not store or use combustible materials near the appliance.
  • Air conditioners contain refrigerants that must be removed by a qualified company before disposal.
  • Ensure the receptacle matches the plug; a qualified electrician should replace it if necessary.
  • R410A systems require specific tools and safety standards for contractors and technicians.
  • WARNING: Do not use extension cords, surge protectors, or multi-outlet adapters with this window air conditioner due to fire risk.
  • Never cut or remove the third (ground) prong from the power cord.
  • Do not change the plug on the power cord.
  • Consult a qualified electrician if aluminum house wiring is present.

Warranty and Support

  • One-Year Limited Warranty: Covers any part that fails due to defects in materials or workmanship for one year from the original purchase date, including labor and related service.
  • Exclusions: Does not cover service trips for user instruction, improper installation/delivery/maintenance, product failure from modifications or unreasonable use, commercial location labor for unit removal, house fuse replacement/circuit breaker resetting, corrosion on unprotected models, damage from improper power supply/accidents/fire/floods/acts of God, incidental/consequential damage from defects, or damage after delivery.
  • Implied Warranties: Limited to one year or the shortest period allowed by law.
  • Consumer Support:
    • Website: GEAppliances.com for questions, assistance, shopping, and online support.
    • Registration: Register online at GEAppliances.com/register or mail the pre-printed card.
    • Schedule Service: Online at GEAppliances.com/ge/service-and-support/service.htm or call 800.432.2737.
    • Extended Warranties: Purchase online at GEAppliances.com/ge/service-and-support/shop-for-extended-service-plans.htm or call 800.626.2224.
    • Remote Connectivity: For Wi-Fi models, visit GEAppliances.com/ge/connected-appliance/ or call 800.220.6899.
    • Parts and Accessories: Order online at GEApplianceparts.com or by phone at 877.959.8688.
    • Contact Us: For service dissatisfaction, contact via website or mail to General Manager, Customer Relations, GE Appliances, Appliance Park, Louisville, KY 40225.

GE AEC12 Specifications

General IconGeneral
BrandGE
ModelAEC12
CategoryAir Conditioner
LanguageEnglish

Related product manuals