13
2
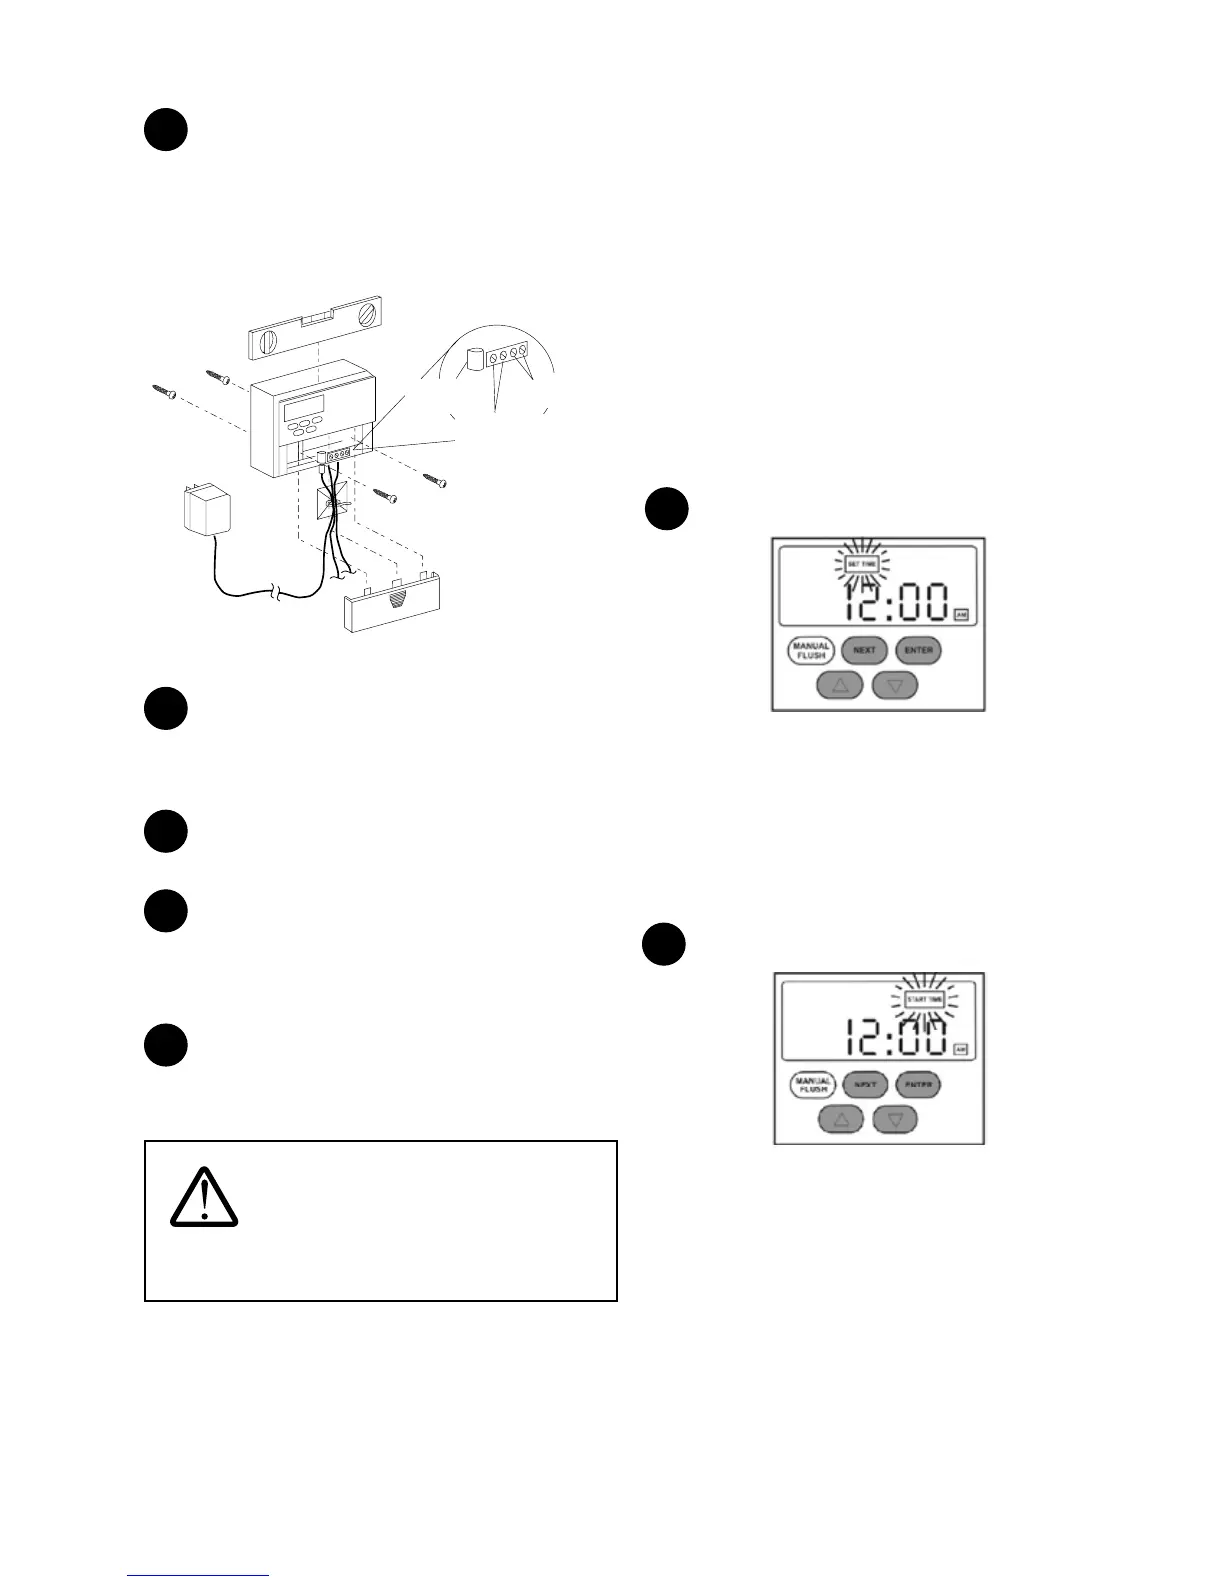
Mount the controller using the keyhole located at the
back of the controller on the screw head. Level the controller.
Remove the controller front cover and drill two additional
holes suitable for a #8 screw into these two holes and secure
the controller to the wall by tightening the two screws. Use the
plastic anchors if necessary.
24 VDC from
Transformer
To Drain
Solenoid Valve
To Inlet
Solenoid Valve
Advanced
Plus Controller
Figure 14
3
Ensure the transformer is not plugged into the electrical
receptacle. Connect the power supply cable from the
transformer to the 24 VAC terminals on the controller. Polarity
is not important.
4
Connect the drain solenoid valve cable to the “drain”
terminals on the controller. Refer to Figure 14.
5
Applicable to Systems Equipped with the Surface
Water Option Kit Only:
Connect the inlet solenoid valve cable to the “inlet” terminals
on the controller. Refer to Figure 14. Polarity is not important.
6
Install the two AA batteries (provided) in the controller.
Replace the controller front cover and plug the transformer
into the electrical receptacle.
WARNING: Use only the supplied
electrical transformer. Failure to follow this instruction
will void the warranty.
Setting the Controller
NOTE: Electrical power to the controller must be ON to
activate the ushing and draining sequences. The batteries
are for keeping the time in case of power failure and will not
activate the ushing and draining sequences.
NOTE: Once the controller is set, the controller will remember
the start time, program number, and ush/drain interval
settings (if applicable) even if the electrical power to the
controller is interrupted.
NOTE: When the system is undergoing a ushing or a draining
sequence, very little or no water will be available for use in the
dwelling. If possible, select a time for the ushing and draining
when no water generation is required. Normal operation will
resume once the ushing and draining sequences are nished.
Follow these steps to set the Controller:
Setting the Clock
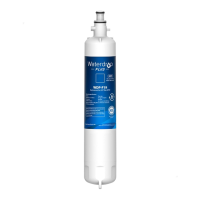
1
Figure 15
1) Press NEXT twice until “SET TIME” ashes on screen.
Press ENTER.
2) Press the UP and DOWN arrows to set the hour. Press
ENTER.
3) Press the UP and DOWN arrows to set the minute. Press
ENTER.
Setting Flush/Drain Time
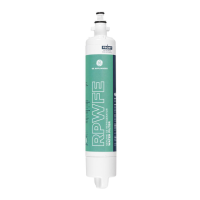
2
Figure 16
1) Press NEXT three times until “START TIME” ashes on
screen. Press ENTER.
2) Press the UP and DOWN arrows to set the hour. Press
ENTER.
3) Press the UP and DOWN arrows to set the minute.Press
ENTER.
NOTE: Check with homeowner. Select a time of day that
water usage is not expected in the dwelling. (e.g. 2:00 a.m.). The
controller will store this setting.