52
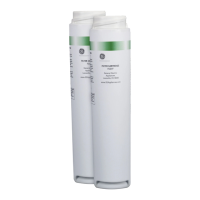
C. INTERNAL PREFILTER REPLACEMENT (CARBON OR
STAINLESS STEEL)
The carbon prelter may require replacement more frequently
than once a year during the annual maintenance or if there
is a chlorine taste in the water after the system has been in
use for a period of time. The carbon prelter may also remove
some other tastes and/or odors. In some cases, the carbon
prelter may become fouled earlier than one year depending
on the intake water source.
The stainless steel prelter generally does not need to be
replaced. It may become dirty and may be cleaned under a
tap. Replace the stainless steel prelter if damaged.
Replacement Instructions:
1. Close the inlet valve.
2. Depressurize the system by performing a manual ush
sequence. Refer to the instructions in the Controller
Functions section for how to perform a Manual Flush
sequence.
For horizontally-mounted systems, connect a 1/4" tubing
to the inlet mini ball valve, direct the other end of the 1/4"
tubing to a drain or a pail, and open the inlet mini ball
valve to drain the water in the internal prelter cavity.
3. Using the cap wrench, remove the system cap.
4. Put on a pair of disposable gloves and carefully remove
and dispose of the internal prelter.
Check that the thimble lter is in place, seated in the
spigot. Inspect and clean thimble lter as needed.
5. Remove the new internal prelter from the packaging.
6. Insert the new internal prelter into the prelter cavity
and push it down gently to ensure it is seated properly.
7. Replace the system cap tightly.
8. Open the inlet valve slowly.
9. Dispose of the disposable gloves.
D. EXTERNAL PREFILTER REPLACEMENT
Depending on the water quality, the external prelter
may need to be washed or replaced prior to the annual
maintenance. A decrease in water pressure at the taps may
indicate that the external prelter may need to be replaced.
NOTE: For rinsing of the used external prelter cartridge, save
a bucket of ltered water from a tap in the dwelling before
servicing the external prelter. Water supply in the dwelling will
be interrupted temporarily during servicing.
Replacement Instructions:
1. Close the inlet valve to the external prelter.
2. Attach a 1/4" tubing to the mini ball valve at the bottom
of the external prelter. Direct the other end of the 1/4"
tubing to either a drain or a pail.
3. Open the mini ball valve slowly.
4. Press and hold down the red button on the external prelter
head to shorten the time to drain the external prelter.
5. Once the external prelter is drained, close the mini ball
valve.
6. Using the housing wrench, loosen the external prelter
housing from the external prelter head.
7. Wear a pair of disposable gloves and carefully remove
the external prelter cartridge from the external prelter
housing.
8. Rinse o the used external prelter cartridge. If the used
external prelter cartridge is no longer reusable, replace
it with a new one. If a new external prelter cartridge is
to be installed, remove the plastic wrap on the outside
of the cartridge.
9. Ensure that the O-ring is in good condition and seated
at the lip of the external prelter housing. If necessary,
replace the O-ring with a new one.
10. Screw the external prelter housing into the external
prelter head and tighten the connection using the
housing wrench.
11. Open the inlet valve slowly and depress the red button
on the external prelter head to allow air to escape from
the external prelter housing.
12.
Once water emerges from the button, release the button.
13. Dispose of the disposable gloves.