- Your HOLD/TIMER, which oPer-
are tirnirw a thre~ minute ohone
tions. The time can range from one
ates without microwave ene’rgy,
has three timing functions.
It operates as a Minute Timer, it
can be set to delay cooking or may
be used as a hold setting after
defrosting. l-iold/Timer can be set
up t. gg minutes and 99 seconds.
Step 1: Touch HOLD/TIMER pad.
The read-out panel shows :0. “En-
ter Time” flashes.
Step 2: Select the amount of time
you desire. Touch the appropriate
number pads. If, for example, you
call, toucfi 3, 0 and 0, The r~adout
panel shows 3:00 and “HOLD”
appears on display.
Step3: Touch START, The readout
display shows the time as it counts
down, and “Hold Time Left”,
Step 4: When time is up, oven
sounds. The readout flashes“END“
and the timer turns off.
The HOLD/TIMER can also be
used to program “standing time”
between microwave cooking func-
second to 99 minutes and 99 sec-
onds. A HOLD, or “standing” time
may be found in some of your own
recipes or Cookbook.
To set the oven to delay cocking
up to 99 minutes follow Steps 1
and 2 to enter hold time, then set
time or temperature desired before
pressing START,When holding be-
fore temperature cooking, be sure
probe is in food before pressing
START.
—
—
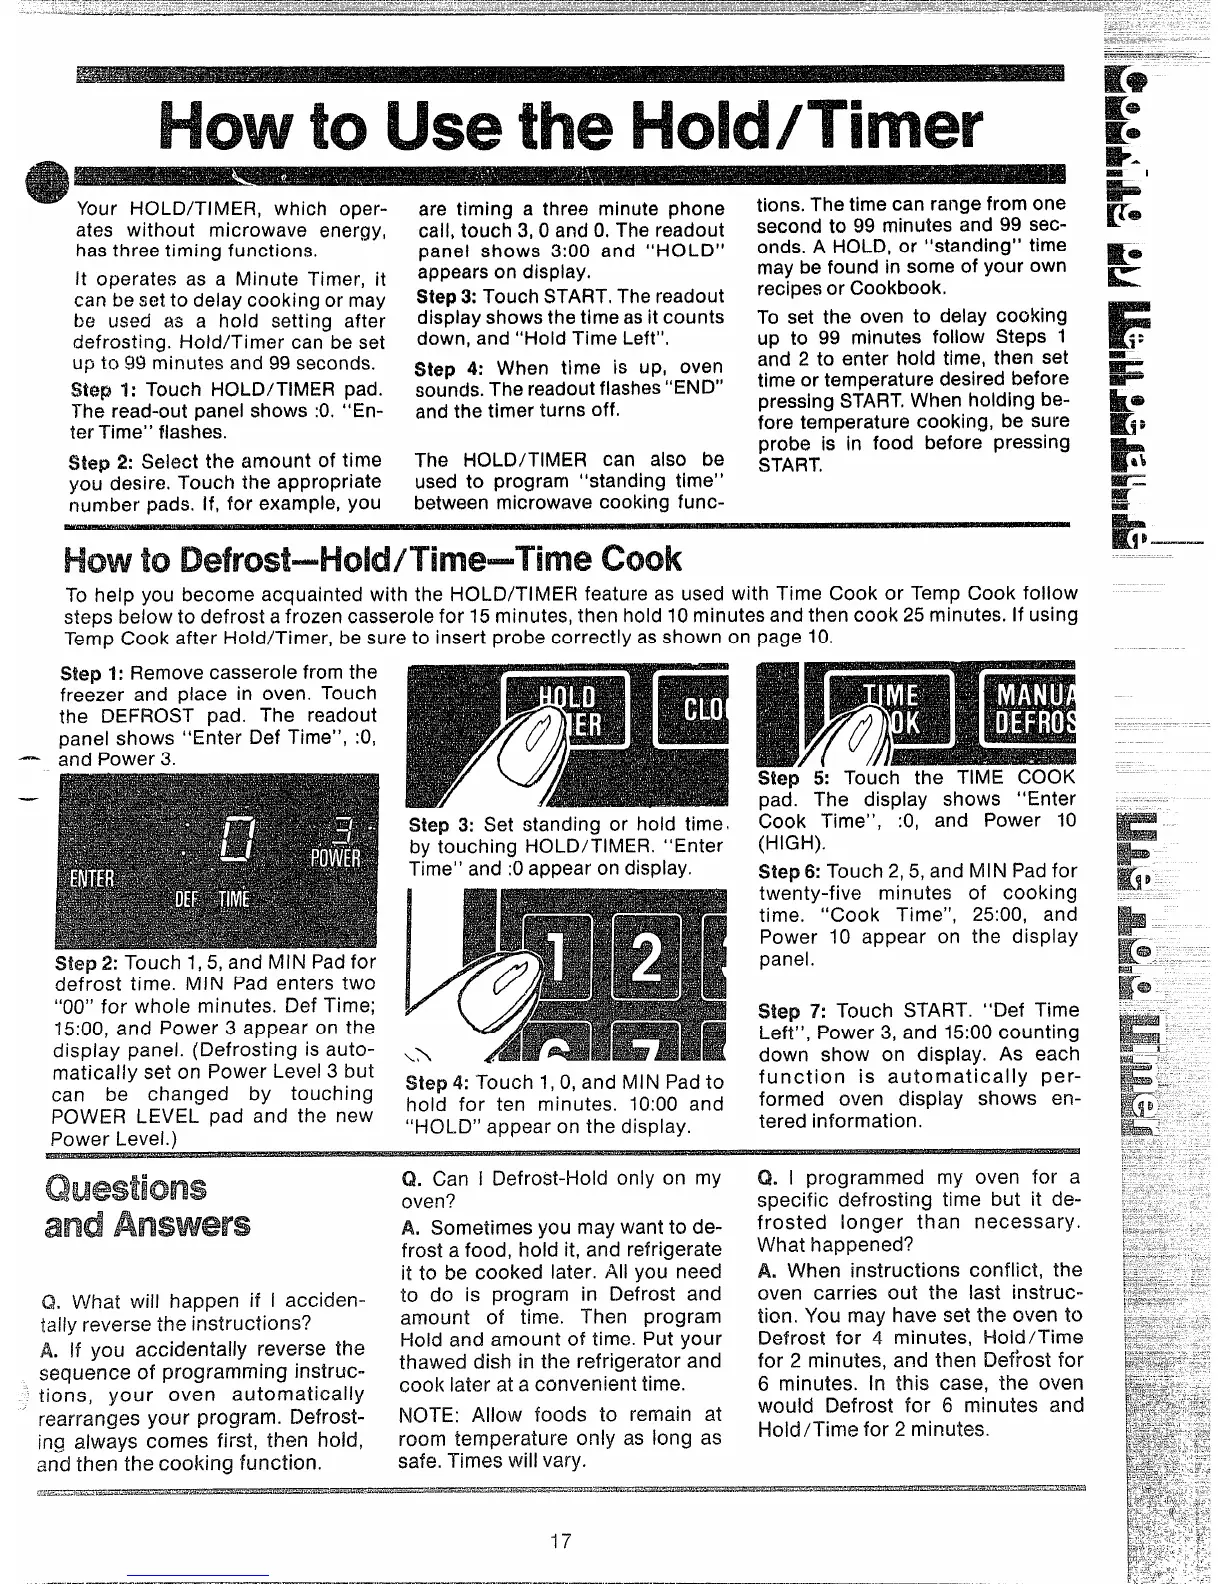
To help you become acquainted with the HOLD/Ti MER feature as used with Time Cook or Temp Cook follow
steps below to defrost a frozen casserole for 15 minutes, then hold 10 minutes and then cook 25 minutes. If using
Temp Cook after Hold/Timer, be sure to insert probe correctly as shown on page 10.
Step 1: Remove casserole from the
freezer and place in oven, Touch
the DEFROST pad. The readout
panel shows “Enter Def Time”, :0,
and Power 3.
Step 3: Set standing or hoid time
by touching HOLD/TIMER. “Enter
Time” and :0 appear on display.
Step 2: Touch 1,5, and MINIPad for
defrost time. iMiN Pad enters two
“00” for whole minutes. Def Time;
15:00, and Power 3 appear on the
dispiay panel. (Defrosting is auto-
matically set on Power Level 3 but
can be changed by touching
POWER LEVEL pad and the new
Power Levei. )
Step 4: Touch 1,0, and MIN Pad to
hold for ten minutes. 10:00 and
“HOLD” appear on the display.
Step 5: Touch the TIME COOK
pad. The dispiay shows “Enter
Cook Time”,
:0, and Power 10
(HIGH).
Slep 6: Touch 2,5, and fvllN Pad for
twenty-five minutes of cooking
time. “Cook Time”, 25:00, and
Power 10 appear on the dispiay
panel.
Step 7: Touch START. “Def Time
Left”, Power 3, and 15:00 counting
down show on display. As each
function is automatically per-
formed oven display shows en-
tered information.
and
Q, What wiil happen if i acciden-
tally reverse the instructions?
A. If you accidentally reverse the
sequence of programming instruc-
tions, your oven automatically
rearranges your program. Defrost-
ing always comes first, then hohd,
and then the cooking function.
Q. Can i Defrost-i-iold only on my
oven?
A. Sometimes you may want to de-
frost a food, hold it, and refrigerate
it to be cooked later. Ali you need
to do is program in Defrost and
amount of time. Then program
I+oid and amount of time. Put your
thawed dish in the refrigerator and
cook iater at a convenient time.
NOTE: Allow foods to remain at
room temperature only as iong as
safe. Times will vary.
Q. I programmed my oven for a
specific defrosting time but it de-
frosted longer than necessary.
What happened?
A, When instructions conflict, the
oven carries out the last instruc-
tion. You may have set the oven to
Defrost for 4 minutes, Hoid/Time
for 2 minutes, and then i3ef~ost for
6 minutes. In this case, the oven
would Defrost for 6 minutes and
Hold/Time for 2 minutes.
-17
 Loading...