Installation Instructions
MAKING THE LP CONVERSION (CONT.)
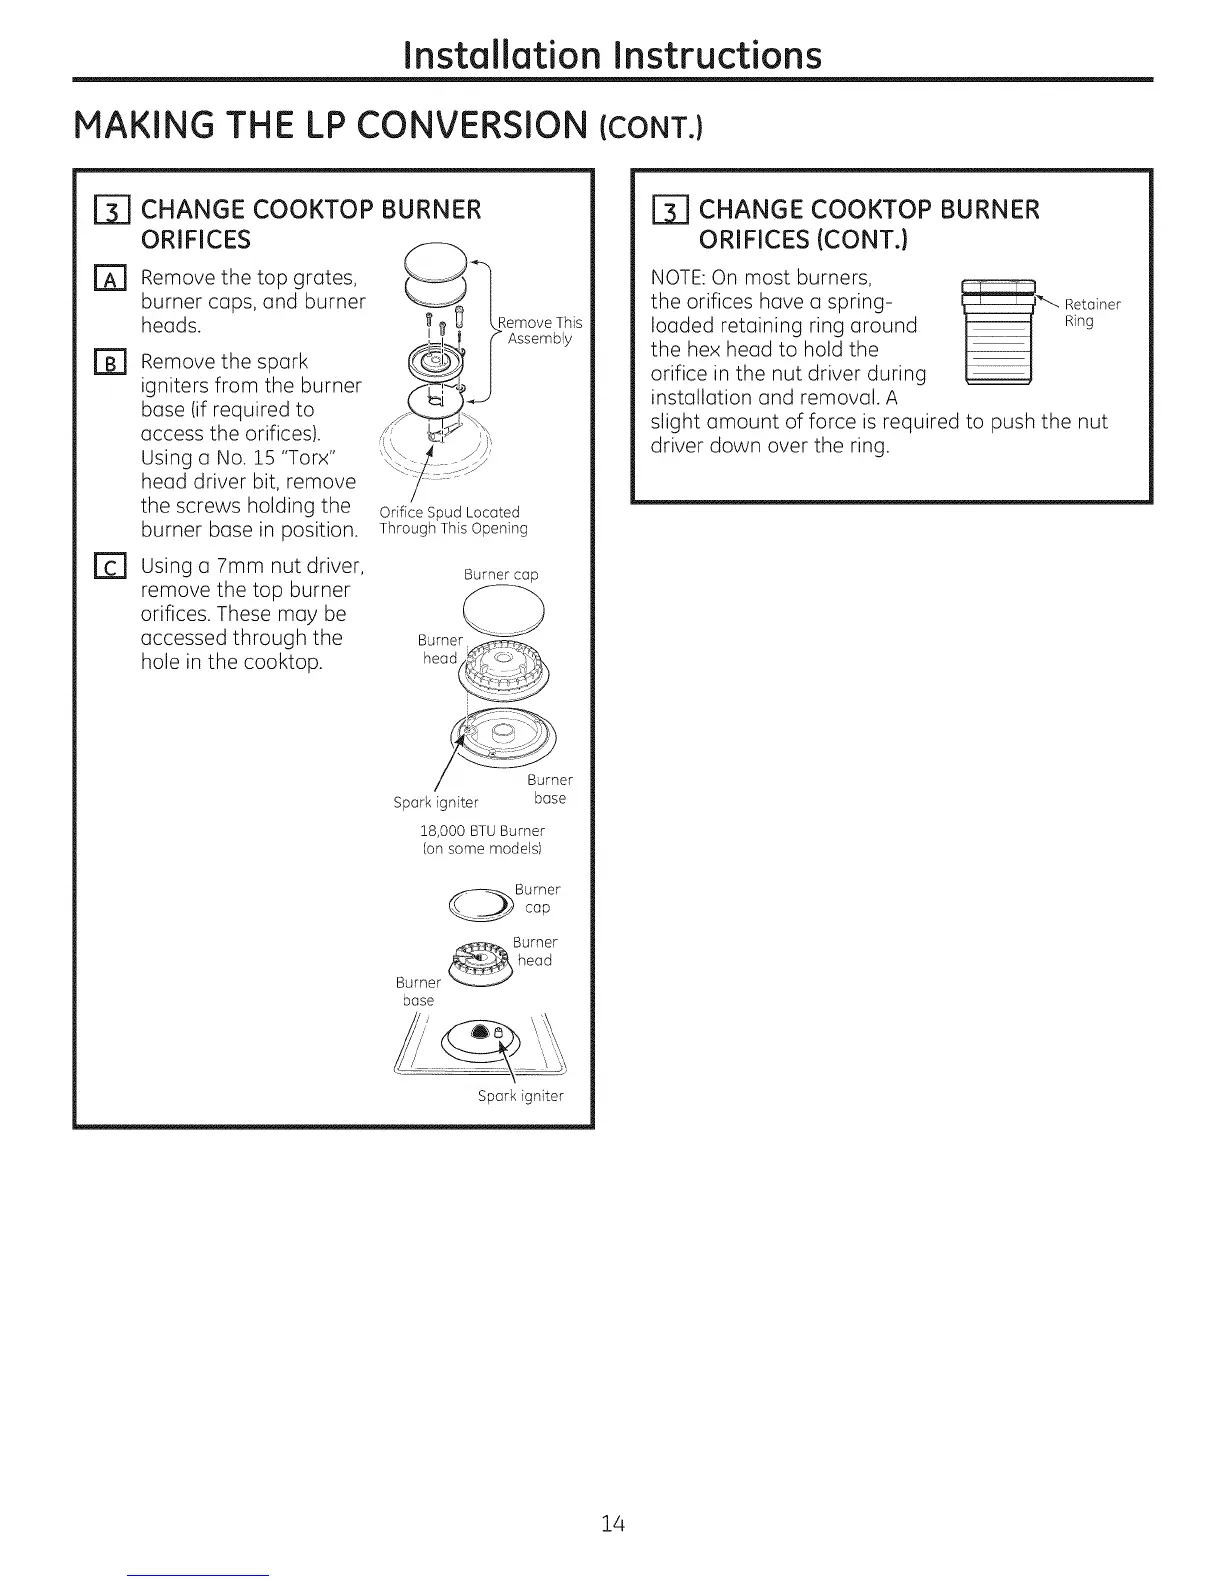
CHANGE COOKTOP BURNER
ORIFICES
Remove the top grates,
burner cops, and burner
heads.
Remove the spark
igniters from the burner
base (if required to
access the orifices).
Using o No. 15 "Torx"
head driver bit, remove
the screws holding the
burner bose in position.
I ue _ Remove This
I!=1_. (> Assembly
Orifice Spud Located
Through This Opening
Using a 7mm nut driver,
remove the top burner
orifices. These may be
accessed through the
hole in the cooktop.
Burnercap
/ Burner
Spark igniter base
18,000 BTUBurner
(on some models)
Burner
cap
base
Spark igniter
r_ CHANGE COOKTOP BURNER
ORIFICES (CONT.)
NOTE: On most burners,
the orifices have a spring-
loaded retaining ring around
the hex head to hold the
orifice in the nut driver during
installation and removal. A
_ etainer
Ring
slight amount of force is required to push the nut
driver down over the ring.
14
 Loading...