nstaJiation nstructions
INSTALL THE RANGE (CONT.)
[] ALTERNATE CONSTRUCTION
PREPARATION (cont.)
[] FOR CABINET OPENINGS
APPROXIMATELY 30-3/8"
If range is installed in cabinet opening
approximately 30-3/8", the Vertical Side Trim Kit
(JXS86XX) should be used to cover gaps between
range sides and cabinet. Refer to the kit
instructions for installation details.
[] CABINETS OVER THE RANGE LESS
THAN 30"
If a 30" clearance between cooking surface and
overhead combustible material or metal cabinets
cannot be maintained, protect the underside of the
cabinets above the cooktop with not less than 1/4"
insulating millboard covered with sheet metal not
less than 0.0122" thick.
[] OPERATION CHECKLIST
• Double check to make sure everything in
this guide has been completed. Rechecking
steps will ensure safe use of the cooktop.
• Make sure all controls are left in the OFF
position.
• Make sure the flow of combustion and
ventilation air to the cooktop is unobstructed.
• The serial plate for your Range is located
under the oven door above the storage
area. In addition to the model and serial
numbers, it tells you the ratings of the
burners and the type of fuel and pressure
the cooktop was adjusted for when it left
the factory.
• When ordering parts, always include the
serial number and model number to ensure
proper replacement parts.
• Recheck Steps: Double check to make sure
everything in this guide has been completed.
Rechecking steps will ensure safe use of
the Range.
Please see L.P. conversion instructions
supplied with this range when L.P. Gas
is used.
NOTE: Instructions are mounted on
regulator bracket.
IN SOME CASES
[] With L.P. gas, some yellow tipping
on the outer cone is normal.
[] Foreign particles in the gas line may
cause an orange flame at first, but this
will soon disappear.
SPECIAL NOTE:
To convert the oven back to natural gas,
reverse the instructions given in making
L.P. Adjustments.
Once the conversion is complete
and checked ok, fill out the LP
sticker and include your name,
organization and the date the
conversion was made. Apply the sticker near
the regulator to alert others in the future that
this appliance has been converted to LP gas.
If converting back to natural gas from LP,
please remove the sticker so others know the
appliance is set to use natural gas.
ADJUSTING LOW FLAME SETTING
ON COOKTOP BURNERS
Low setting adjustments must be made with
two other burners in operation on a medium
setting. This procedure prevents the low
flame from being set too low, resulting in the
flame being extinguished when other burners
are turned on.
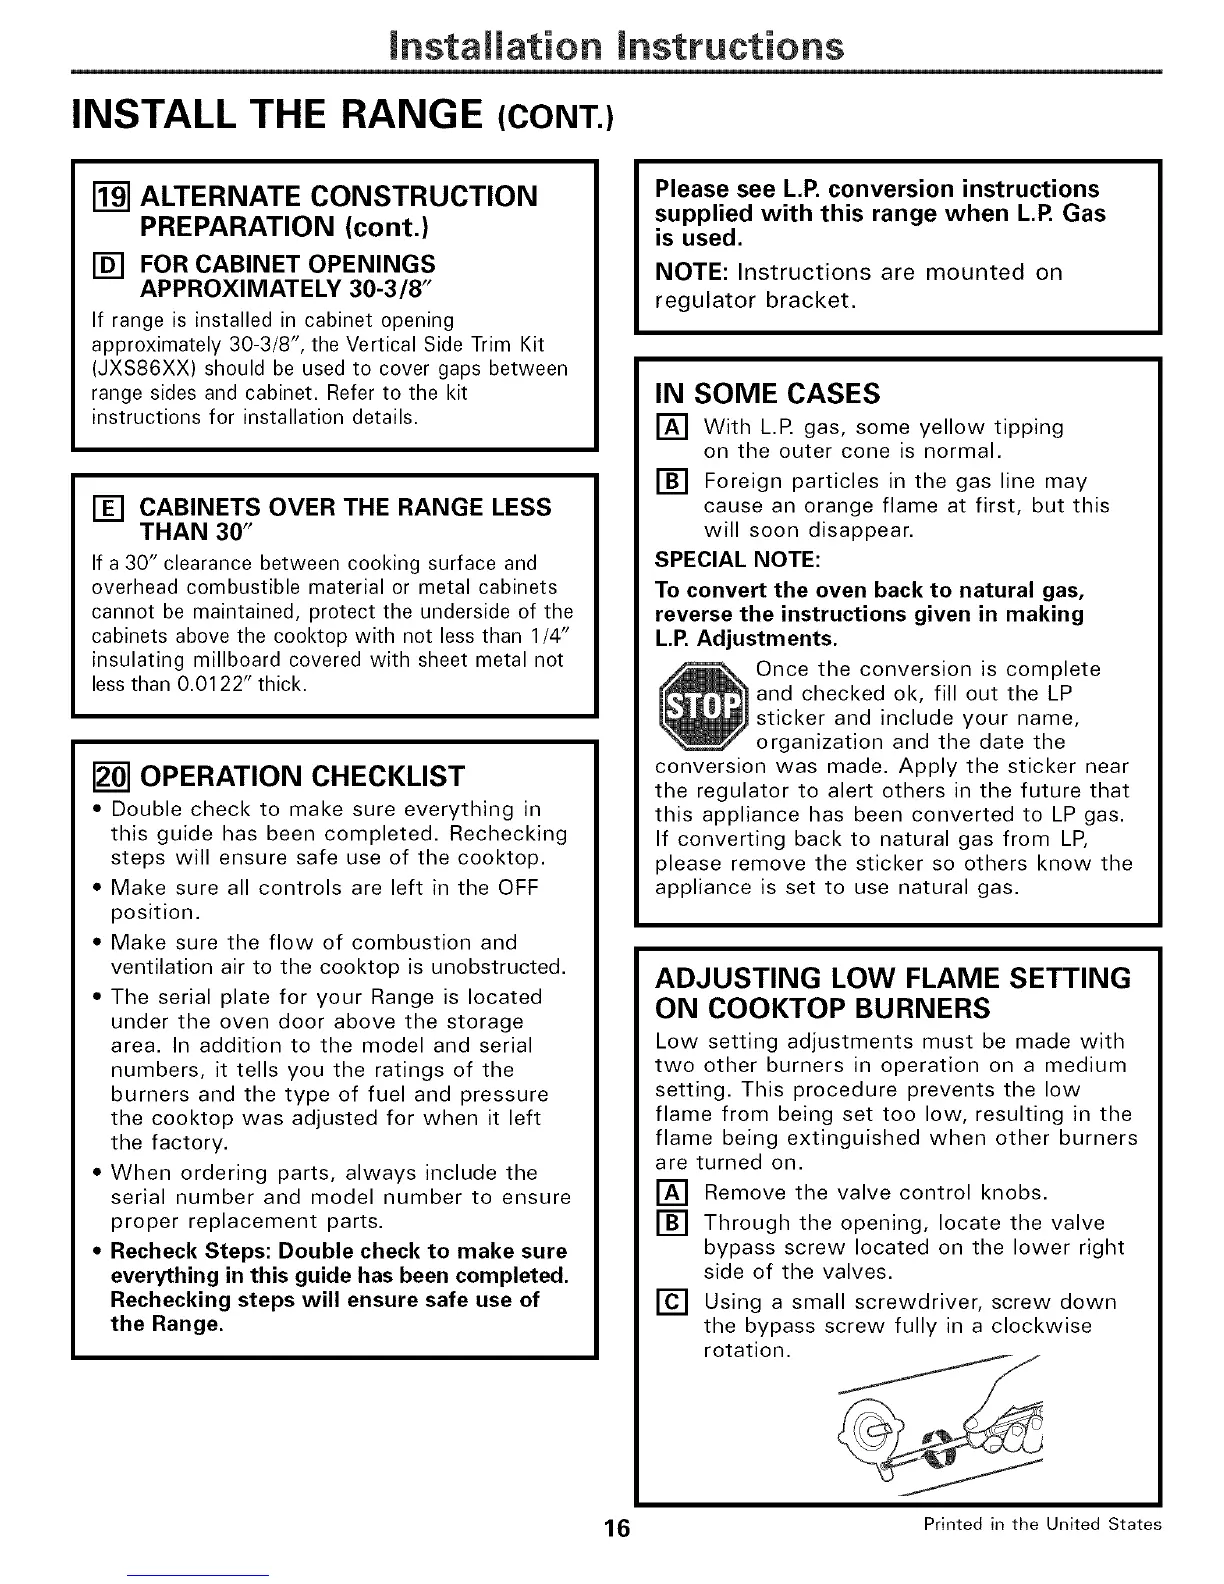
[] Remove the valve control knobs.
[] Through the opening, locate the valve
bypass screw located on the lower right
side of the valves.
[] Using a small screwdriver, screw down
the bypass screw fully in a clockwise
rotation.
16 Printed in the United States
 Loading...