This document is an owner's manual for GE Convection Built-In Electric Wall Ovens, covering both single and double oven models. It provides comprehensive information on safety, usage, maintenance, and troubleshooting.
Function Description:
The GE Convection Built-In Electric Wall Oven is designed for baking, broiling, roasting, and warming various foods. It features convection cooking modes that use increased air circulation for improved performance and even cooking. The oven also includes traditional cooking modes, a proof mode for rising dough, and a warm mode to keep foods hot. For convenience, it offers self-clean and steam clean modes. Advanced features include a meat probe for monitoring internal food temperature, a Sabbath mode for religious observance, and WiFi Connect for remote operation via a smart device.
Important Technical Specifications:
The manual covers the following models:
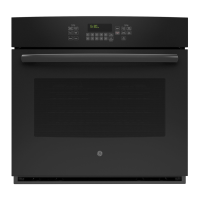
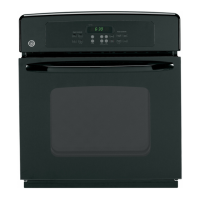
- JKS5000 - 27" Single Wall Oven
- JTS5000 - 30" Single Wall Oven
- JKD5000 - 27" Double Wall Oven
- JTD5000 - 30" Double Wall Oven
The oven operates at temperatures up to 550°F for cooking and higher for self-cleaning. The meat probe can be programmed for internal food temperatures up to 200°F. The self-clean cycle can be set for 3 to 5 hours. The oven light is a replaceable bulb. The appliance is designed to operate on a standard household electrical supply, and users are advised to disconnect power before servicing.
Usage Features:
Controls:
The oven features a control panel with various buttons for different functions. Button shapes are representative and may vary. Controls become visible when the oven door is opened or a button area is pressed.
- Convection Cooking Modes: Convection Bake and Convection Roast utilize a fan for enhanced air circulation, leading to more even cooking and reduced cooking times. Auto Recipe Conversion is available for Convection Bake, automatically adjusting traditional baking temperatures.
- Traditional Cooking Modes: Bake, Broil (Hi and Lo), Proof, and Warm.
- Bake: Uses heat primarily from the lower element, with some heat from the upper element. Preheating is generally recommended.
- Broil Hi: Intense heat from the upper element for searing. Recommended for thinner cuts of meat.
- Broil Lo: Less intense heat for thorough cooking with surface browning, suitable for thicker foods.
- Proof: Designed for rising bread doughs. Covers dough to prevent drying.
- Warm: Keeps hot foods warm for up to 3 hours. Not for heating cold food.
- Clean:
- Self Clean: Uses high temperatures to burn away food soils. Requires removal of all non-enameled racks, probe, and cookware.
- Steam Clean: Uses water and lower temperatures for small spills.
- Start/Enter: Initiates cooking, cleaning, or timed functions.
- Cancel/Off: Cancels all oven operations except clock and timer.
- Timer: Countdown timer, programmable in hours and minutes.
- Remote Enable: Allows remote control of the oven via a smart device after connecting to WiFi. The oven must be connected to WiFi for this feature to be active.
- Lock Controls: Locks the control panel to prevent accidental activation.
- Oven Light: Turns the interior oven light on or off.
- Options and Settings: Accesses detailed menus for additional functions and cooking modes, including:
- Cook Time: Counts down cooking time and turns off the oven when complete.
- Delay Time: Sets a future time for the oven to turn on. Not available with all modes.
- Oven Probe: Monitors internal food temperature and turns off the oven when the programmed temperature is reached. Usable with Bake, Convection Bake, and Convection Roast.
- Auto Off: Shuts down the oven after 12 hours of continuous operation.
- Sound: Adjusts alert volume and tone type.
- F/C (Fahrenheit or Celsius): Toggles between temperature scales.
- Adjust Oven Temperature: Allows adjustment of bake and convection bake temperatures by up to 35°F hotter or cooler.
- Oven Info: Displays model number and software version.
- Sabbath Mode: Disables oven lights, sounds, Convection, Broil, Warm, Proof, Cook Time, Timer, Clock, and Delay Time functions. Only usable with Bake.
Oven Racks:
The oven has six rack positions. Recommended positions are provided in the Cooking Guide.
- Traditional Flat Racks: Can be pulled out to a stop position for easy access. To remove, tilt the front end up and pull out. To replace, place the curved end onto supports, tilt up, and push in.
- Extension Racks: Pull out to a fully open position. Cannot be used in the top rack position. Graphite lubricant is provided for smooth operation.
Cookware Guidelines:
The material, finish, and size of cookware affect baking performance.
- Dark, coated, and dull pans absorb heat more readily, resulting in browner, crisper crusts. May require reducing oven temperature.
- Shiny pans produce more evenly cooked goods.
- Glass and ceramic pans heat slowly but retain heat well, suitable for pies and custards.
- Air insulated pans heat slowly and reduce bottom browning.
- Cookware should be kept clean for even heating.
Aluminum Foil and Oven Liners:
Do not use foil or oven liners to cover the oven bottom. Foil can be used on a lower rack to catch spills, but should be at least 1-1/2" from oven walls.
Cooking Guide:
Provides recommended modes and rack positions for various food types, including baked goods, beef & pork, poultry, fish, casseroles, and frozen convenience foods. Emphasizes thorough cooking to safe internal temperatures.
Maintenance Features:
Cleaning:
- Control Panel: Wipe with mild soap and water or vinegar and water, rinse, and dry with a soft cloth. Avoid abrasive cleansers.
- Oven Exterior: Clean with mild soap and water or vinegar and water. Avoid oven cleaners, abrasive cleansers, steel wool.
- Painted Surfaces and Black Stainless Steel: Clean with soap and water or vinegar and water. Avoid commercial oven cleaners, cleaning powders, steel wool, or harsh abrasives.
- Stainless Steel (excluding Black Stainless Steel): Use warm sudsy water or a stainless steel cleaner/polish. Wipe in the direction of the grain.
- Oven Interior: Can be cleaned manually or using Steam Clean or Self Clean modes. Wipe up spills immediately.
- Manual Cleaning: Use mild soap and water or vinegar and water. Avoid abrasive cleaners.
- Self Clean Mode: Operates at very high temperatures. Remove all items except enameled racks before starting. Wipe out ash after cooling.
- Steam Clean Mode: For small spills. Pour one cup of water into the oven bottom, close the door, and start the cycle. Wipe out excess water and soil after the cycle.
Probe Care:
Clean with soap and water or a soap-filled scouring pad. Do not immerse in water. Do not store in the oven or leave inside during self-clean or steam clean cycles.
Oven Light Replacement:
Requires disconnecting electrical power to the oven. Remove glass cover, then bulb. Replace with a new bulb, grasping with a clean towel or tissue.
Oven Door Removal and Replacement:
The manual provides detailed instructions for removing and replacing the oven door for cleaning or maintenance, noting that the door is heavy and caution should be exercised.
Troubleshooting:
A comprehensive troubleshooting section addresses common issues such as improper baking/broiling, oven temperature problems, control malfunctions, odors, fan noise, and connectivity issues. It provides possible causes and recommended solutions. For wireless network connectivity issues, a dedicated support line is provided.
Warranty and Support:
The product comes with a one-year limited warranty covering defects in materials or workmanship. GE Appliances provides service through its Factory Service Centers or authorized technicians. Online resources and phone numbers are available for product registration, scheduling service, purchasing extended warranties, and ordering parts and accessories.