Installation Instructions
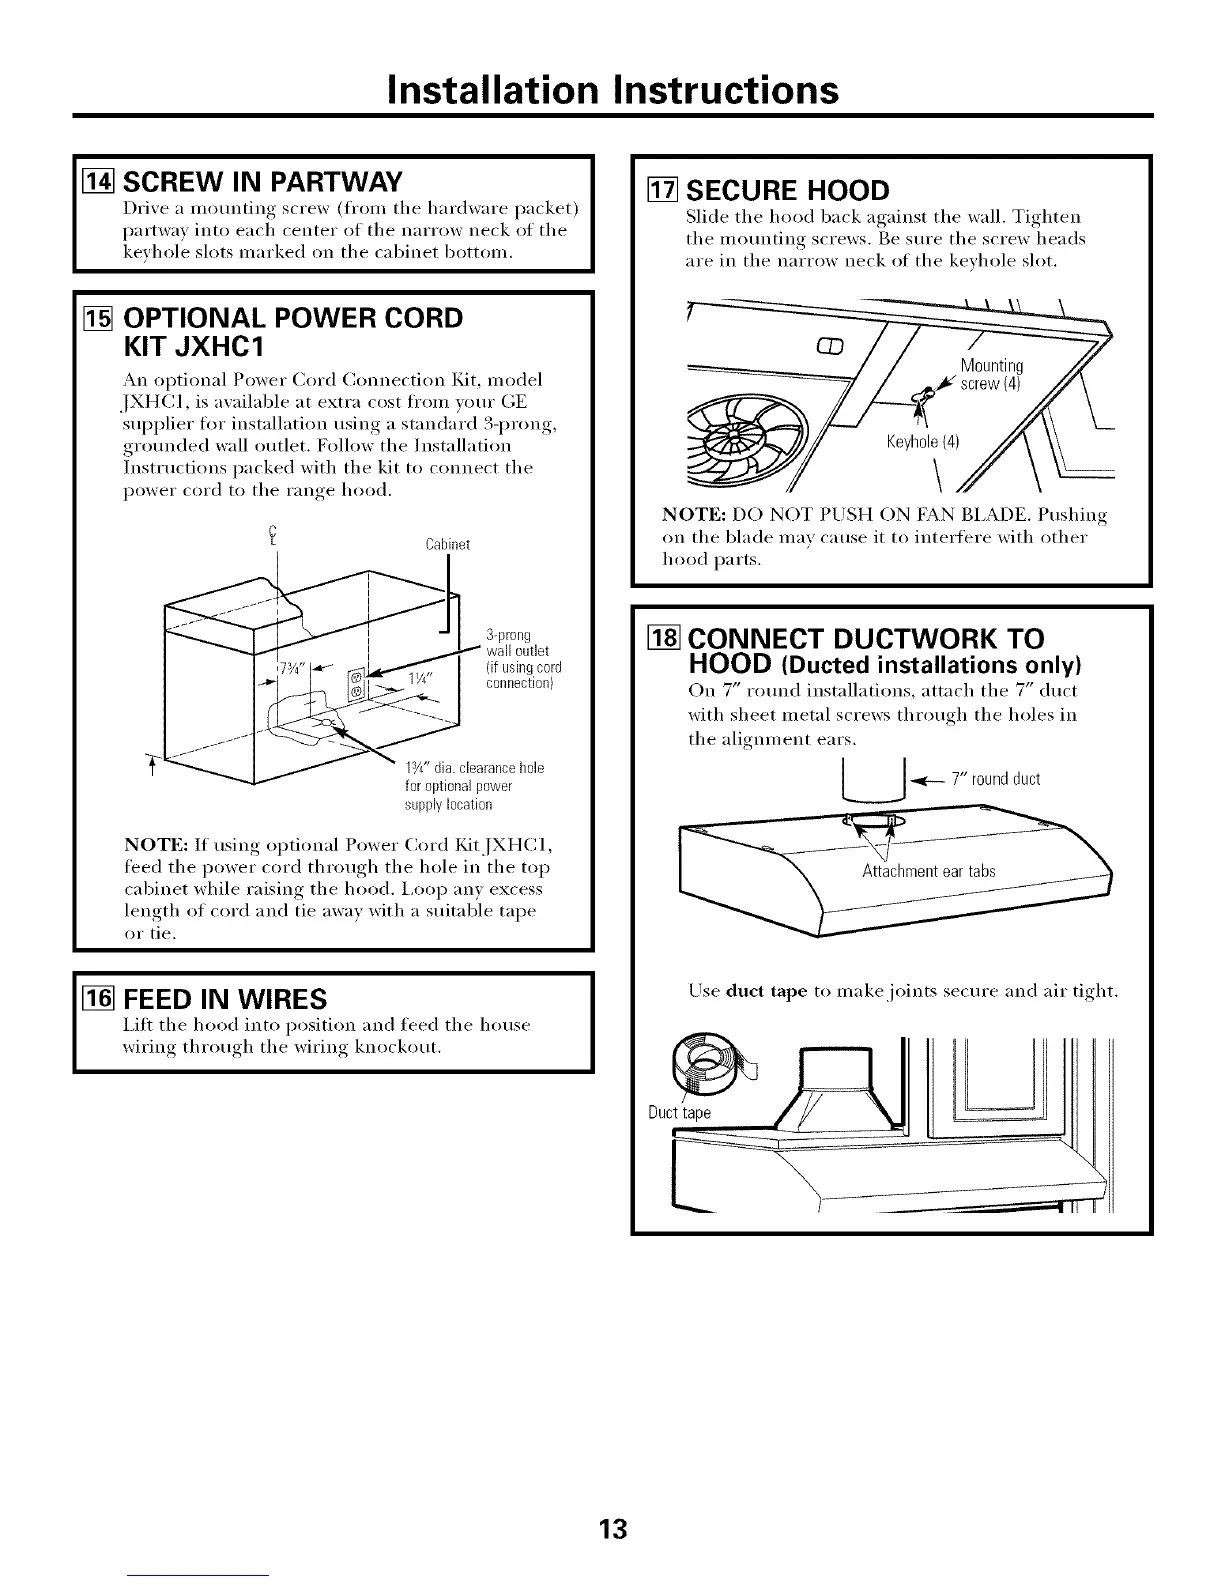
II_ SCREW IN PARTWAY
Drixe a mounting screw (front the hardware packet)
partway into each center of the narrow neck of the
keyhole slots marked on the cabinet bottom.
[] OPTIONAL POWER CORD
KIT JXHC1
An optional Power Cord Connection Kit, model
JXHCI, is awfilable at extra cost fl'om vour GE
supplier for installation using a standard 3-prong,
grounded wall outlet. Follow the Installation
Instructions packed with the kit to connect the
power cord to the range hood.
Cabinet
3-prong
{if usingcord
connection)
13/4"dia.clearancehole
for optional power
supplylocation
NOTE: If using optional Power Cord KitJXHCI,
feed the power cord through the hole in the top
cabinet while raising the hood. I,oop any excess
length of cord and tie awav with a suitable tape
or tie.
1_] FEED IN WIRES
I,ifl the hood into position and feed the house
wiring through the wiring knockout.
[] SECURE HOOD
Slide the hood back against the wall. Tighten
the mounting screws. Be sure the screw heads
are in the narrow neck of the keyhole slot.
Keyhole(4)
\
NOTE: DO NOT PUSH ON FAN BI,ADE. Pushing
on the blade may cause it to interfere with other
hood parts.
[] CONNECT DUCTWORK TO
HOOD (Ducted installations only)
On 7" round installations, attach the 7" duct
with sheet metal screws throuoh the holes in
the alignment ears.
-<--- 7" round duct
Use duct tape to make joints secure and air ti *ht
13