Installation Instructions
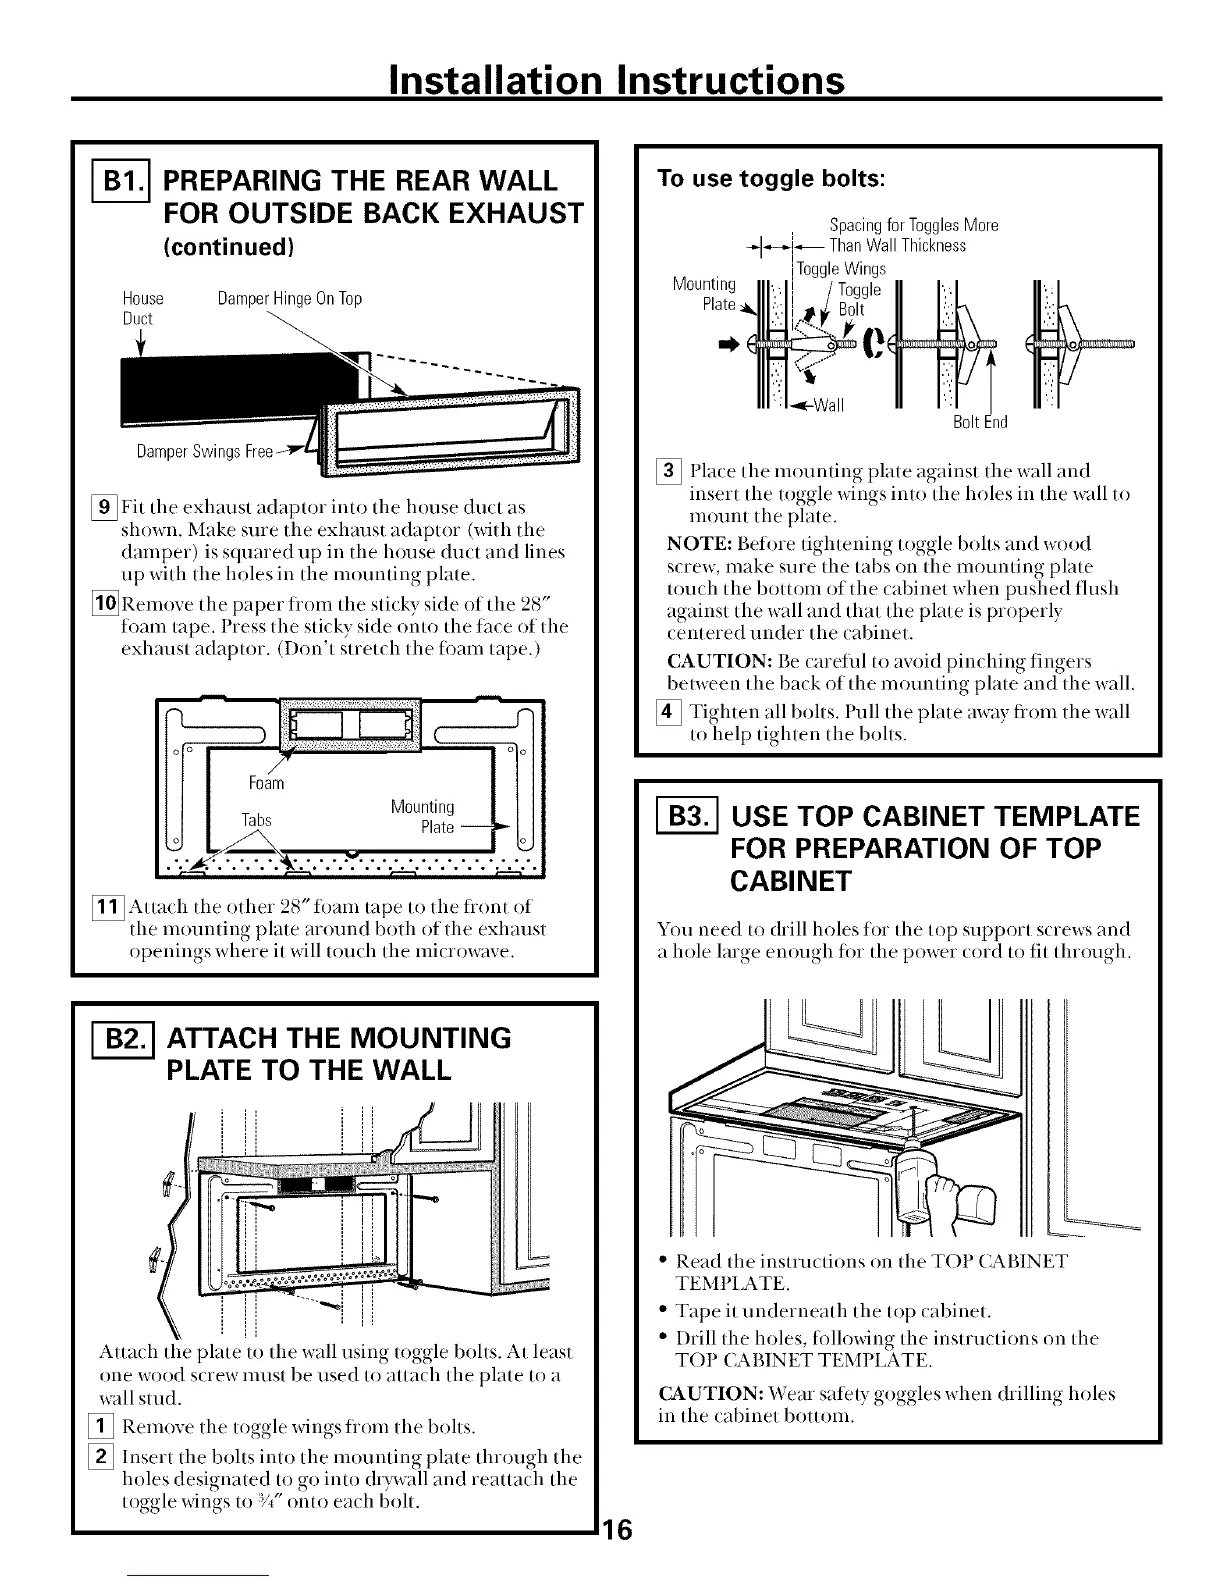
_-_ PREPARING THE REAR WALL
FOR OUTSIDE BACK EXHAUST
(continued)
House
Duct
Damper Hinge On Top
DamperSwings
[_Fit tile exhaust adaptor into the house duct as
shown. Make sure the exhaust adaptor (with the
damper) is squared up in the house duct and lines
up with the holes in the mounting plate.
[_Remove the paper f_om the sticky side of the 28"
fr)am tape. Press the sticky side onto the thce of the
exhaust adaptor. (Don't stretch the foam tape.)
M0u TI
J _ Plate/%U
[_ Attach the r)ther 28" foam tape tr) the flont r)f
the mrmnting plate around both of the exhaust
r)penings where it will tr)uch the micrr)wave.
I-_ ATTACH THE MOUNTING
IiI
PLATE TO THE WALL
il i
Attach the plate to the wall using toggle bohs. At least
one wood screw must be used to attach the plate to a
wall stud.
[] Remove the toggle wings tiom the bolts.
[] Insert the bolts into the mounting plate through the
holes designated to go into (h)avall and reattach the
toggle wings to Y_" onto each bolt.
To use toggle bolts:
Mounting
Plate
SpacingforTogglesMore
-_l_-_i_ ThanWallThickness
i
ToggleWings
B01tEnd
[] Place the mounting plate against the wall and
insert the toggle wings into the holes in the wall to
mount the plate.
NOTE: Before tightening toggle bolts and wood
screw, make sure the tabs on the mounting plate
touch the bottom of the cabinet when pushed flush
against the wall and that the plate is properly
centered under the cabinet.
CAUTION: Be careflfl to avoid pinching fingers
between the back of the mounting plate and the wall.
[] Tighten all bolts. Pull the plate away flom the wall
to help tighten the bolts.
USE TOP CABINET TEMPLATE
FOR PREPARATION OF TOP
CABINET
Yrm need to drill holes for the top support screws and
a hole large enr)ugh for the power (ord to fit through.
)
• Read the instmctirms rm the TO1 CABINET
TEMPI,ATE.
• Tape it underneath the top (abinet.
• I)rill the hr)les, follo_dng the instructirms rm the
)
TOP ( ABINET TEM1 LATE.
CAUTION: Wear satety goggles when drilling holes
in the (abinet bottom.
6
 Loading...