CAUTION: When the door Is removed
and hinge arms are at stop position,
do not bump or try to move the hinge
arms. The hinges could snap back
causing an injury to the hands or
damage to the porcelain on the front
of the range.
Cover the hinges with toweling or
empty towel rolls while working in
the oven area.
Put the oven into the cabinet and use a 1/8" drill bit to
drill holes in the cabinet front through the holes in the
oven trlm. Secure the oven in the cabinet with the
screws provided.
The lower trim should be mounted to the bottom of the
oven frame with the 3 screws provided.
The trim provides cooling air entry
into cabinet through the bottom
opening. The bottom opening should
never be blocked. See Fig. 313.
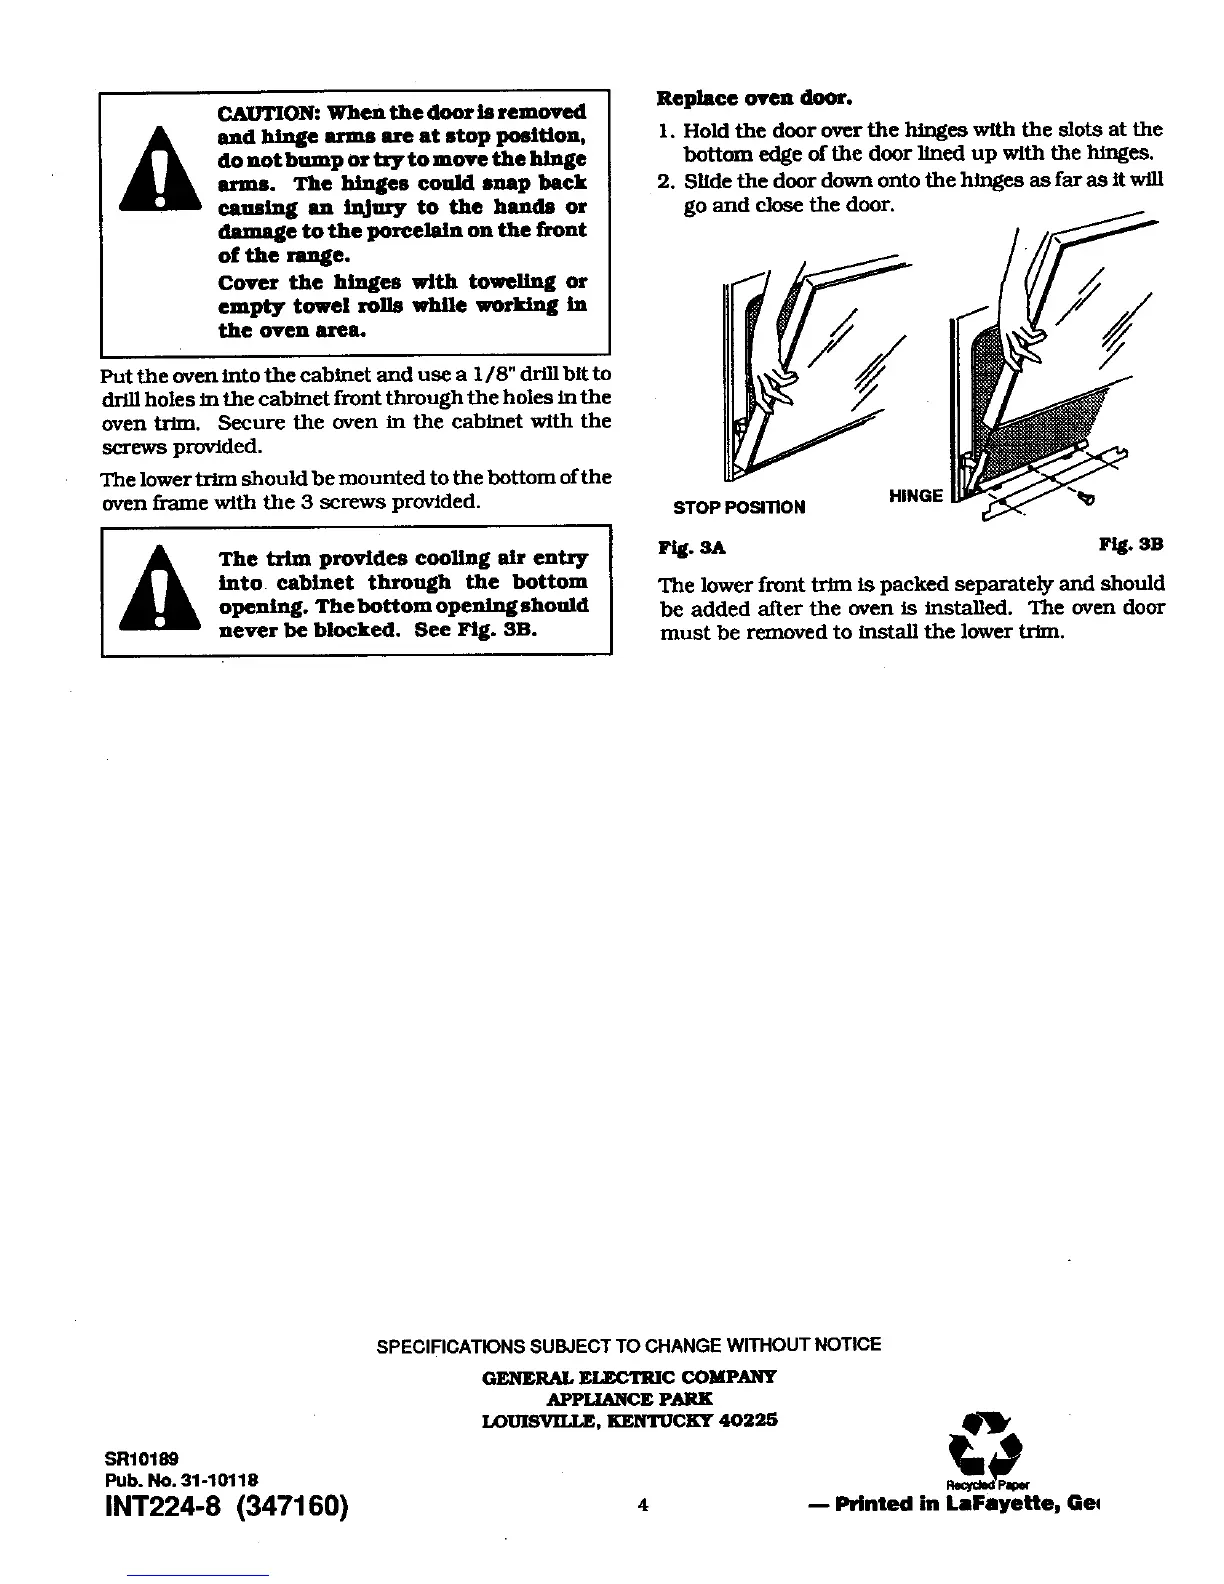
Replace oven door.
I. Hold the door over the hinges with the slots at the
bottom edge of the door lined up with the bLUes.
2. Slide the door down onto the hinges as far as it will
go and close the door.
HINGE
STOP POSIllON
.sn
The lower front trim is packed separately and should
be added after the oven is Installed. The oven door
must be removed to install the lower trim.
SR1018g
Pub. NO. 31-10118
1NT224-8 (347160)
SPECIFICATIONS SUBJECT TO CHANGE WITHOUT NOTICE
GENERAL ELECTRIC COMPANY
APPLIANCE PARK
LOUISVILLE, KENTUCKY 40225
D Printed in LaFayette, G_
 Loading...