Installation Instructions
REMOVING THE FREEZER DRAWER (on some models)
The freezer drawer can be removed, if needed,
to fit through tight areas.
Read these instructions completely and carefully.
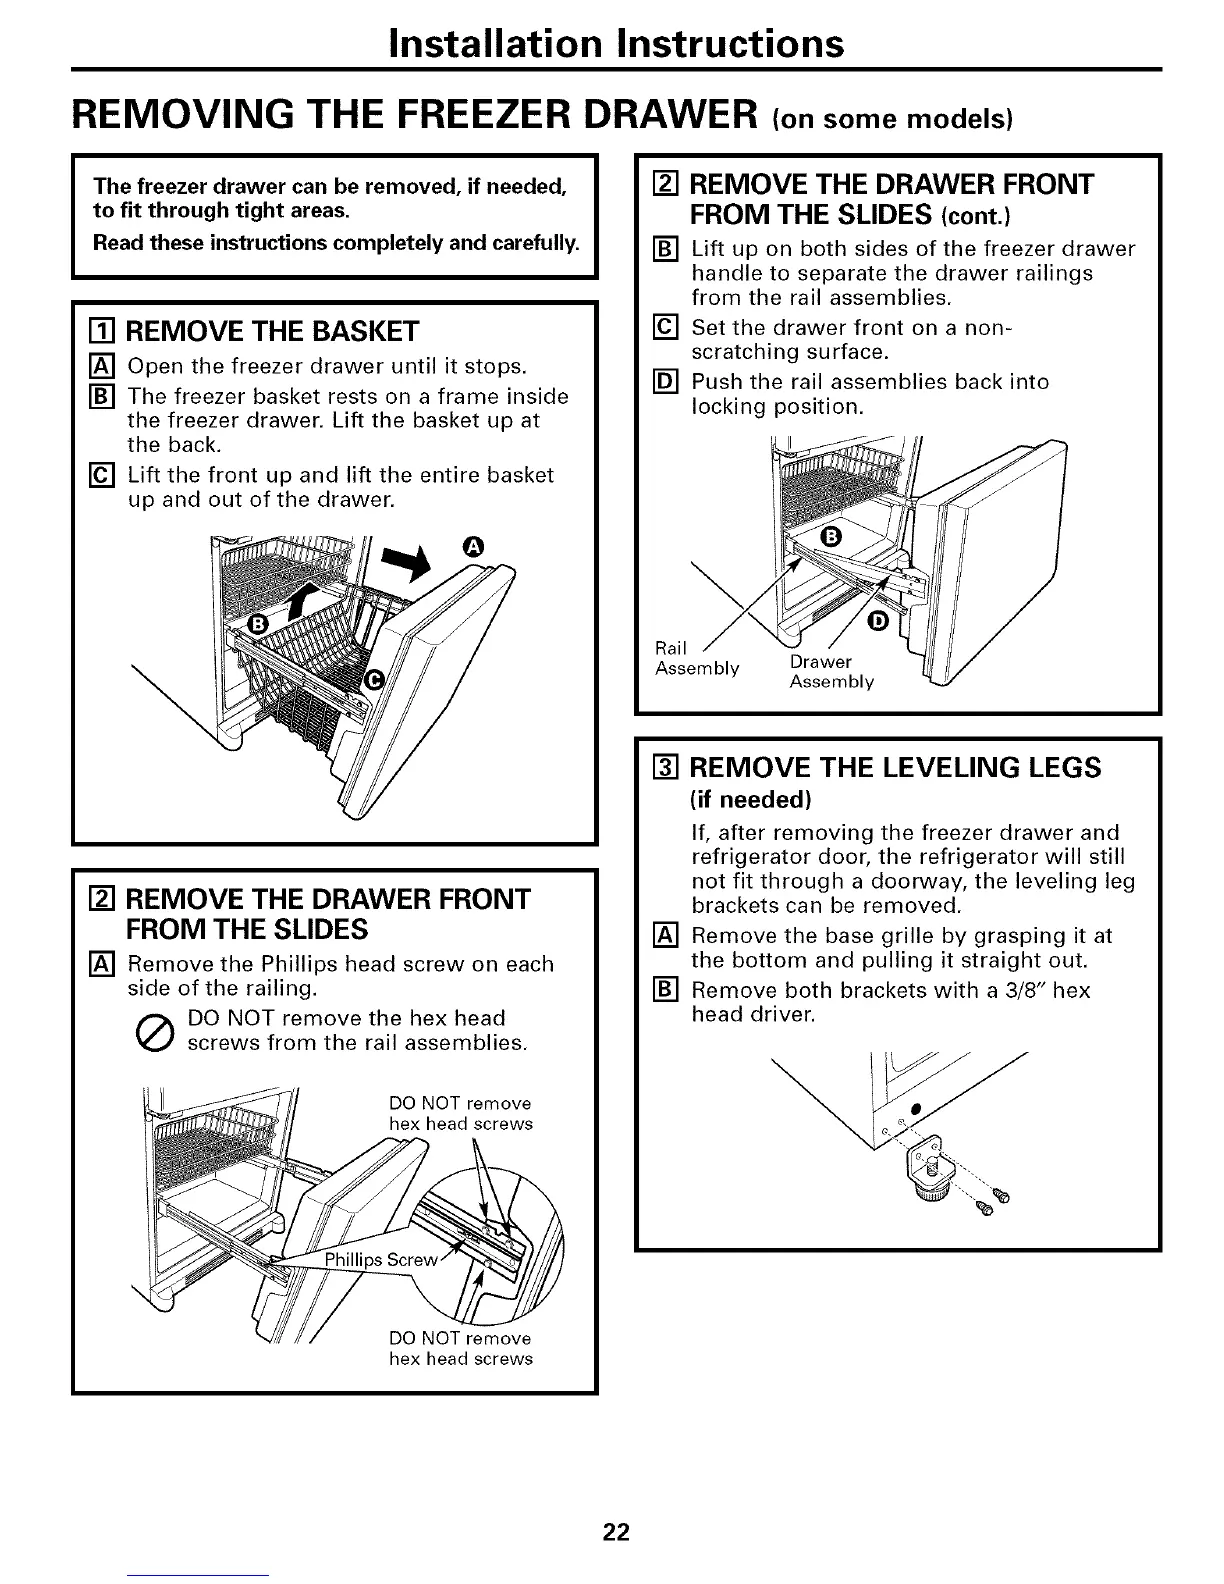
[] REMOVE THE BASKET
[] Open the freezer drawer until it stops.
[] The freezer basket rests on a frame inside
the freezer drawer. Lift the basket up at
the back.
[] Lift the front up and lift the entire basket
up and out of the drawer.
\
[] REMOVE THE DRAWER FRONT
FROM THE SLIDES
[] Remove the Phillips head screw on each
side of the railing.
(_ DO NOT remove the hex head
screws from the rail assemblies.
DO NOT remove
hex head screws
DO NOT remove
hex head screws
[] REMOVE THE DRAWER FRONT
FROM THE SLIDES (cont.)
[] Lift up on both sides of the freezer drawer
handle to separate the drawer railings
from the rail assemblies.
[] Set the drawer front on a non-
scratching surface.
[] Push the rail assemblies back into
locking position.
Rail
Assembly Drawer
Assembly
[] REMOVE THE LEVELING LEGS
(if needed)
If, after removing the freezer drawer and
refrigerator door, the refrigerator will still
not fit through a doorway, the leveling leg
brackets can be removed.
[] Remove the base grille by grasping it at
the bottom and pulling it straight out.
[] Remove both brackets with a 3/8" hex
head driver.
22