

R
Robert SnyderJul 30, 2025
How to reset GE Refrigerator?
- EEmily CarrilloJul 30, 2025
To perform a soft reset on your GE Refrigerator, use the 'Refrigerator Reset' function.
How to reset GE Refrigerator?
To perform a soft reset on your GE Refrigerator, use the 'Refrigerator Reset' function.
How to exit HMI Self Test on GE Refrigerator?
To exit the HMI Self Test on your GE Refrigerator, press and hold both FF temperature pads simultaneously for 3 seconds, then release.
Information for individuals with electrical, electronic, and mechanical experience; repair may cause injury or damage.
Crucial step to disconnect power before any servicing to prevent personal injury.
Ensure grounding wires are properly reconnected after service for electrical safety.
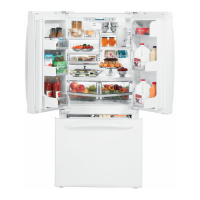
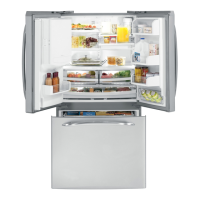
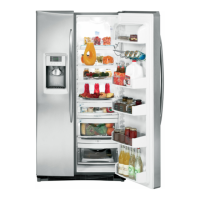
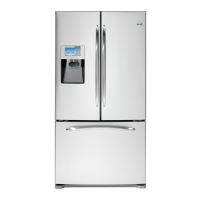
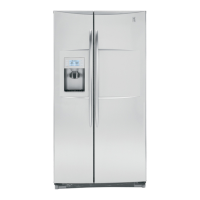
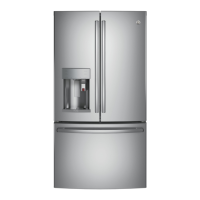
Highlights the main features of the refrigerator, including capacity, icemaker, and ENERGY STAR compliance.
Explains the meaning of each character in the model number for identification.
Details how to interpret the serial number to determine manufacturing date.
Lists electrical ratings, compressor capacity, pressure, and refrigerant charge.
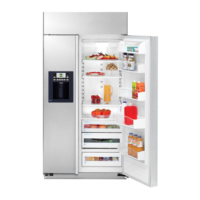
Covers no-load performance metrics and illustrates the airflow path.
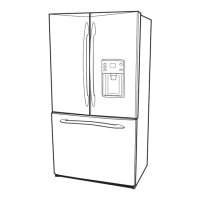
Guidance on fitting custom panels to the refrigerator doors.
Provides specific measurements for custom wood panels on refrigerator doors.
Safety guidelines for power cords and recommendations regarding extension cord usage.
Specifies ideal placement and required space around the unit.
Instructions and materials for installing the anti-tip floor bracket for safety.
Guide for measuring the cabinet opening to ensure proper fit.
Steps for positioning and marking the anti-tip floor bracket's mounting holes.
Details acceptable screw placement for wood and concrete installations.
Guides on moving the refrigerator to secure it with the anti-tip bracket.
Instructions for removing and reattaching the fresh food door handle on different models.
Key precautions and steps for safely removing the refrigerator door.
Procedures for servicing the center hinge and transferring the door stop.
Steps to rehang the door and reinstall the logo badge.
Instructions for removing and reattaching the freezer drawer handle.
Important notes and initial steps for safely removing refrigerator doors.
Procedures for removing the second door and referencing freezer drawer removal.
Steps for reattaching refrigerator doors, including wiring and water line connections.
Guides for aligning doors and referencing freezer drawer replacement.
Steps to remove the freezer basket and the drawer front from its slides.
Procedures for reattaching the drawer front and reinstalling the freezer basket.
Instructions for adjusting temperatures and understanding the control display.
Explains the functionality of TurboCool, Door Alarm, and Energy Saver features.
Step-by-step guide for replacing the filter cartridge and resetting the indicator light.
Information on using the filter bypass plug and its effect on the icemaker.
Guidance on initial ice production time and accessing the icemaker controls.
How to lock the dispenser and activate the door alarm function.
Step-by-step instructions for replacing light bulbs in both refrigerator and freezer compartments.
Explains the defrost cycle operation and the dispenser lock feature for safety.
Details the freezer liner protection mode activated by prolonged door opening.
Diagrams identifying components within the fresh food compartment.
Diagrams identifying components in the freezer compartment and the rear view.
Lists and describes the function of various connectors on the main control board.
A visual layout of the main control board with labeled connectors.
Illustrates and labels key components like evaporator, compressor, and condenser.
Safety precautions for working with refrigerants and charging the system.
Detailed procedure for evacuating, charging, and leak testing the refrigerant system.
Explains airflow paths and how the damper controls air movement between compartments.
Instructions for rearranging, removing, and replacing shelves in the refrigerator.
Details on spillproof and slide-out shelves for containment and access.
Procedures for removing and relocating adjustable and non-adjustable door bins.
Instructions for removing and replacing the beverage rack on the door.
Guidance on humidity control, temperature adjustment, and pan removal/replacement.
Steps for removing and reinstalling various freezer baskets from the drawer slides.
A table showing thermistor resistance values across different temperatures.
Identifies the location of ambient, fresh food, and freezer thermistors.
Instructions for replacing the evaporator thermistor and details on evaporator fan operation.
Explains how light thermostats manage power to interior lights based on temperature.
Details the fan's mounting, airflow path, and its role in cooling the condenser.
Covers the fan's wiring connections and methods for testing the motor.
Explains how Pulse Width Modulation controls condenser fan speed relative to compressor operation.
Procedures for accessing, removing, and safety precautions for the inverter.
Warns against direct-starting the compressor due to its 3-phase power requirement.
Details how inverter controls compressor speed based on cabinet temperatures.
Steps to remove components and the evaporator itself.
Procedures for removing the vertical divider and the icemaker assembly.
Steps for removing the freezer fan cover and the main evaporator cover.
Instructions for removing the defrost heater and details on the icemaker fill tube heater.
Explains the purpose, operation, and testing of return duct heaters.
Lists necessary parts and the importance of the heat shield kit for protection.
Detailed steps for brazing the new evaporator into the system.
Details the components of the damper and steps for its removal.
Explains how the articulating mullion works and its alignment features.
Procedures for removing the water dispenser interface from the door panel.
Steps for disconnecting wiring and carefully removing the dispenser trim.
Explains the self-closing mechanism for freezer drawers.
Procedures for accessing and removing the EMI filter.
How to enter and use the display's self-diagnosis mode for testing.
Lists initial diagnostic modes like Showroom Mode and software version checks.
Lists further diagnostic modes including HMI Self Test and Sensor Self Test.
A detailed wiring schematic showing connections to the main control board and components.
Details warranty terms, what GE replaces, and labor coverage.
Lists items not covered by warranty and limitations on implied warranties.
| Brand | GE |
|---|---|
| Model Number | PDCF1NBW |
| Category | Refrigerator |
| Type | French Door |
| Ice Maker | Yes |
| Water Dispenser | Yes |
| Energy Star Certified | Yes |
| Color | Black |
| Width | 35.75 in. |