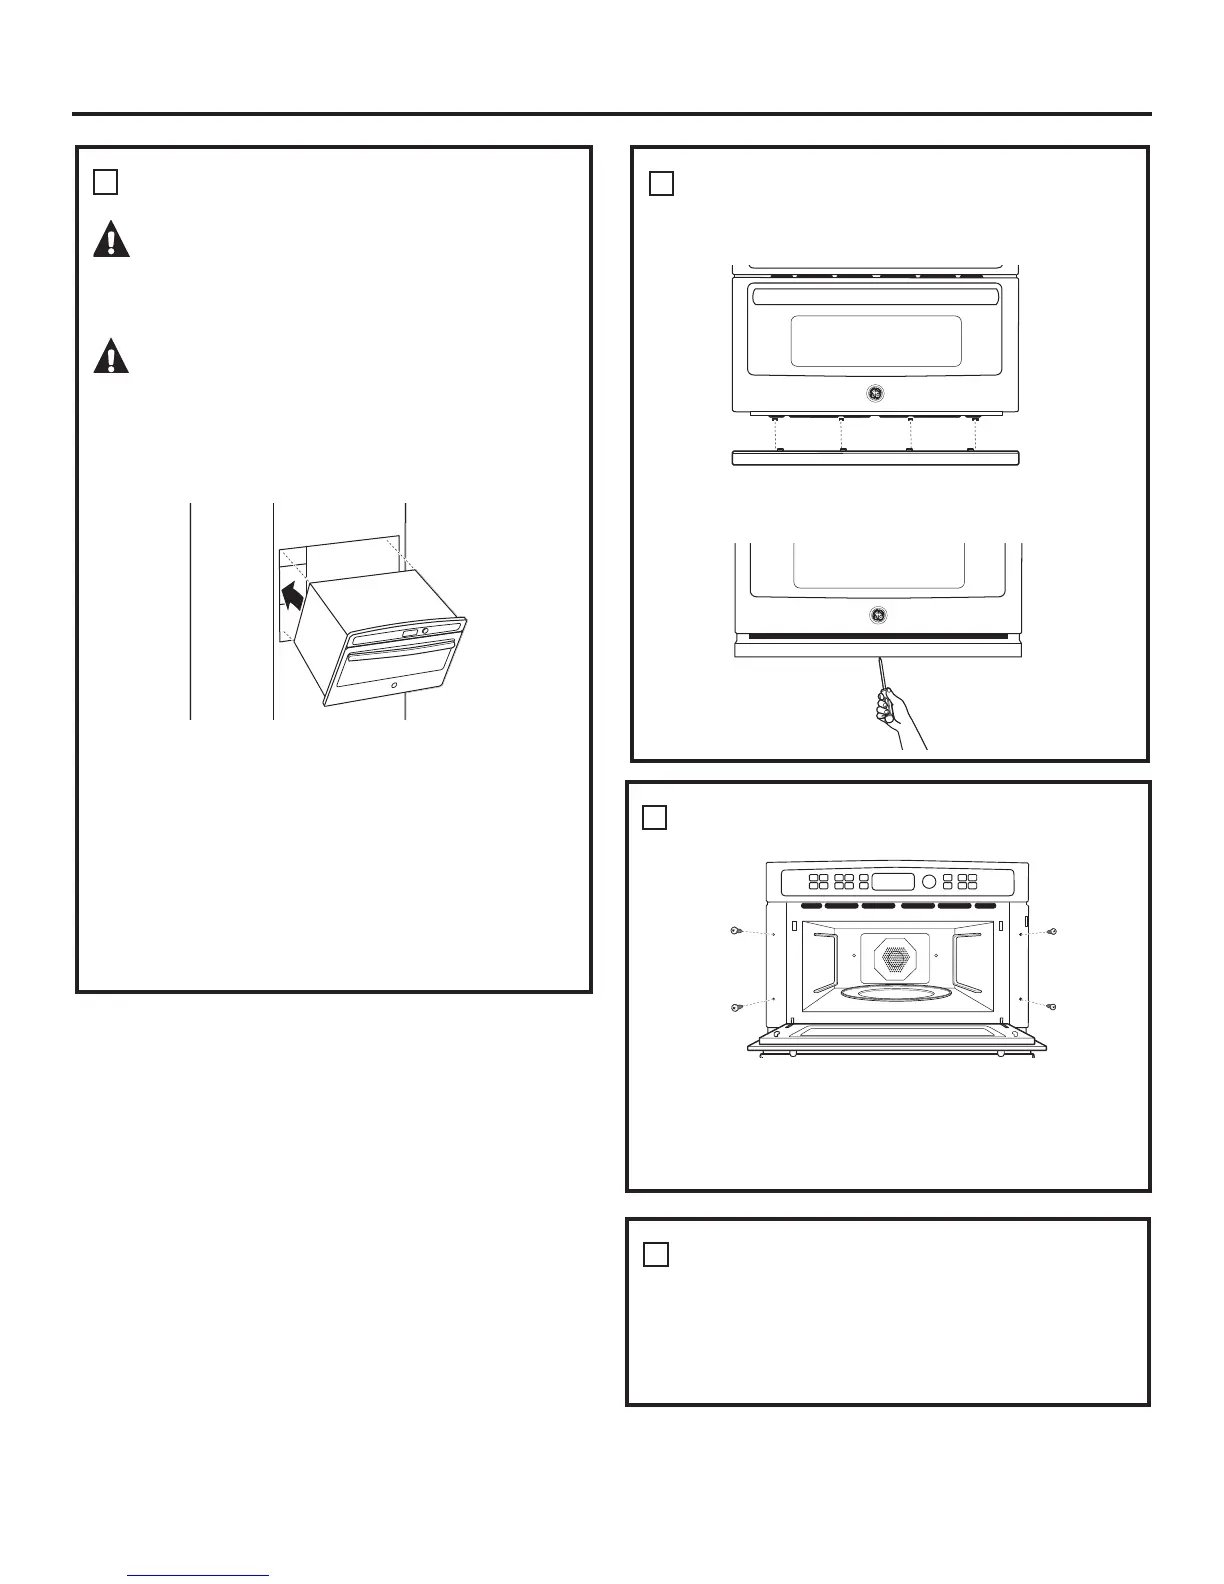
INSTALL MOUNTING SCREWS
'ULOOSLORWKROHVWKURXJKWKHVLGHIODQJHVRQHDFK
side.
'ULYHWKHFRORUPDWFKHGVFUHZVLQWRWKHVLGH
flange.
FINALIZE INSTALLATION
7XUQWKHSRZHURQDWWKHVRXUFH7KHLQWHULRUOLJKW
should come on when the door is opened.
5HIHUWRWKH2ZQHU
’
s Manual for operating
instructions.
Printed in Korea
3
4
8
Installation
$OLJQERWWRPWULPWDEVWRVORWVLQWKHERWWRP
of the oven.
6HFXUHWKHERWWRPWULPWRWKHERWWRPRIWKHRYHQ
using 3 brass screws provided.
SLIDE THE OVEN INTO THE CUTOUT
CAUTION: Two people are required
to lift the oven into the opening. Grasp the bottom
DWWKHIURQWDQGUHDU'212786(7+(+$1'/(
72/,)77+(29(1'$0$*(:,//2&&85
PRECAUCIÓN: Se requieren
dos personas para levantar el horno e introducirlo
en la abertura. Agarre la parte inferior por delante
\SRUGHWUiV1286(/$0$1,-$3$5$/(9$17$5
(/+2512£38('('$³$56(
/LIWDQGKROGWKHRYHQDWWKHIURQWRIWKHRSHQLQJ
+ROGWKHRYHQDWDDQJOHDQGSOXJLQWKH
power cord.
&DUHIXOO\VOLGHWKHRYHQLQWRWKHFDELQHWSDUW
way. Leave the oven a few inches forward of the
cabinet frame.
&KHFNWREHVXUHWKHSRZHUFRUGLVQRWWUDSSHG
under the oven or along the sides of the oven.
INSTALL BOTTOM TRIM
1
2
 Loading...