29-6326 15
NEW CONSTRUCTION, PRE-PLANNING, OR REMODELING
NOTE: For existing construction, skip to the section, Installing The Hood Bracket Mount.
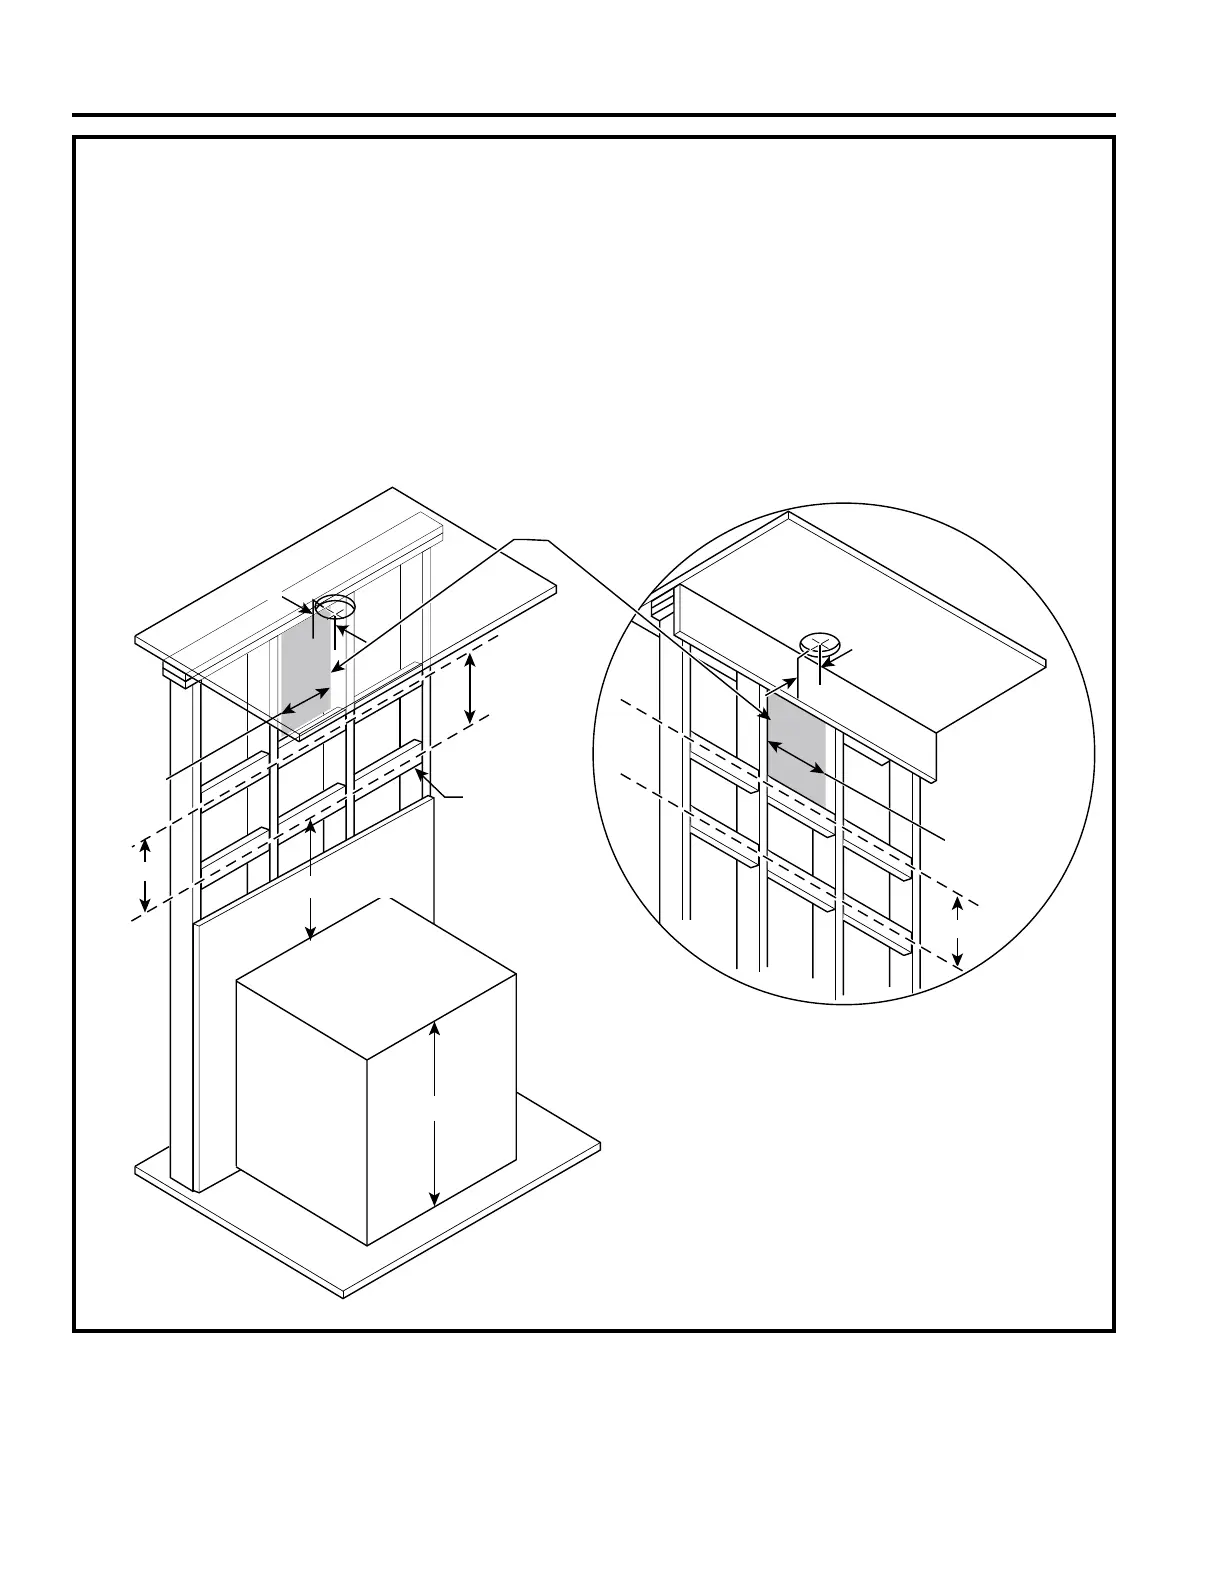
■ Install horizontal wood supports between 2 wall
studs that align with the vertical mounting height
locations shown in the illustration.
■ The horizontal supports must be flush with the room
side studs.
■ For ducted installation, the hole for the duct in the
ceiling must be centered 5" away from the finished
rear wall.
■ The bottom support aligns with the hood mounting
bracket. This height depends on the desired height
of the hood.
■ The top support must be flush with the ceiling.
■ The electrical wiring can be located 5-1/2” to the left
or right (junction box is on the left) of the centerline.
Must remain 7/16” above the back panel and 5” from
the ceiling, refer to illustration on next page.
INSTALLATION
Installation
Acceptable
area for
electrical
wiring
Acceptable
area for
electrical
wiring
14-3/8"
14-3/8"
5"
5"
11"
11"
See the Installation
Height Table for possible
installation heights.
24-36" + 1-1/8"
Wood Supports
• 36" minimum
width centered
• 4" height
From the lower left corner of
the gray shaded area, it is
recommended to have at least
20" of house electrical wiring.
* 36” or 38” Range
* Typical electrical range is 36"
and typical gas range is 38"
1" = 2.5 cm
 Loading...