Installation Instructions
iNSTALLiNG THE WASHER
1. Run some water fl'om the hot and cold fiulcets to flush
tile water lines and remove particles that might clog up
tile water _;dve screens.
2. Remo\e tile inlet hoses ti'om tile plastic bag,
3. (90 ° elbow end)
Carefifllv connect the inlet
hose marked HOT to the
outside "H" outlet of the
water vi|lve. Tighten by
hand, then tighten another
2/3 turn with pliel_.
Carefifllv connect the other
inlet hose to tile inside "C' (('3
outlet of tile water _;dve.
Tighten by hand; then tighten another 9/3 turn with
pliers. Do not cmssthread or over-tighten these
€onne€_ons,
4. Comlect tile inlet hose ends to the HOT and COI,D
water fimcets tightly by hand, then tighten another 2/3
turn with pliel_. Turn tile water on and check tbr leaks.
5,
6,
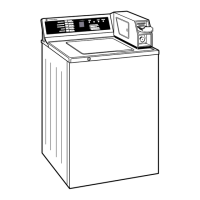
(_i"efldlv inove tile washer to its final location. Genflv
rock tile washer into position.
NOTE: Do not use tile dispenser drawer or door to lift
the washer.
NOTE: If you are installing into a drain pail you can
use a 24-inch long 2x4 to lever the washer into place.
With the washer in its
final position, place a
level on top of the
washer (if the washer
is installed under a
counter, tile washer
should not be able to
rock). A(!just tile fl'ont
leveling legs up or down to ensure tile washer is
resting solid. Turn the lock nuts on each leg tlI)
towards tile base of tile washer and slmg with a
wFench.
NOTE: Keep tile leg extension at a nfininmm to
prevent excessive vibration. Tile ti_rther out tile
legs are extended, the more the washer will vibrate.
If tile floor is not level or is dalnaged, you may have
to extend the rear leveling legs.
16
 Loading...