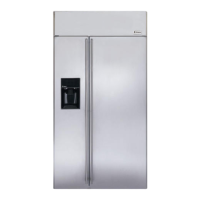
Do you have a question about the GE ZISS420DXASS and is the answer not in the manual?
| Brand | GE |
|---|---|
| Model | ZISS420DXASS |
| Category | Refrigerator |
| Language | English |
Required skill level for installation, including mechanical, carpentry, and plumbing expertise.
Essential precautions to secure the refrigerator against tipping, requiring anti-tip protection.
Details on required installation space, including dimensions, clearances, and utility locations.
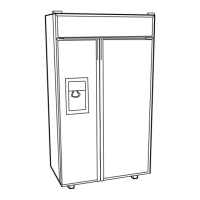
Specifications for door swing clearances and cabinet interaction for proper refrigerator fit.
Information on door swing stops and adjustments for cabinet interaction.
Overview of options for custom panels, handles, and accessory kits for refrigerator personalization.
Guidance on installing custom framed or overlay panels for a seamless appearance.
Information on custom handles, side panels, and optional accessory kits for personalization.
Specific dimensions for constructing and installing 1/4 inch thick custom framed panels.
Important notes regarding panel thickness and dispenser trim fit for dispenser models.
Detailed measurements for creating and attaching 3/4 inch thick custom overlay panels.
Instructions for assembling overlay panels and notes on dispenser trim compatibility.
Requirements for custom raised panel designs, including middle rail specifications for dispenser trim.
Visual examples illustrating how dispenser trims fit with framed and overlay panels.
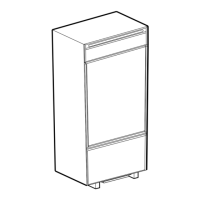
Guidelines for installing side panels when refrigerator sides are exposed.
List of tools and materials needed for refrigerator installation.
Critical safety instructions for properly grounding the appliance and electrical setup.
Specifications for the floor surface to ensure proper installation and protection.
Instructions for safely removing packaging materials and securing the refrigerator unit.
Guidance on safely moving the refrigerator into the installation area, protecting surfaces.
Procedure for connecting the water supply line for the icemaker and dispenser.
Completing the water line installation, including shut-off valve and flushing.
Instructions for installing or bypassing a household water filtration system.
Procedure for installing side panels if the refrigerator sides are exposed.
How to install anti-tip brackets to secure the refrigerator against tipping.
Instructions for leveling the refrigerator using front legs and rear wheels for proper alignment.
Alternative method for securing the refrigerator against tipping, especially with metal wall studs.
Method for securing the refrigerator to adjacent cabinets for stability and tip prevention.
How to adjust the refrigerator door swing from 130° to 90° if clearance is limited.
Procedure for installing the grille panel, especially for custom panel models.
Detailed steps for installing custom 1/4 inch framed panels onto the refrigerator doors.
Instructions for fitting and installing custom 3/4 inch overlay panels onto the refrigerator doors.
Steps for attaching custom handles and aluminum cover trim to overlay panels.
How to select and install the appropriate dispenser trim onto the refrigerator door.
Procedure for connecting the water supply line, either copper or GE SmartConnect tubing.
Connecting power to the refrigerator and closing the grille panel after installation.
Instructions for activating and starting the refrigerator's icemaker.
How to attach the toekicks to the bottom of the refrigerator.
Final checks for door alignment, handle alignment, and overall installation quality.
List of tools and materials needed for installing the ZKHSS2 handle kit.
Procedure for removing existing door handles and trim to prepare for new installation.
Steps for drilling pilot holes and attaching the handle standoffs to custom panels.
Details on securing the handles to the panel using screws and spacers.
Procedure for installing the assembled handles and trim pieces onto the refrigerator doors.
Instructions for installing the dispenser trim for models equipped with a dispenser.