3
Adjust the image projected
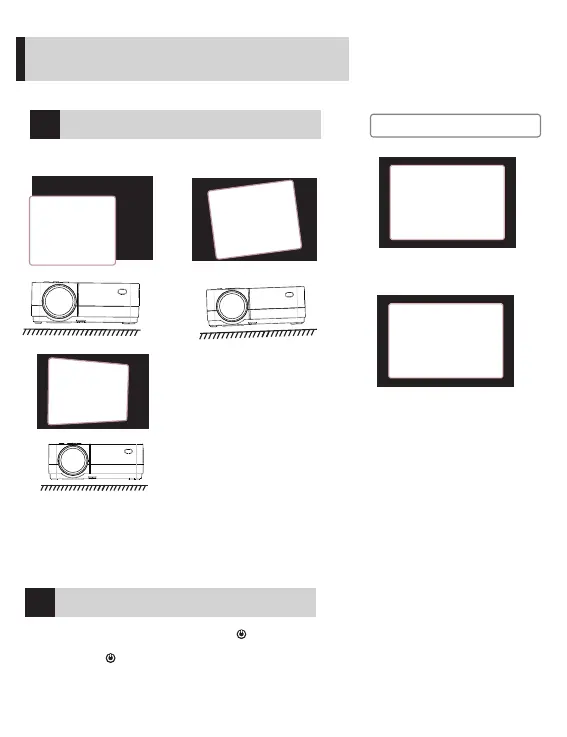
Check the horizontal and vertical settings of
ñ
2
ð
1
ò
ñ
3
3
Æ
Ã
4
4
A B CD
A B
C
D
ò
4
Startup & Shutdown
Installation and debugging
How to quickly install and debug the projector
onto the screen
the screen
!
Precaution
1. When the screen is offset to the left or right, move the projector to
one side.
2. When shifting in a vertical direction, move the projector up or down.
3. If there is an angular offset, place the projector on a horizontal
plane.
4. If the projection screen is as shown in the figure, it indicates that the
projector does not face the screen directly. Please turn the projector
to face the screen.
When the projector is suspended
from the ceiling or in a rear
projection system, please change
the projection direction in the
settings (See Projector settings on
page 14 to change the projection
direction).
1. 5 seconds after power-on, press the key on the projector
panel or the remote controller to turn on the device.
2. Press the key on the projector control panel or the remote
control to turn off the device as prompted by the system.
When the machine is turned off, unplug the power line in time to
save energy.
8