EasyManua.ls Logo

Gecko in.yj-2 - User Manual

Gecko in.yj-2
2 pages
Print Icon
To Next Page IconTo Next Page
Loading...
Quick Start Card
in.yj-2
North American version
2- Connect the main power
1- Connect all outputs & keypads
3- Select spa configuration (see back page)
3
At first startup the keypad display
will show L 1 or LL 1.
Note: To re-enter the Low level
selection menu, hold the
Pump 1 key for 30 seconds.
Note: If the keypad does not have a
Program or Filter key, use the Light
key instead.
Note: For the Color keypad series,
select Settings menu, go into
Electrical config and choose the
appropriate Low level.
Use the Up/Down key to choose the
new Low level configuration number.
Press the Program key to confirm the
selection.
21
Heater connections
(P3 & P4 Element, P5 Ground)
P33 - Light outputs
(12 V DC, 500 mA Max.)
Main power
entry connection
Aperture Ø 2.54 cm (1'')
Ground:
connect all Green wires: P27, P28, P29 or P30
C1 - Main keypad
connector
P1 - Heater communication cable
Bonding lugs:
connect redundant
ground cable to
heater, pumps, etc.
75 L/min (20 GPM) minimum water flow required.
This side up
Outputs:
in.yj-2 pack has 2 relay controlled outputs
Out 1: K7-P
Out 2: K6-P
Direct: P25
240 V (4 wires)
Remove and discard brown wire and
insert each wire into the appropriate
socket of the main terminal block ac-
cording to the color code indicated on
the sticker. Use a flat screwdriver to
tighten the screws on the terminal.
Look at the pump and accessory voltage requirement and make sure to connect
each WHITE common wire to the correct tab on the board: Use any neutral tab for
120 V or use any LINE2 tab for 240 V
WARNING! All connections must be made by a qualified electrician in
accordance with the national electrical code and any state, provincial or local
electrical code in effect at the time of the installation. This product must always be
connected to circuit protected by a Ground Fault Circuit Interrupter (GFCI).
2.a- Electrical wiring 2.b- Pump & accessory voltage
Press and hold the Program key for
20 seconds until you access the
breaker setting menu.
Note: For the Color keypad series,
select Settings menu, go into Electri-
cal config and choose Input current.
4- Select breaker current
Breaker setting for GFCI used.
GFCI b
50 A 40 A
40 A 32 A
30 A 24 A
20 A 16 A
15 A 12 A
Use the Up/Down key to select the
desired value. Then press the Program
key to confirm the selection.
Note: If the keypad does not have the
Program or Filter key, use the Light key
instead.
The values displayed by the system
correspond to 80% of the maximum
amperage capacity of the GFCI.
98
For more information, see our
website: www.geckoalliance.com
For more information, see our
website: www.geckoalliance.com
321
(10 to 20A is only to be use with
120V input)
Neutral: connect White wires from 120V pump
/ acc : P18, P19, P20 or P35
Line 2: connect White wires from 240V
pump / acc : P14, P15, P16 or P37
120 V (3 wires)
DO NOT REMOVE THE BROWN WIRE.
Insert each wire into the appropriate
socket of the main terminal block
according to the color code indicated
on the sticker. Use a flat screwdriver to
tighten the screws on the terminal.
CO - Communication links
in.touch, in.stik, Aux keypad in.k120
Question and Answer IconNeed help?

Do you have a question about the Gecko in.yj-2 and is the answer not in the manual?

Overview

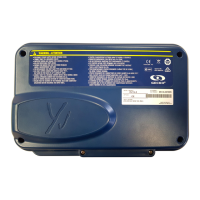
The in.yj-2™™™ is a spa control system designed for North American installations, offering comprehensive management of various spa components including heaters, pumps, lights, and communication interfaces. This Quick Start Card provides essential instructions for its setup and configuration.

Function Description

The in.yj-2™™™ system serves as the central control unit for a spa, orchestrating the operation of all connected accessories. It manages power distribution, ensures proper heating, controls water circulation and filtration, and facilitates user interaction through keypads. The system is designed to be robust and adaptable to various spa configurations, supporting both 120 V and 240 V setups.

Usage Features

Connecting Outputs & Keypads:

The system features dedicated connectors for various spa components. The P1 connector is for the heater communication cable, enabling the control unit to communicate with and manage the heater. P33 provides 12 V DC power for light outputs, with a maximum current of 500 mA. CO connectors are for communication links, supporting devices like in.touch, in.stik, and the in.k120 auxiliary keypad. The C1 connector is specifically for the main keypad, which serves as the primary user interface.

The in.yj-2™™™ pack includes two relay-controlled outputs: Out 1 (K7-P) and Out 2 (K6-P), which can be configured to control pumps or other accessories. A direct output, P25, is also available. Heater connections are made via P3 and P4 for the element and P5 for ground. Bonding lugs are provided for connecting redundant ground cables to the heater, pumps, and other metallic components, ensuring electrical safety. The main power entry connection has an aperture of 2.54 cm (1"). For 240 V pumps and accessories, white wires connect to Line 2 (P14, P15, P16, or P37). For 120 V pumps and accessories, white wires connect to Neutral (P18, P19, P20, or P35). All green wires connect to ground (P27, P28, P29, or P30).

Connecting Main Power:

Proper electrical wiring is crucial for the safe and efficient operation of the spa.

  • 120 V (3 wires): For 120 V setups, the brown wire must not be removed. Each wire should be inserted into the appropriate socket of the main terminal block according to the color code indicated on the sticker. A flat screwdriver is used to tighten the screws on the terminal, securing the connections.
  • 240 V (4 wires): For 240 V setups, the brown wire should be removed and discarded. Similar to the 120 V setup, each wire is inserted into its corresponding socket on the main terminal block, following the color code. The screws are then tightened with a flat screwdriver.

Pump & Accessory Voltage:

It is essential to verify the voltage requirements of all pumps and accessories. White common wires must be connected to the correct tab on the board: any neutral tab for 120 V devices or any LINE2 tab for 240 V devices. This ensures that each component receives the appropriate voltage.

Selecting Spa Configuration:

Upon initial startup, the keypad display will show "L 1" or "LL 1," indicating that the system is ready for configuration.

  • To select the desired Low level configuration number, the Up/Down key on the keypad is used.
  • Once the desired configuration is selected, the Program key is pressed to confirm the selection.
  • To re-enter the Low level selection menu, the Pump 1 key must be held for 30 seconds. If the keypad lacks a Program or Filter key, the Light key can be used instead. For Color keypad series, the user navigates to the Settings menu, then Electrical config, and chooses the appropriate Low level.

Selecting Breaker Current:

The breaker setting is critical for protecting the electrical system.

  • To access the breaker setting menu, the Program key is pressed and held for 20 seconds. For Color keypad series, the user navigates to the Settings menu, then Electrical config, and chooses Input current.
  • The system displays values corresponding to 80% of the maximum amperage capacity of the GFCI.
  • The Up/Down key is used to select the desired breaker value.
  • The Program key is then pressed to confirm the selection. If the keypad lacks a Program or Filter key, the Light key can be used instead.

Configuration Selection Chart:

The system supports various standard configurations, each defining the operation of Pump 1, Pump 2, Circulation Pump (CP), Ozone (O3), filter cycle daily, and heater.

  • Config #1: Pump 1 operates at 2 speeds (K7-P, K6-P) with 10A-3A output. The filter cycle runs for 2 * 1 hour with P1, and Heater 1 is used.
  • Config #2: Pump 1 operates at 1 speed (K7-P) with 4A output. The filter cycle runs for 2 * 1 hour with P1, and Heater 1 is used.
  • Config #3: Pump 1 operates at 1 speed (K7-P) with 4A output, and Pump 2 operates at 1 speed (K6-P) with 8A output. The filter cycle runs for 2 * 1 hour with P1, and Heater 1 is used.
  • Config #4: Pump 1 operates at 1 speed (K7-P) with 10A output. An external circulation pump (K6-P) is installed. The filter cycle runs for 2 * 6 hours with the CP, and the CP is used as the heater.
  • Config #5: Pump 1 operates at 2 speeds (K7-P, K6-P) with 10A-3A output. The circulation pump (P-25) is always on with 2A output. The filter cycle runs for 2 * day purge, and the CP is used as the heater.

Glossary:

  • X: Indicates that a component is installed.
  • 1SP: Refers to high speed only operation.
  • 2SP: Refers to high and low speed operation.
  • 10A, 10A-3A: Denotes output current, specifying 1 speed or High-Low speed.

Maintenance Features

The system requires a minimum water flow of 75 L/min (20 GPM) for proper operation. Circulation pumps, especially those running 24/7, must maintain this flow without causing kinetic heating of the water. Gecko recommends using the Aqua-Flo Circ-Master (1/15 HP) for this purpose.

Safety Warnings:

All electrical connections must be made by a qualified electrician in accordance with national, state, provincial, and local electrical codes. The product must always be connected to a circuit protected by a Ground Fault Circuit Interrupter (GFCI) to ensure safety and prevent electrical hazards.

Gecko in.yj-2 Specifications

General IconGeneral
Modelin.yj-2
CategoryControl Systems
Output Voltage12V DC
Output Current1A
Efficiency85%
ProtectionOverload, Short Circuit
Operating Temperature-20°C to 60°C

Related product manuals