123
UserManual
VISO15–MSF(UK)
1.Features
‐EasytoReadandUnderstandTimedisplay
‐PerpetualCalendarUptoYear2099
‐Daysoftheweek&Monthin14differentlanguages
2.UnitAppearance
PartA‐LCD
A1: DayoftheWeek
A2:RadioControlIcon
A3:Time
A4:Periodoftheday
A5:AM/PM
A6:Date
A7:Month
A8:Year
PartB‐Button PartC‐Structure
B1:“SET/ ”Button
B2:“▲”Button
B3:“▼”Button
B4:Poweradaptor
C1:backlightsensor
C2:HangingHole
C3:BatteryCompartment
C4:Stand
3.Gettingstarted:
z Plug the power adaptor into the wall socket and into
thebackofyourclockin(B4)
z Openthebatterycompartment(C3).
z Insert 3 x AA size alkaline batteries observing polarity
[“+”and“–“marks].Youshouldherea“click”sound,it
indicatesthatyouhaveplacedthebatteriescorrectly.
z Replacethebatterycompartmentcover.
z Thebatteriesareonlyusedincaseofpowerfailure.
z Youcanselectthelevelofbrightnessofthebacklightby
placingyourhandonthebacklightsensor(C1).Thereare
fourlevels(High,middle,lowandOFF).
In NIGHT mode, the brightness is set on LOW and the
HIpositioncan’tbeselected.
4.Setting
4.1Automaticclocksetting
z WhenyouconnectyourpoweradaptorortheAlkaline
batteries,yourclockasksyoutoselectyourlanguage.
Youha v ethechoice betweenthefollo wing14language s:
English,Français,Deutsch,Nederlands,Italiano,Espanol,
Portugues,Swenska,Norsk,Dansk,Suomi,Polski,Ceska
andMagyar.
z Pressthe “▼” (B3)or “▲”(B2) buttonto chooseyour
languageandthenpresstheSET(B1)button
z Pressthe “▼” (B3)or “▲”(B2) buttonto chooseyour
type of display and then press the SET (B1) button to
exit.
Youcanchoose betweenfourtypesofdisplay(seepictur es)
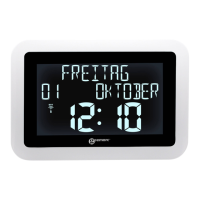
a)DP1:Day+Periodoftheday+Time
b)DP2:
Day+Date+Time
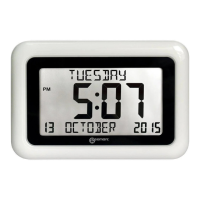
c)DP3:Day+Date+Year
d)DP4:Inthismode,youcanselectboth(DP1, DP2or
DP3)mode,theclockwillthenswitchbetw eenth e thir d .
By default,theswitchwill happenevery 5 secondsbut
you have the possibility to
increase the time period
betweentwoswitches(upto60seconds).
z After having set the language and the type of display,
theclockautomaticallystartstoscanforthe MSF time
signal. The Radio Control Icon “
” (A2) will then
appearonthescreen.
(A2)flashes
Indicatesthattheclockisnow
receivingtheMSFsignal
(A2)stayson
Indicatesthesignalhas
successfullybeenreceived
(A2)disappears
Indicatesthereceptionofthe
signalhasfailed
z Theclockautoma ticall y synchronizeswiththeMSFradio
signal every day at 3.00 amto maintain accurate time
keeping. If synchronization with the MSF radio signal
fails,the“
”iconwilldisappearfromthescreen.The
clock will then reattempt to synchronizewith theMSF
radiosignalat4.00and5.00am.
z Youcanmak etheclockscanfortheradiosignalbyholding
the “▼” button (B3) for 3 seconds. Each attempts at
gettingthesignaltakesseveralminutes.Ifthereception
fails, the scanning stops momentarily (the “
” icon
disappears)andthenstartsag ainonthenextclockhour.
E.g. if reception failed at 8:20a.m. the clock will scan
againforthesignalat9:00a.m.
z To stop the scanning for the MSF radio signal, hold
the“▼”button(B3)for3seconds.
Day
+
Periodof
theday
+
Time
Day
+
Date
+
Time
Day
+
Date
+
Year