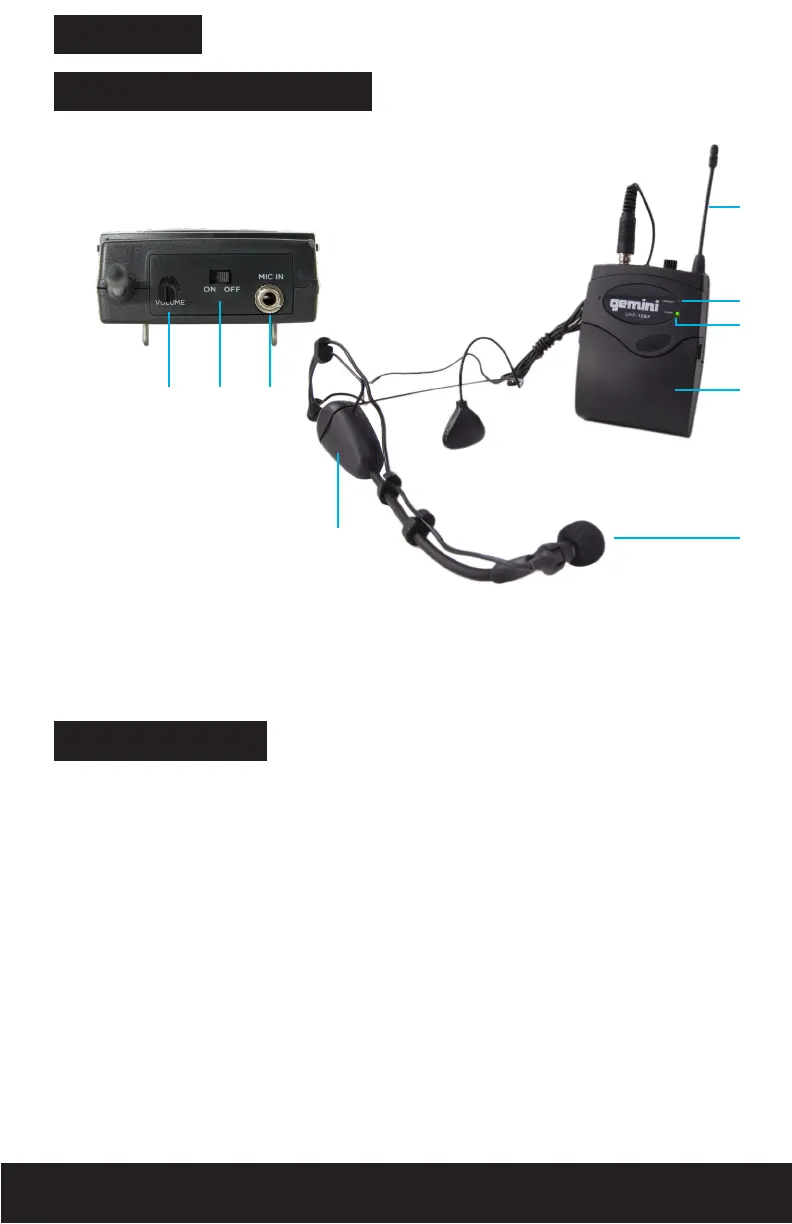
1. MIC In Jack
2. Power ON/OFF Switch
3. Microphone Volume
4. Antenna
1. Open battery cover and install 2 AA batteries into battery compartment
with correct polarity. Then close the battery cover.
2. Insert supplied headset MIC or lapel MIC into MIC IN jack. Turn the
metal slip ring on the plug clockwise to thread it on to the jack.
3. Slide power switch to “ON” position to turn on the transmitter. Power
indicator will light green. This indicates correct operation.
4. Now receiver RF indicator will light (please confirm the frequency of
the transmitter is the same as that of receiver before operation). During
operation if low battery indicator lights red, this indicates the battery is
low. Please replace batteries.
5. After use, please slide power switch to “OFF” position to turn o
the transmitter. If you are not going to use the wireless microphone
system for a long period of time please take out the batteries from the
transmitter to avoid possible battery leakage which may damage the
transmitter.
Low Power Indicator
Power Indicator
Battery Compartment Cover
Lapel MIC
Headset MIC
5.
6.
7.
8.
9.
6
8
4
5
7
9
3 12
7
BELT PACK TRANSMITTER
ENGLISH
PARTS DESCRIPTION
OPERATION
UHF-01/02 manual • geminisound.com
7
 Loading...