1.Please read this manual carefully before installation and
adjustment.
2.Installation and operation must be operated under
professional trained staff.
3.It is not allowed change the structure of any motor parts,
otherwise the customer should take full responsibility
4.Confirm the power connected to the ground safety and
keep in accordance with the voltage range and technical
requirements in the nameplate.
5.Please leave your feet away from the pedal when power
is turned on or off.。
6.You must cut the power off under operation mentioned
below:
A.install the machine
B.insert or pull out any plug in the control box;
C.threading, changing needle and rotate the machine head.
D.machine maintenance and machine is in idle state.
7.The setting of control system and maintenance should be
operated by trained staff
8.There should be 5 seconds separate during changes of
power.
9.The system must be connected to the ground safety
注意 CAUTION
使用机器前请详细阅读本用户手册及所配套的缝纫设备
说明书,配合正确使用,由接受过专业培训的人员进行
安装调试 控制器电源接入规定供电系统,用户供电系
统必须有独立接地装置,安装电机和控制器任何组件必
须先断开电源
本产品仅适用于指定范围的缝纫设备,请勿移作其他用
途。
,
Please read instruction manual and completing instruction
manual carefully before operating. The power should be
connected in the safety electronic system, and that system
must have individual grounding device.You must be cut off
the power before you install the motor or any other parts.
The Installation and operation must be operated under
professional trained staff.
安全说明 SAFETY INSTRUCTION
1.安装和调试前,请认真仔细阅读本手册。
2.本产品须受过专业培训的人员来安装或操作。
3.严禁用户改动控制器任何部分的结构,否则,由此而
产生的一切后果,由用户自己承担全部责任。
4.确保电源安全接地并符合产品铭牌上标示的电压范围
及技术要求。
5.接通电源开关时,请把脚移开机器脚踏板。
6.在进行以下操作时,必须先断开系统电源。
A 安装机器时
B 在控制器上插拔任何连接插头时
C 穿针线、换机针及翻抬机头时
D 机器维修及机器休息不用时
7.设置系统控制参数或进行保养维修工作应由受过相关
培训的人员来完成。
8.每次关闭电源后再次启动,应在相隔5秒钟以后。
9.系统接地线必须可靠连接!
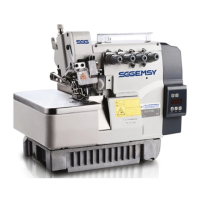
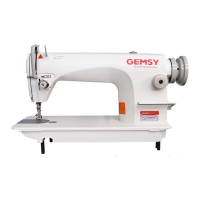
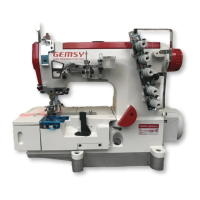
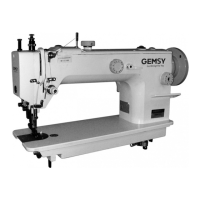
工业缝纫机一体节能电机
ENERGY-SAVING INTEGRATION MOTOR
7720E/E1/E2
5 故障显示代码 及排除方法
Fault codes and solving methods
.
故障
代码
Fault
Code
故障名称
Fault
Meaning
故障原因分析
Reason
解决方案
Solution
查明U、V、W接线短 接处并更除 ;检查控制 板Q1-Q6的D、
S端是否短 路,将有短 路现象的更 换;
检查电机U、V、W接 线是否短接 ,功
率管是否 击穿
Check whether the motor’s U, V and W
wiring is short circuited and whether the
power tube is broken down.
Er-1
Find the short circuit places of the U, V and W wiring and then
eliminate them; check whether control board Q1-Q6’s D and S
units are short circuited and then change the short circuit unit.
检查四孔 插头是否插 牢,缝纫机 头是
否卡死
将电机U、V、W接线 检查是否可 靠接触,缝 纫机机头卡
死维修;
Check whether the four-hole plug is well
inserted and whether the head of sewing
machine gets stuck.
Make sure the motor’s U, V and W wiring are well contacted
and maintain the head of sewing machine.
过流及短 路
Over Current and
Short Circuit
电机堵转 保护
Motor Rotating
Obstruction
Protection
Er-2
电网电压 输入过低
装配稳压 器或者寻求 正常电网上 电;
Power supply voltage is too low.
Equip voltage stabilizer or use normal supply voltage.
欠压保护
Under-voltage
protection
Er-3
检查五孔 插头是否插 牢,五孔插 头上
的红黄绿 蓝黑小线是 否有脱落。 没有
可靠接地 ,雷击导致 霍尔损坏。
关闭电源 ,拔下五孔 插头重新插 ,开机仍然 报E-4需更
换电机霍 尔,必须专 业人员更换 。
Check whether the five-hole plug is well
inserted and whether the red, yellow,
green, blue and black wires in five-hole
plug fall off. Without safely connecting the
ground, lightning stroke causes the
damage of Hall.
Turn off the power, disconnect the five-hole plug and insert
again. If still displaying E-4 after restarting, the motor hall
should be changed by professionals only.
霍尔信号 异常
Hall Signal
Abnormal
Er-4
1检查四孔 插头是否插 牢,检查插 头
上黑线是 否脱落。
2开机转动 手轮是否有 红灯亮。
关闭电源 ,拔下四孔 插头重新插 ,开机仍然 报E-5需更
换定位传 感器,必须 专业人员更 换。
1 Check whether the four-hole plug is well
inserted and whether the black wire in the
plug falls off.
2.Check whether the red light turns on
when starting and rotating the hand wheel.
Turn off the power, disconnect the four-hole plug, and insert
again. If still displaying E-5 after restarting, the positioning
sensor should be changed by professionals only.
定位传感 器
上停针故 障
Fault on Up
Needle Position
in Positioning
Sensor
Er-5
1检查四孔 插头是否插 牢,检查插 头
上白线是 否脱落。
2开机转动 手轮是否有 绿灯亮。
关闭电源 ,拔下四孔 插头重新插 ,开机仍然 报E-6需更
换定位传 感器,必须 专业人员更 换。
1 Check whether the four-hole plug is well
inserted and whether the white wire in the
plug falls off.
2.Check whether the green light turns on
when starting and rotating the hand wheel.
Turn off the power, disconnect the four-hole plug, and insert
again. If still displaying E-6 after restarting, the positioning
sensor should be changed by professionals only.
定位传感 器
下停针故 障
Fault on Down
Needle Position
in Positioning
Sensor
Er-6
1检查六孔 插头是否插 牢,检查插 头上
红黑绿线 是否脱落。
2没有可靠 接地,雷击 导致霍尔损 坏。
脚踏调速 器
信号异常
Pedal Speed
Regulator Signal
Abnormal
5
关闭电源 ,拔下六孔 插头重新插 ,开机仍然 报E-7需更
换定位传 感器,必须 专业人员更 换。
1Check whether the six-hole plug is well
inserted and whether the red, black and
green wires in the plug fall off.
2Without safely connecting the ground,
lightning stroke causes the damage of Hall.
Turn off the power, disconnect the six-hole plug and insert
again. If still displaying E-7 after restarting, the positioning
sensor should be changed by professionals only.
Er-7
Er-8
(E1/E
2专用)
压脚安全 保护
Press Foot
Protect
检查压脚 臂是否打开(安 全保护)。
Check the pressure foot position.
把压脚臂 合上到可缝 纫状态即可 消除代码;如按 上述操作
后仍然报E-8,则需更 换霍尔开关,必 须由专业人 员更换.
Put the pressure foot to sewing position, the error will gone,
otherwise need to change the Hall.