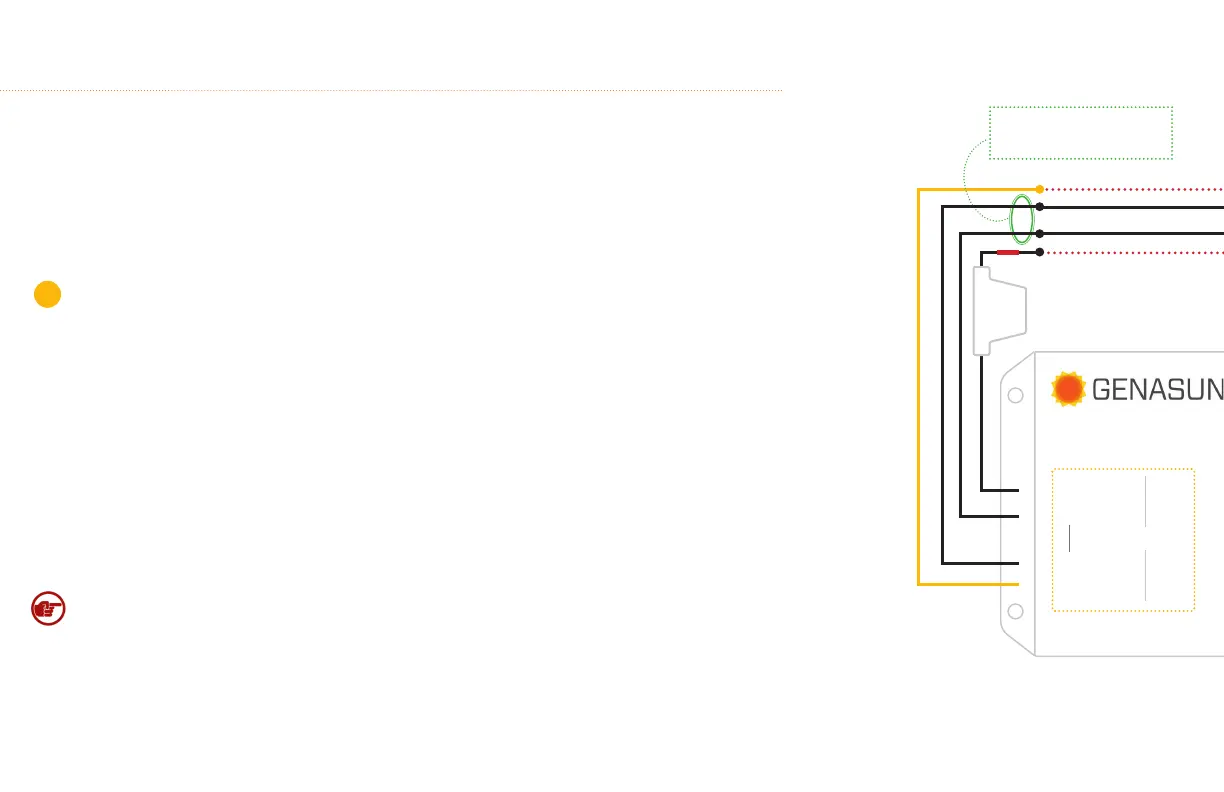
10A IN-LINE FUSE
(INCLUDED)
VOLTAGE BOOSTING MPPT SOLAR CHARGE CONTROLLER
PANEL
PANEL
BATT
BATT
+
+
8A
MAX
COMMON
Installation & System Connections:
MOUNTING
Mount the controller near your battery securely using the holes provided on the enclosure’s anges or with a means
appropriate to the application.
• Mount near the battery (for lead-acid versions only, use within 0.3 m (1 ft) of batteries. See Caution, p.2).
• The GVB-8-WP can be mounted in any orientation on the oor or wall. We recommend a position in which all
labels are clearly visible.
• Do not mount in direct sunlight or near a source of heat.
• Allow adequate airow around the controller to achieve maximum output capability.
• Connections should be made according to Article 690 of the National Electrical Code (NFPA 70)
or the standards in force at the installation location.
• Electrical connections may be made in any order; however the sequence below is recommended.
Note*: The positive or negative battery cable must be protected by a fast-acting fuse or circuit breaker of 10A or
less, rated for the maximum battery voltage and connected close to the battery terminal or power distribution
block. This fuse will protect the wiring in the event of a short circuit or controller damage.
1
Note: GVB is Negative Common,
"-Panel" and "-Battery" (both black
cables) are interchangeble.
 Loading...