Ver 1.0
13
~ÄëçäìíÉ=ÑáÇÉäáíó
Please visit the Harmony Remote website for support, and to activate
and configure your remote.
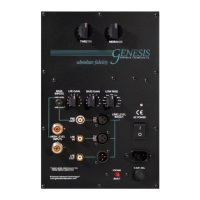
2.2 Bass Control Adjustments
Your servo-bass amplifier should be the last thing you turn on in your
system, and the first thing you turn off. As a general rule, turn your
system on starting at the source to the amplifiers, and turn it off
starting at the amplifiers back to the source.
If the remote is not already set-up to control the Servo-Bass Amplifier,
press the [Devices] button on the top of the remote, and select
Amplifier on the screen by pressing the button next to it.
Using the remote control, turn on each stack of the Servo-Bass
amplifier system by pointing the remote at the Control Module, and
pressing the OK button which functions as a power toggle. The
display on the Control Module shows on
onon
on and then shows the
currently set bass gain.
When you make any adjustments, the display flashes to identify the
function that is being adjusted. The input sensor of the Control Module
is directional, and each channel of the Servo-Bass amplifier system
can be separately controlled or both channels can be controlled
together by careful aiming of the remote control.
The bass volume or gain is controlled with the Ch. + and – buttons.
(The Vol + and – buttons are used for your main volume control on
your preamplifier.) When you first press one of the volume control
buttons, the currently-set volume will flash. The next press will move
the volume up or down. Pressing and holding the Ch. + or – buttons
will change the volume up or down rapidly.
The bass volume/gain has a range of 0 to 100. A volume setting of
around 30 is nominal for normal sized rooms. That is a good place to
start when making adjustments. In general, a lower bass volume setting
is needed in smaller rooms.
Next, adjust the phase with the buttons marked “” or “” on the
remote control. When you first press the phase up or down button,
the display will flash Ph
PhPh
Ph and then the current phase setting will be
shown. The next press of the button will move the phase up or down.
Set the phase to zero as an initial setting.
Two crossover controls are provided on the Control Module that helps
you tune the system into your room. The high-pass filter determines