41
REPLACING BLADE INSERTS (C185, C195, C236 NXTGEN EFORCE 2.0)
During blade replacement, the cutter is xed in place. Any slipping should be avoided. Re-
placing the blade requires a soft-face hammer, the roll pins supplied, a punch and the blade
inserts themselves. It makes sense to replace both blade inserts so that the cutting behavior
is not impaired.
NOTE!
The blade inserts should not be reground, simply cleaning off any soil is
recommended.
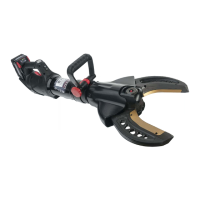
Procedure:
The cutter is positioned with the type plate pointing
upward and is xed in place. A clamping
device, as shown in the illustrations, is not obliga-
tory. When the blade insert is being changed, the
battery must be removed from the cutter and not
under load.
This means that the shear is not completely open
or closed. The blade insert for the cutter blade with
the smooth surface can now be replaced. The
roll pins are knocked out and downward from the
punch (see gure 1).
Fig. 1
After the roll pins have been knocked out of their
position, the blade insert can be pulled out. The
use of a forked screwdriver is recommended. If
the blade insert cannot be loosened immediately,
it can be gently levered out using a punch in the
holes (see gure 2).
Fig. 2
 Loading...