Box contents
• Genexis Pulse EX
• Power adapter
• RJ Nework cable
• Labels (self-adhesive)
• Plugs & screws
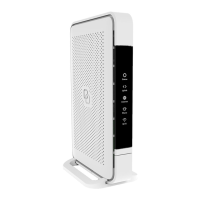
Placement
Pulse EX suppots wo placement
options; desktop and mounted
to a wall. It is recommended to place
the device ‘away’ from objects.
Desktop
. Place the device horizontally on a
lat suface.
Wall mount
. Download and print the drilling
guide from htps:genexis.eu
productpulsedownloads
. Use the drilling guide to drill the
holes, inset plugs and put
screws into place.
. Use the wall mount points on the
back of the Pulse EX to mount
the device to the screws.
Various translations of this document (if available) and additional product
information can be foundon htps:genexis.euproductpulsedownloads
Installation guide
Pulse EX can be setup as a router or wirelesswired extender.
* This installation guide is applicable to setup the Pulse EX as a wireless or wired extender
in combination with a Genexis router which suppots the WiFi EasyMesh™ standard. For other
combinations please refer to the Genexis website at htps:genexis.euproductpulseinstallation-guide
or contact your sevice provider.
Seting up the Pulse
The Pulse EX can be used in three
dierent operation modes.
• Router: Pulse EX functioning as
a gateway to the broadband, only
needed if there is no other router in
the home nework.
If the Pulse EX is your router in
the home nework:
• Wireless extender*: Pulse EX
extends your WiFi signal via a
wireless uplink connection.
• Wired extender*: Pulse EX
extends your WiFi signal via a
wired uplink connection.
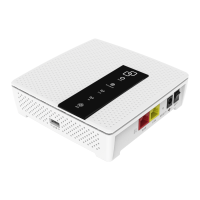
Router
. Place your Pulse EX near your
broadband outlet.
. Connect an RJ nework cable
beween your broadband outlet
and the Pulse EX WAN pot
(red pot).
. Plug the power adapter into an
electrical socket and connect it to
the power pot at the back of
the Pulse EX.
. Flip the ONOFF switch at the
back of the device to turn it on.
. Wait until the Status LED stops
blinking and turns solid green.
Your Pulse EX is setup as a router.
Your nework is now ready to be
extended with a wireless or
wired extender.
 Loading...