36 - Tekniske ændringer forbeholdes - Technische Änderungen vorbehalten - Subject to Technical Modications - 830209G/160228
1. Users guide
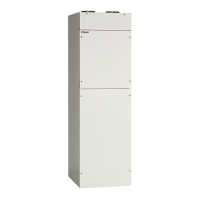
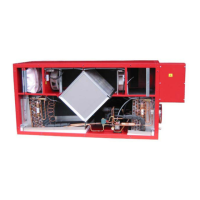
Optima 300 VP/VPC
Genvex residential-use heat pumps are supplied with
Optima 300 controller with a factory setup, which enables
the immediate start of the unit without changing the
operating settings. The factory setups are only basic
settings that can be changed according to the operational
wishes and demands, you have for your home, to obtain
an optimal operation and use of the equipment.
1.1 Use
Use this button to change fan speed between
low, medium and high. (Level 1, Level 2, Level 3).
To stop the unit press this button 3 - 4 seconds
until all levels are switched off. Heating coils
will turn off immediately while the fans will run
for app. 2 minutes in order to cool down the re-
heating surfaces.
Use this button to change the desired room
temperature.
Heat pumps of types VP/VPC may be supplied
with pre-heating and re-heating surfaces. Using
this button, allows a signal to be sent to switch
on the electric element to heat up the domestic
hot water if required.
Use this button to view all temperatures in the
unit, and press arrow down to view which relays
are in operation. This will allow you to get a quick
overview of the operation of the unit.
The following temperatures and relay functions are
shown in the info menu. The relays are ON when the
display shows 1:
T1: Supply
T2: Room
T3: Fresh air
T4: Exhaust air
T5: Before coil (cooling)
T6: Coil (cooling)
T7: Extract air
T8: Antifreeze
T9: Solar collector
R1: Compressor
R3: Pre heat
R2: Supp. heat
R8: Cooling
R5: Heat level 2 (R10)
R6: Heat level 3 (R11)
R7: Heat level 4 (R12)
R4: Defrosting
When relays R5, R6 and R7 are ON, the relays on the
relay circuit boards R10, R11, R12 are ON.
1.2 Altering of the operation data
Optima 300 comes with a factory setup, which enables an
immediate start of the unit. The factory setup is basic and
must be adjusted to the operational requirements and
demands of the individual home, in order to obtain the
optimum operating benet from the unit.
The display normally shows the main menu, at which
“day of the week, time, room temperature and short-cut
keys” can be seen.
Supply 48.0
Room 26.8
Fresh air 22.5
Escaping air 06.0
Precooling surface 23.0
Cooling surface 6.7
Info menu
Press “Arrow up, Arrow down, Enter” to enter the
operating menu. The display now shows the rst four
points on the operating menu.
Press “Arrow down” to change from one
menupoint to the next. Press “Arrow up” to change
from one menupoint to the previous one.
If you wish to ick through the pages of the
‘operation menu’ you may press the “Enter”-button
in the middle and this will change the whole page
to the next set of menupoints.
When “>>” appears opposite a text, shown as example
”language” in below display, you see, there is a “0” on the
“Set point” line. By pressing “>”, the set point changes to
“1”.
Supply 48.0
Room 26.8
Fresh air 22.5
Exhaust air 06.0
Before coil 23.0
Coil 06.7
Info menu
ENGLISH
C I
ON/OFF
Room temperature
21.5
o
C
Wednesday 12:18
 Loading...