9
4 5
(if necessary) the sealing ring;
then replace the corresponding
cartridge (Fig. 4).
Sealing ring is
recommended to be greased
with food silicon or Vaseline
(do not use sealant!) prior to
reassembly.
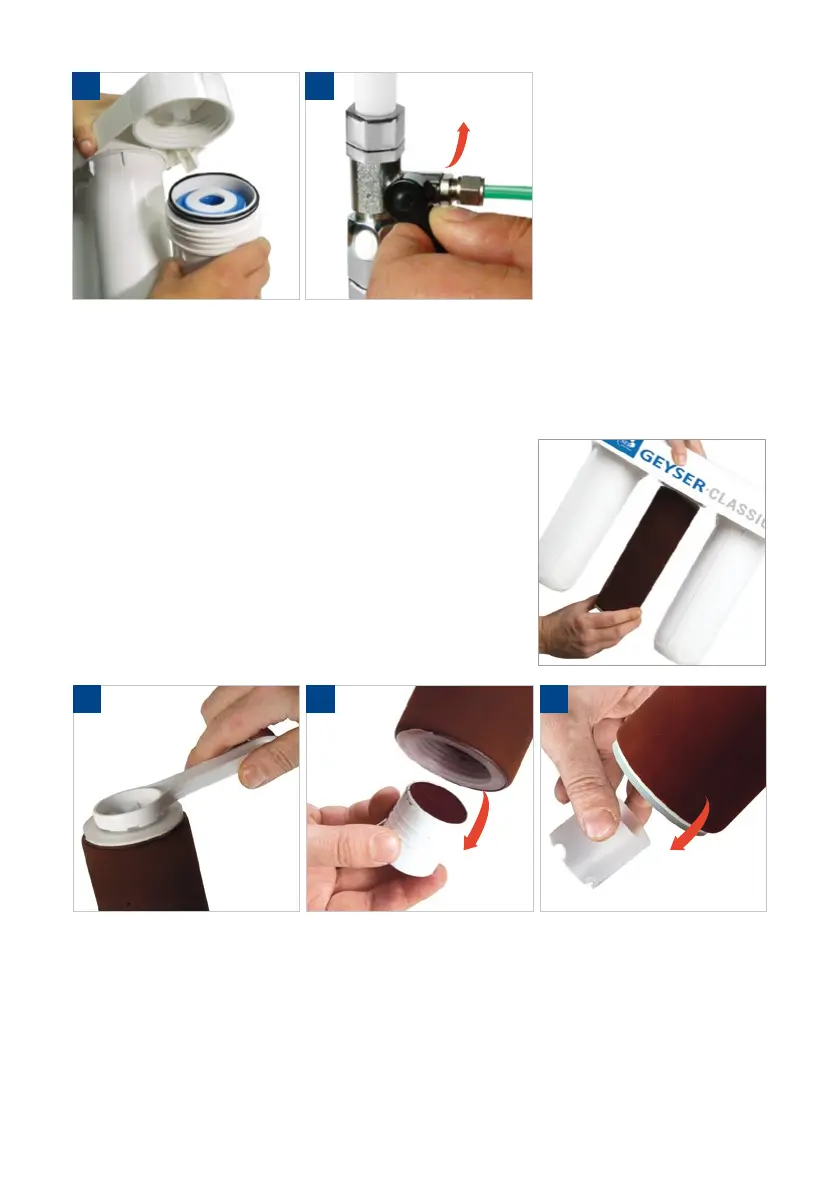
Return the housing to its
position and tight with the
wrench. Open water at the inlet
and check the leak-tightness
of the system (Fig. 5).
Using the wrench, unscrew the housing with Aragon
cartridge (from standard equipment) and get the cartridge
out. Pour water from it, clean its external surface with a soft
brush (e.g. clothes one) under water stream.
Using the wrench for the bottom valve, unscrew the
bottom valve out the cartridge (Fig.1) and extract the used
insert (Fig.2).
Take a cap off from a new insert and place it with its
open side up. Screw the bottom valve. Assemble the lter in
reversed order and wash it for 1-2 minutes.
1 2 3
Insert B
ARAGON CARTRIDGE CLEANING AND REGENERATION
Pour 40 gr of citric acid, 30 gr (2 tea spoons) of baking soda and 1 l of water into a
1.5 – 2 l holding capacity. Water should be poured slowly to prevent foaming (carbon
dioxide emission).
Install a cartridge into a housing and ll the housing with the salt solution till its top
(ca. 0.6 l). Let it stay for 8-10 hours. Afterwards, extract the cartridge from the housing
cautiously and let the salt solution pour out. Place it into the wash-bowl and pour 3.0 l
of solution through its threaded throat, then let it drain completely.
Wash the solution residue out of the cartridge in two steps. Firstly, pour 3 l water
 Loading...