8 9
CONNECTION TO THE WATER MAIN LINE
1. Install the tee adapter (A) on the cold water pipe,
sealing the connection (Fig. 1).
2. Insert the nut (B) into the plastic tube (Fig. 2). The
tube insert in the ball valve tting until it stops and tighten the nut (Fig. 3).
2
В
А
1
CONNECTION OF THE TAP OF CLEAN WATER
Drill a hole in the sink with a diameter of 12 mm.
Make assembly of the tap in the following sequence:
1. Tap
2. A cup decorative
3. The rubber gasket
4. Plastic Washer
5. The rubber washer
6. The nut fastener
7. The lock washers
Secure faucet to sink. Thread the blue tube into the nut (E) (Fig. 2). Insert piston (D) into the
tube until it stops. Put the plastic stopping ring at the end of the tube (C) (Fig. 1). Screw the
nut onto the threaded rod of the tap (Fig. 3).
3
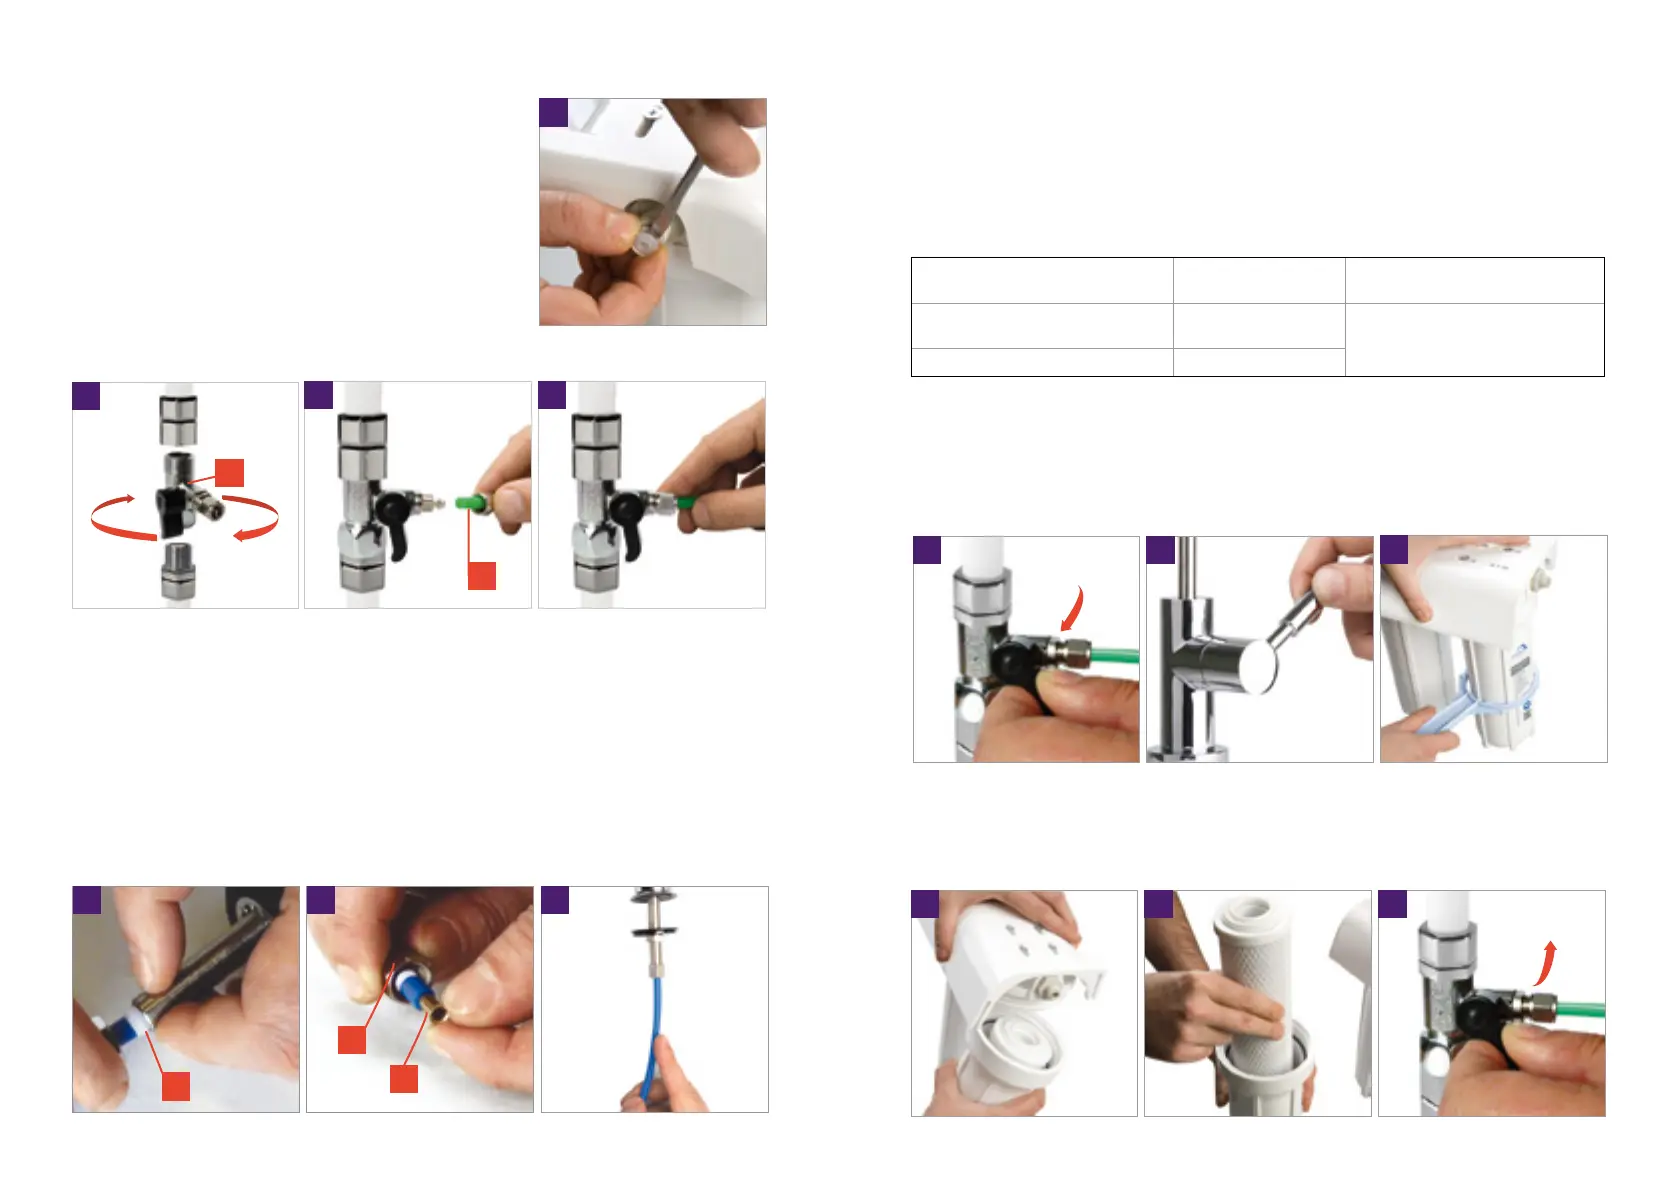
THE ORDER OF CONNECTIONS
The system is connected to the cold water main
line. Remove the lter from the package. Remove the
transport seals. To do this, press the collet to the housing
of the tting and remove the plug without effort (Fig. 1).
Cut the tube connection set for 2 pieces and
connect each input and output of the lter.
Attention! Input - the rst stage. Output - the third stage.
Install the lter in a convenient location for operation.
1
Е
D
32
1
C
REPLACEMENT THE CARTRIDGES FOR I, II, III STAGES
Shut off the water inlet (Fig. 1). Open the clean water valve for pressure relief in the
system (Fig. 2). Using the wrench, open the lter flask (Fig. 3), check the O-ring and replace
it if necessary, and then change the appropriate cartridge (Fig. 4, 5).
3
1 2
4 5 6
GETTING STARTED
Wash the lter before use within 10 minutes at a flow rate about 3 liters / min. Washing
of the lter should be performed after each replacing the cartridges, and after a long (more
than 5 days) a break in service.
After installing a new lter or changing the cartridges the air could remains inside the
system. This leads to excessive aeration of water (the water can be visually milky-white).
As the operation of the air lter system will leave, and the puried water get clear.
Service Cartridge Type of service
Appearance of scale / decreasing
of water flow
Aragon MAX/Akva-
soft
Change the set of cartridges
Decreasing of purication quality CBC Ag, ММВ
FILTER SERVICE
At the end of the resource and life time of cartridges, they must be replaced
It is recommended to grease O-ring with silicone grease
before re-installing (do not mix up with a sealant) or Vaseline.
Place the flask and tighten the key.
Check for leaks (g. 6), opening the water supply to the lter. The system is ready for
operation.
 Loading...