011_03 - GAS KITCHENS
14 · 22
07/2009
5 - SET-UP FOR OPERATION
5.3 Replacing parts
All parts must be replaced by authorized technicians
only!
To replace the following parts first remove all the control knobs and
control panel (after loosening the fixing screws), then extract the
ignition wire.
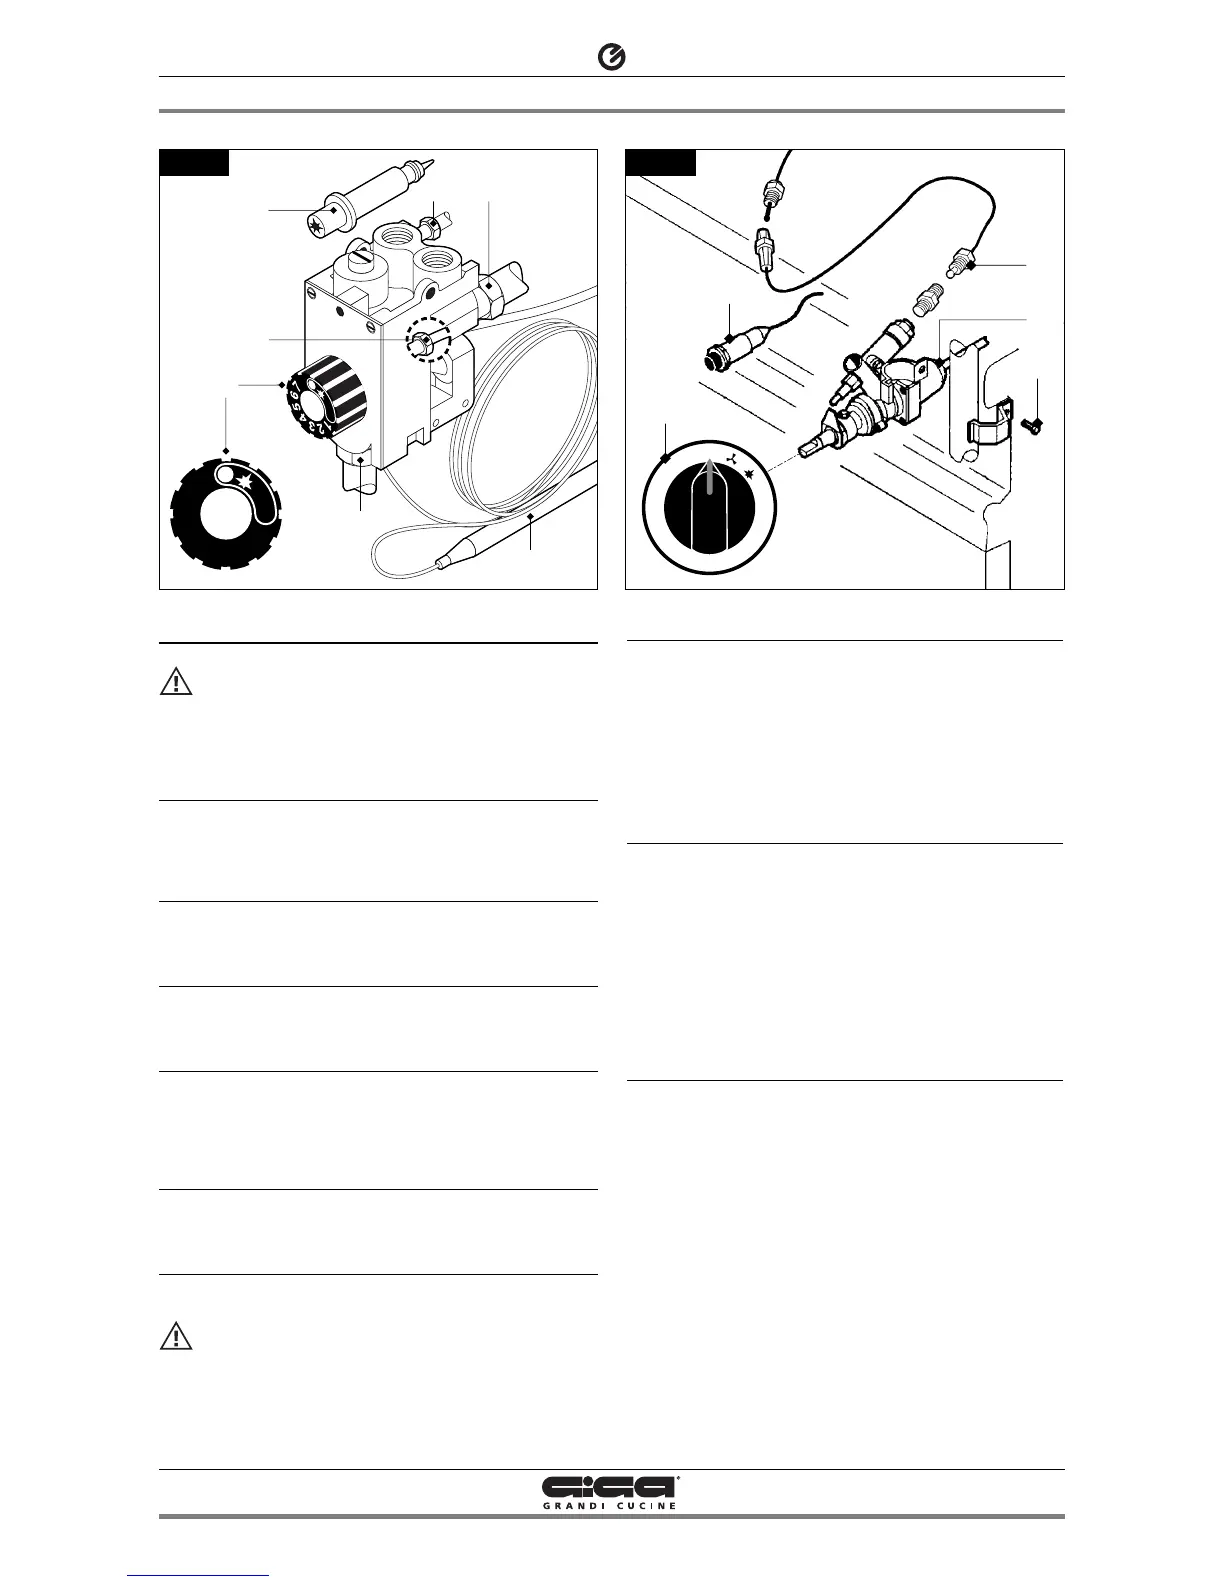
5.3.1 Open flame gas valve (Fig. 1 – Pos. 4)
Loosen the fitting of the pipes (6) and (9) of the gas and of the ther-
mocouple (8), loosen the fitting (7) for the fastening of the valve on
the ramp and replace the piece.
5.3.2 Open flame thermocouple (Fig. 1 – Pos. 14)
Loosen the nut (8) for fastening the thermocouple on the valve and
on the burner (17) and replace the piece (14).
5.3.3 Plug of gas oven (Fig. 2A/2B - Pos. 6)
Unscrew the fastening screws and remove the lower panel, extract
the ignition wire and unscrew the screws (15). Insert a new plug.
5.3.4 Gas oven gas valve (Fig. 3A/3B)
Loosen the fittings (1,2,3,4 in fig. 3A and 1,2,3 in fig. 3B) which are
for the connection for the gas pipe and the thermocouple, remove
the coil of the thermostat from its place in the cooking chamber and
put in a new piece in the reverse sequence.
5.3.5 Gas oven thermocouple (Fig. 2A/2B/2C and 3)
Unscrew the screws (15) and the nut (16) for fastening the thermo-
couple to the extension of thermocouple and insert the new piece.
5.3.6 Gas oven main burner (Fig. 2A)
Unscrew the fastening screw (19) of the main burner and replace it
with a new one. See also oven burner cleaning, para. 6.7).
After any maintenance or repair work, replace the con-
trol panel and the lower panel.
After replacing gas input components, check operation
again and test for leakage.
5.3.7 Heating elements for electric oven GN 2/1 (Fig. 4A)
Unplug the appliance from the electrical mains!
The lower heating element is placed under the bottom. The upper
heating element is attached to the top of the cooking chamber.
To remove the heating elements, loosen the screws that attach
them to the corresponding flange, and pull the heating elements
and relative wires forward.
Use a screwdriver to disconnect the wires and install a new heating
element in reverse order.
5.3.8 Heating elements for electric oven GN 1/1 (Fig. 4B)
Unplug the appliance from the electrical mains!
The lower heating element is placed under the bottom. The upper
heating element is attached to the ceiling of the cooking chamber
and the fan heating element is behind the back wall.
To remove the heating elements, remove either the bottom and/or
the rear wall, loosen the screws which fasten the heating element
to the oven, and pull the heating element and relative wires for-
ward.
Disconnect the wires, and install a new heating element in reverse
order.
5.3.9 Fan for electric and gas ovens GN 1/1 (Fig. 4B)
To replace the fan, remove the fan cover rear wall. Remove the fan
(1) by loosening the locking nut (2).
Loosen the bolts (3) that hold the plate (4) which supports the
motor (5) on the oven, pull the plate forward with the motor and
relative wires, remove and re-install in reverse order.