- 9 - Hardware Installation Process
English
Hardware Installation Process
To set up your computer, you must complete the following steps:
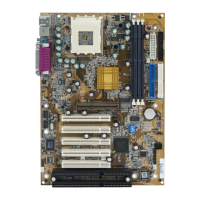
Step 1- Set System Jumper (JP1)
Step 2- Install the Central Processing Unit (CPU)
Step 3- Install memory modules
Step 4- Install expansion cards
Step 5- Install I/O Peripherals cables
Step 1: Set System Jumper (JP1)
The system bus frequency can be switched at 100/133/166/200MHz by adjusting system jumper (JP1).
(The internal frequency depend on CPU.)
Open: Auto
Close: 100MHz
1
1
JP1
Open Auto
Close 100MHz
Auto : Support FSB 266/333/400 MHz CPU
100MHz : Fix FSB 200MHz CPU
If you want to use a CPU with 200MHz FSB, please
set JP1 to 100MHz.
Step 1
Step 4
Step 5
Step 5
Step 2
Step 3
Step 5
 Loading...