C-1 在安裝散熱風扇前,請先塗抹散熱膏於CPU表面。接
著將CPU專用的散熱風扇裝好。(詳細安裝方式請參考
散熱風扇的使用手冊。)
C-2 將散熱風扇的電源線接至主機板上的CPU_FAN插座,
以避免您的CPU處於不正常的工作環境,或因溫度過
高而燒毀CPU。
C. 散熱風扇的安裝
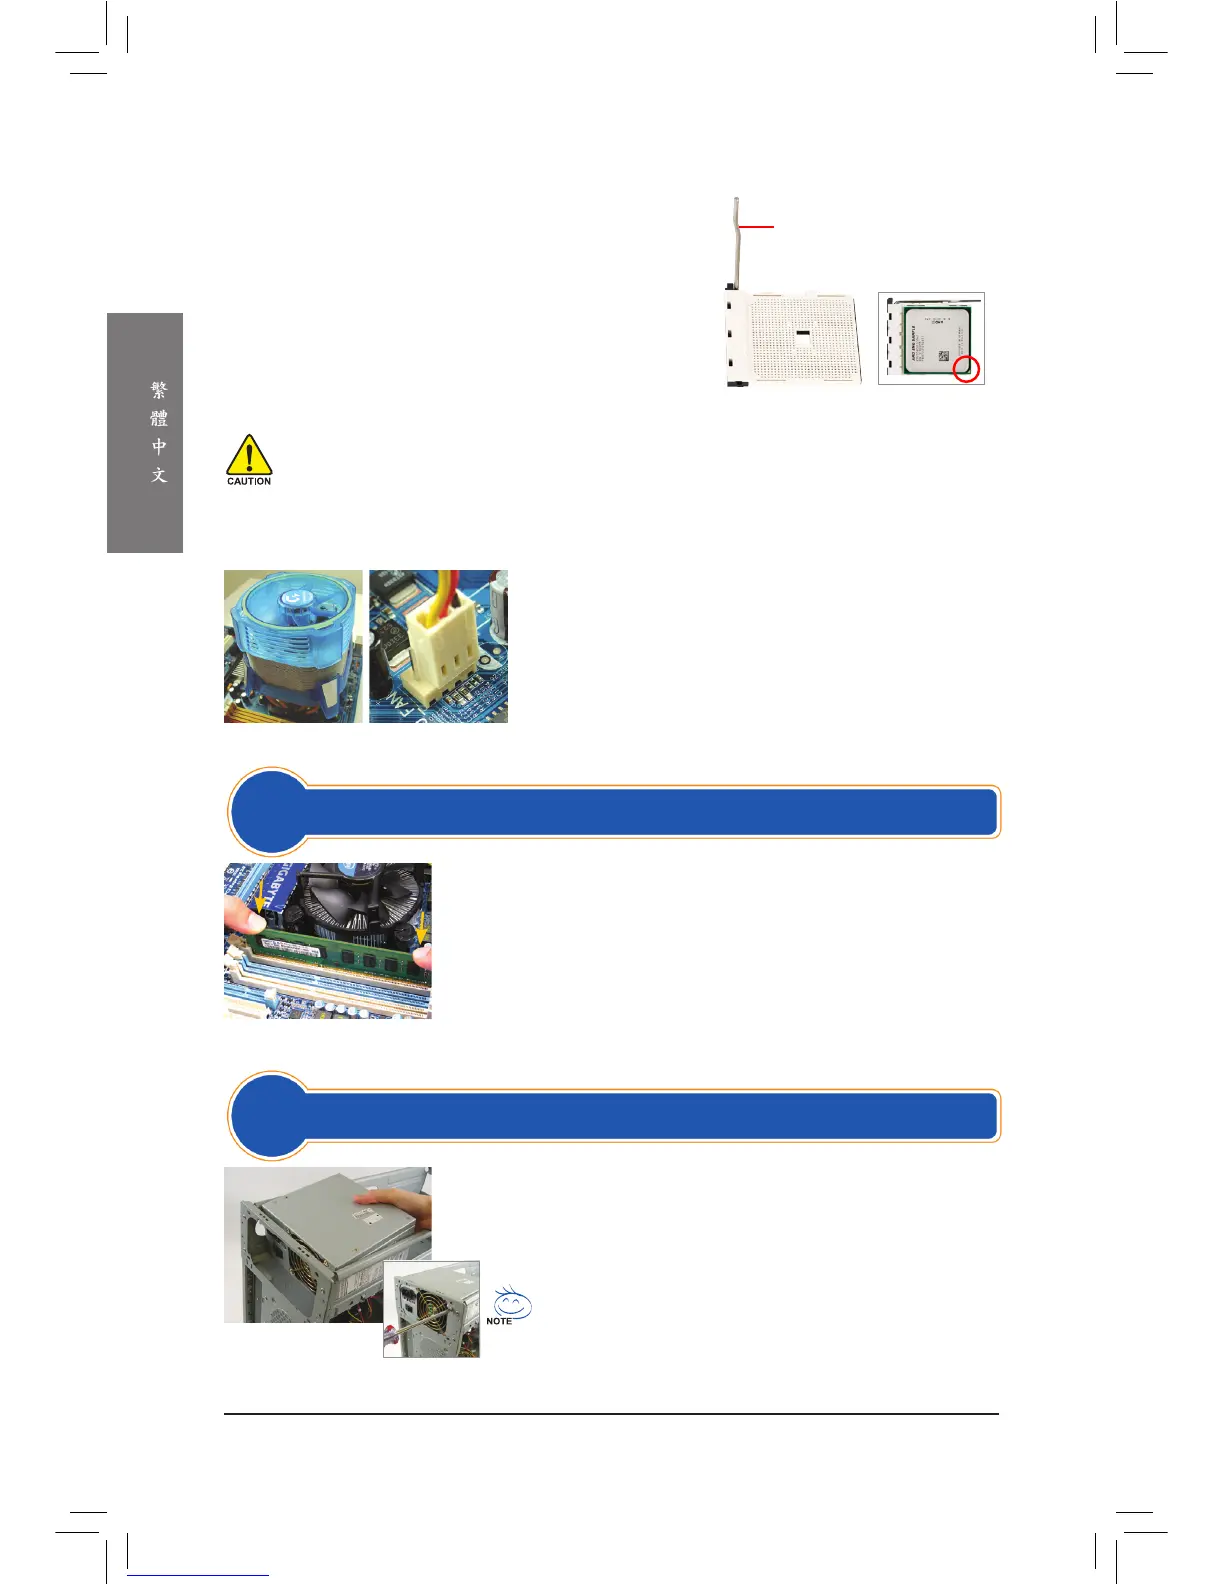
B-1 將CPU插槽拉桿向上完全拉起,將CPU第一腳(標
示小三角形記號處)對齊C P U插槽上的三角型記
號,再將CPU小心放入插槽中,並確定所有針腳
都已進入插槽內。
B-2 確定CPU完全插入定位後,一手按住CPU中間的位
置,緩緩地將插座拉桿向下壓至鎖住的位置。
CPU插槽拉桿
B. AMD CPU的安裝 (若主機板已內建CPU,請略過此步驟)
第一腳位置
CPU 插槽
步驟
2
安裝記憶體模組
步驟
3
拆卸機殼及安裝電源供應器
確定好記憶體模組的方向後,扳開記憶體模組插槽兩側的卡榫,
將記憶體模組放入插槽,雙手按在記憶體模組上邊兩側,以垂直
向下平均施力的方式,將記憶體模組向下壓入插槽。記憶體若確
實地壓入插槽內,兩旁的卡榫便會自動向內卡住記憶體模組,予
以固定。
以技嘉桌上型電腦為例,先將機殼兩側的側板及頂蓋拆下,才能
將電源供應器放入。位置擺放正確後,再依螺絲孔位鎖上螺絲固
定。(電源供應器的安裝及放置位置,會依不同機殼而有不同!)
建議您使用品質優良的電源供應器,以確保能供應足夠的電
力需求。若使用電力不足的電源供應器,可能會導致系統不
穩定或無法開機等狀況。
•
切勿強迫安裝CPU至CPU插槽,若插入的方向錯誤,CPU就無法插入,此時請立刻更改插入方向。
•
請勿觸摸CPU插槽的接觸點。為保護CPU插槽,主機板沒有安裝CPU時,請將保護蓋放回。
 Loading...