EasyManuals Logo

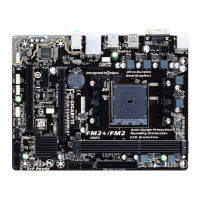
Gigabyte GA-F2A68HM-S1 User Manual

Gigabyte GA-F2A68HM-S1
36 pages
To Next Page IconTo Next Page
To Previous Page IconTo Previous Page
Page #9 background imageLoading...
Page #9 background image
- 9 -
1-3 Installing the APU
Read the following guidelines before you begin to install the APU:
Make sure that the motherboard supports the APU.
(Go to GIGABYTE's website for the latest APU support list.)
Always turn off the computer and unplug the power cord from the power outlet before installing the
APU to prevent hardware damage.
Locate the pin one of the APU. The APU cannot be inserted if oriented incorrectly.
Apply an even and thin layer of thermal grease on the surface of the APU.
Do not turn on the computer if the APU cooler is not installed, otherwise overheating and damage
of the APU may occur.
Set the APU host frequency in accordance with the APU specications. It is not recommended
that the system bus frequency be set beyond hardware specications since it does not meet the
standard requirements for the peripherals. If you wish to set the frequency beyond the standard
specications, please do so according to your hardware specications including the APU, graphics
card, memory, hard drive, etc.
APU
A Small Triangle
Marking Denotes Pin
One of the Socket
Installing the APU
Locate the pin one (denoted by a small triangle) of the APU socket and the APU.
FM2+ Socket
A Small Triangle
Marking Denotes
APU Pin One
Form Factor Micro ATX Form Factor; 22.6cm x 17.4cm
* GIGABYTE reserves the right to make any changes to the product specications and product-related information without
prior notice.
* Please visit the Support & Downloads\Utility page on GIGABYTE's website to check the supported operating system(s)
for the software listed in the "Unique Features" and "Bundled Software" columns.
Read the following guidelines before you begin to install the memory:
Make sure that the motherboard supports the memory. It is recommended that memory of the
same capacity, brand, speed, and chips be used.
(Go to GIGABYTE's website for the latest supported memory speeds and memory modules.)
Always turn off the computer and unplug the power cord from the power outlet before installing the
memory to prevent hardware damage.
Memory modules have a foolproof design. A memory module can be installed in only one direction.
If you are unable to insert the memory, switch the direction.
1-4 Installing the Memory
DualChannelMemoryConguration
This motherboard provides two DDR3 memory sockets and supports Dual Channel Technology. After the memory
is installed, the BIOS will automatically detect the specications and capacity of the memory. Enabling Dual
Channel memory mode will double the original memory bandwidth.
The two DDR3 memory sockets are divided into two channels and each channel has one memory socket as
following:
Channel A: DDR3_2
Channel B: DDR3_1

Questions and Answers:

Question and Answer IconNeed help?

Do you have a question about the Gigabyte GA-F2A68HM-S1 and is the answer not in the manual?

Gigabyte GA-F2A68HM-S1 Specifications

General IconGeneral
Memory channelsDual-channel
Memory slots typeDIMM
Number of memory slots2
Supported memory typesDDR3-SDRAM
Maximum internal memory64 GB
Supported memory clock speeds1333, 1600, 1866, 2133, 2400 MHz
Processor socketSocket FM2+
Processor manufacturerAMD
Compatible processor seriesAMD A
Maximum number of SMP processors1
S/PDIF out connectorYes
Number of SATA III connectors4
USB 3.2 Gen 1 (3.1 Gen 1) connectors0
RAID levels0, 1, 10, JBOD
Supported storage drive interfacesSATA III
USB 2.0 ports quantityUSB 2.0 ports have a data transmission speed of 480 Mbps, and are backwards compatible with USB 1.1 ports. You can connect all kinds of peripheral devices to them.
Ethernet interface typeGigabit Ethernet
Component forPC
Power source typeATX
Motherboard chipsetAMD A68H
PC health monitoringFAN, Temperature, Voltage
Audio output channels7.1 channels
Motherboard form factormicro ATX
Windows operating systems supportedWindows 7 Enterprise, Windows 7 Enterprise x64, Windows 7 Home Basic, Windows 7 Home Basic x64, Windows 7 Home Premium, Windows 7 Home Premium x64, Windows 7 Professional, Windows 7 Professional x64, Windows 7 Starter, Windows 7 Starter x64, Windows 7 Ultimate, Windows 7 Ultimate x64, Windows 8, Windows 8 Enterprise, Windows 8 Enterprise x64, Windows 8 Pro, Windows 8 Pro x64, Windows 8 x64, Windows XP Home, Windows XP Professional
Maximum graphics card memory2048 MB
Parallel processing technology support-
BIOS typeUEFI AMI
ACPI version5.0
BIOS memory size64 Mbit
Bundled softwareNorton Internet Security (OEM)
Weight and Dimensions IconWeight and Dimensions
Depth174 mm
Width225 mm

Related product manuals