Do you have a question about the Gigaset AL145 and is the answer not in the manual?
This document describes the Gigaset AL140/AL145 cordless telephone, covering its functions, usage, and maintenance.
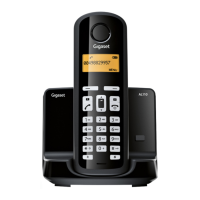
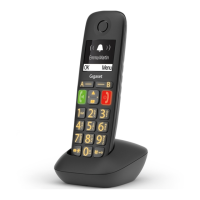
The handset features a display that shows the charge status of the batteries, an answer machine icon (for AL145 only), and the current date and time. Display keys below the screen activate functions shown above them. The "INT" key allows internal calls to other registered handsets, while the "MENU" key opens the main or submenus. The control key (up/down/left/right arrows) is used for scrolling, adjusting volume, and moving the cursor. The "Talk" key initiates calls, and the "End Call/On/Off" key ends calls or switches the handset on/off. Other keys include a directory key, ringer tone on/off, keypad lock on/off, and a recall key for consultation calls or dialling pauses. A "Microphone off" key mutes the microphone during a call. New messages in the calls list or answer machine list are indicated by a flashing display.
The base station includes a registration/paging key. A brief press initiates a search for handsets ("Paging"), causing all registered handsets to ring simultaneously. Pressing and holding this key allows for handset registration.
The Gigaset AL140/AL145 is designed with ECO DECT technology to reduce energy consumption and transmission power. It uses an energy-saving adapter plug. Transmission power is automatically reduced based on the handset's distance from the base station. If only one handset is registered and within the base station, transmission power is reduced to nearly zero.
Users can further reduce transmission power by activating Eco Mode or Eco Mode+. Eco Mode provides an 80% reduction in standby and call transmission power, though it reduces the base station's range. Eco Mode+ offers a 100% transmission power deactivation in standby mode, indicated by a top-left display icon. To check if the base station can be reached in Eco Mode+, press and hold the talk key; a ringing tone confirms connectivity.
Users are advised to read the safety precautions carefully, especially regarding battery usage. Only the supplied mains unit and recommended rechargeable batteries should be used to avoid health risks or damage. The phone should not be used near medical appliances, nor should the rear of the handset be held to the ear during ringing to prevent hearing damage. It may cause humming with hearing aids. The phone is not splashproof and should not be installed in bathrooms or showers, or used in environments with explosion hazards. Faulty base stations should be removed from use or repaired to prevent interference with other wireless services.
For disposal, batteries and electrical/electronic equipment must be disposed of separately from general household waste, following local regulations. The crossed-out rubbish bin symbol indicates compliance with European Directive 2002/96/EC, promoting reuse and recycling.
For care, the base station, charging cradle, and handset should be wiped with a damp (not solvent) or antistatic cloth. Dry cloths should be avoided to prevent static. In case of liquid contact, immediately switch off the handset, remove the battery pack, drain the liquid, and pat all parts dry. Place the handset with the battery compartment open and keypad facing down in a dry, warm place for at least 72 hours (not in a microwave or oven) before attempting to switch it on again.
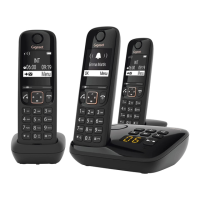
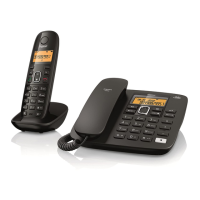
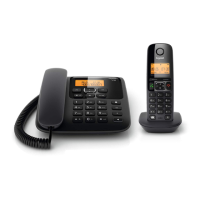
The package contents include a Gigaset AL140/AL145 base station, mains adapter, Gigaset AL14H handset, phone cord, battery pack, battery cover, and user guide. Models with multiple handsets will have additional battery packs, covers, and charging cradles.
The base station and charging cradle (if included) should be set up in enclosed dry rooms between +5 °C and +45 °C. Place the base station centrally on a flat, non-slip surface. The phone's feet usually do not leave marks, but caution is advised on certain furniture finishes. The base station and charging cradle can also be wall-mounted. Avoid exposing the telephone to heat sources, direct sunlight, or other electrical devices, and protect it from moisture, dust, corrosive liquids, and vapours.
To connect the base station, first connect the mains adapter, then the telephone jack, inserting cables into the cable ducts. Only the supplied mains adapter and phone cord should be used.
For the charging cradle (if included), connect the flat plug from the power supply and plug the mains adapter into the socket. To disconnect, press the release button and pull the plug.
Remove the protective plastic film from the display. When inserting the battery pack, ensure leads are placed in the lead guides to prevent damage when closing the battery cover. Use only recommended rechargeable battery packs. Insert the plug into the socket, then the battery pack, and place leads in the guides. Place the cover on the battery compartment and push it up until it clicks. To open the cover, press down below its upper end and slide it down.
Place the handset in the base/charging cradle with the display facing forward. Handsets are factory-registered, but additional handsets or use with a different base require manual registration. For initial charging, leave the handset in the base/charging cradle for 7 hours. Then, remove it and do not replace it until the batteries are fully discharged. This initial charge/discharge cycle ensures correct charge level display. Repeat this procedure if batteries are removed and reinserted. Batteries may warm during charging, which is normal. Battery capacity will decrease over time due to technical reasons.
Set the date and time for accurate incoming call assignment and alarm clock functionality. From idle status, go to MENU → Settings → OK → Date/Time → OK. Enter the date (6-digit format) and time (4-digit format), then press OK. The display will show "Saved." When entering, use the control button to move the cursor left or right.
Once registered and time set, the idle display shows the date and time. Battery charge status is indicated by icons: three bars for full, flashing bars for almost flat, and flashing bars for charging. If multiple handsets are registered, the internal handset number appears top-left. The Eco Mode+ icon appears top-left if activated. For AL145, the answer machine icon appears in the header if activated, indicating a pre-recorded announcement.
Press and hold the end call key to activate or deactivate the handset. Placing a deactivated handset in the base station or charging cradle will automatically activate it.
To make external calls, enter the phone number and press the talk key. Alternatively, press and hold the talk key for a dial tone, then enter the number. Earpiece volume can be adjusted during a call. To end or cancel a call, press the end call key. A network provider dialling code can be automatically inserted before a phone number (see Menu tree "Preselection").
Incoming calls are indicated by ringing and a display message. Press the talk key to accept. If "Auto Answer" is activated, simply remove the handset from the base station/charging cradle. In idle status, use the control key to activate the menu for setting call volume.
When receiving a call, the caller's number is displayed, and their name if stored in the directory. Preconditions include having CLIP activated by your network provider and the caller's number being identified. "<<<>>>>>" appears if CLIP is not requested, "Withheld" if the caller has withheld CLI, and "Unavailable" if CLI cannot be requested.
During external calls, press the "Microphone off" key to mute/unmute your handset.
Access the directory by pressing the directory key. Up to 50 phone numbers (max. 32 digits) with corresponding names (max. 14 characters) can be saved. To save the first number, press the directory key → New Entry? → OK, enter number → OK, enter name → OK. To store subsequent numbers, go to MENU → New Entry → OK, enter number → OK, enter name → OK.
To select an entry, open the directory and scroll with the control key or enter the first character of the name. To dial, select the entry and press the talk key. Other functions include editing, deleting, sending entries to other handsets, deleting the entire list, and assigning entries to shortcut keys (0 and 2–9). To dial a shortcut, press and hold the assigned key.
This list stores the ten last dialled numbers. To dial from this list, press the redial key briefly, select the entry, and press the talk key. Options include editing/adding to the number, copying to the directory, deleting selected entries, or deleting all entries.
An advisory tone and flashing message key indicate new entries. Pressing the message key displays all lists. If only one list has new messages, it opens automatically. The calls list (if CLIP is active) can contain answered calls, missed calls, or calls recorded by the answer machine (AL145 only). It saves numbers of the last 25 incoming calls or just missed calls, depending on settings.
The calls list displays new and old entries (e.g., "CallsList 01+02"). To open, select and press OK. The last incoming call is displayed; use the control key to select others. Functions include deleting entries, copying to directory, viewing date/time, and checking status (New Call, Old Call, Answ.). All entries can be deleted.
The answer machine list allows listening to messages. It displays new and old played-back messages (e.g., "VoiceMail 01+02"). To open, select and press OK. Playback starts with the first new message, or first old message if no new ones. Functions include resuming paused playback, setting volume, copying to directory, and deleting all old messages.
The answer machine is operated from the handset and comes with a pre-recorded announcement. Users can record their own announcements. If memory is full, the answer machine automatically switches off and reactivates when old messages are deleted.
To activate/deactivate, go to MENU → Voice Mail → OK → Answer Mach. → OK. The answer machine icon appears when active.
To record an announcement, go to MENU → Voice Mail → OK → Announcements → OK → Rec announce → OK → Speak after OK → OK. Speak after the ready tone (at least 3 seconds). Press OK to confirm or the control key to reject. Recording ends automatically after 170 seconds or a 2-second break in speaking.
To play back or delete announcements, open the answer machine list. During playback, press 2 to stop/resume, the control key to go to the start of the current message, 2x to skip to the previous message, the control key to skip to the next message, or 2x to skip to the next message but one. To delete individual messages, press the "C" display key while playback is paused. To delete all old messages, go to MENU → Delete all old → OK during playback or pause.
To pick up a call while the answer machine is recording, press the talk key. Recording stops, and you can speak to the caller.
The answer machine has factory presets, but individual settings can be adjusted via the handset, including delay time, recording length, and call screening.
Key 1 can be assigned for fast access to the answer machine (network mailbox). Press and hold key 1 to connect directly.
The answer machine can be checked and activated from any other telephone (touch-tone dialling required). Preconditions include setting a system PIN other than 0000. To call the answer machine and play messages, dial your own number, then press the star key and enter the system PIN during the announcement. Keys 1, 2, 3, and 0 are used for navigation and deletion.
Internal calls between registered handsets are free. To call another handset, press INT and enter the handset number (1-4) or press INT → star key * to call all handsets. Press the end call key to end the call.
For internal consultation calls/connecting calls, during an external call, press INT and call another handset. The external participant hears hold music. To divert the call, press the end call key before the internal participant answers. After they answer, you can talk to them, then press the end call key to divert the call or the display key to reconnect to the external participant.
To listen in to an external call (conference), the "Listening in" function must be activated (MENU → Settings → OK → Base → OK → Listening in → OK). To listen in, press and hold the talk key during an external call. All participants hear a signal tone. Press the end call key to end. If the first internal participant presses the end call key, the handset that listened in remains connected to the external participant.
To activate/deactivate the alarm clock, go to MENU → Alarm Clock → OK → Activation → OK. When activated, the wake-up icon appears, and the wake-up time is displayed. To set the wake-up time, go to MENU → Alarm Clock → OK → Wake-up time → OK, enter the time, and press OK. When the alarm rings, press any key to switch it off for 24 hours.
Audio settings and system PIN settings for the base station can be found in the Menu tree.
To change the display language, go to MENU → Settings → OK → Handset → OK → Language → OK, select the language, and press OK. If an incorrect language is accidentally chosen, press MENU 4 2 1, then select the correct language.
To reset the handset, go to MENU → Settings → OK → Handset → OK → Reset Handset → OK. This resets individual settings but retains directory entries, calls list, and handset registration.
To restore the base station to factory settings, go to MENU → Settings → OK → Base → OK → Base Reset → OK. This de-registers all handsets, resets individual settings, deletes all lists, and resets the system PIN to 0000, retaining only date and time. For a hardware reset, disconnect the power cord, hold down the registration/paging key on the base station, and reconnect the power cable, releasing the key after 5 seconds.
A repeater can extend the base station's range. Repeater mode (p. 15) must be activated and is incompatible with Eco Mode or Eco Mode+.
These settings are only necessary if required by your PABX. Enter digits slowly.
To change the dialling mode, go to MENU 4 3 9 1 1. The number for the set dialling mode flashes (0 for DTMF, 1 for DP). Enter the number and press OK.
To set recall, go to MENU 4 3 9 1 2. The number for the current recall flashes (0-7 for different ms values). Enter the number and press OK.
To change the pause after line seizure, go to MENU 4 3 9 1 9. The number for the current pause length flashes (1-3 for different sec values). Enter the number and press OK.
To change the pause after the recall key, go to MENU 4 3 9 1 4. The number for the current pause length flashes (1-3 for different ms values). Enter the number and press OK.
To enter letters/characters, press the relevant key multiple times. Briefly press the hash key to switch between "Abc," "123," and "abc" modes.
| GAP | Yes |
|---|---|
| Answering machine | No |
| Talk time | Up to 10 hours |
| Ringtones | 10 |
| Indoor range | 50 m |
| Outdoor range | 300 m |
| DECT | Yes |
| Type | Cordless |
| Weight | 120 g |
| Phonebook Capacity | 50 entries |