DRIVING A PIEZO BUZZER FROM THE A CONNECTION
This conguration can be useful as a temporary measure during your
walk-test. The piezo buzzer will sound every time a detection takes
place.
Figure 9: Piezo buzzer wring diagram
WALK TEST
The walk test iterates through the following adjustments until the
correct area is covered.
TIP: The eld of view of the mini Opal is affected by the cover.
Always perform the walk test with the cover tted removing the cover
each time you need to make adjustments.
1. Adjust the aim of the sensor, loosen the top and side plastic
wing-nuts and swivel the bracket. Tighten the wing-nuts again
and replace the cover.
2. Congure the eld of view by blanking lens area as necessary.
You may want to blank parts of the eld using the vertical
curtains or by cutting the foil sticker to size. Apply the sticker
to smooth, rear side of the lens.
3. Adjust the range between 8 and 30 metres using the PCB
mounted pot.
Figure 10: Range and lux potentiometers
DUSK ADJUSTMENT
Adjust the lux level for the day-night setting using the lux PCB
mounted pot.
The S output is factory set to start operating at dusk. That is, when
the light level falls below 5 lux. If the ambient night-time light levels
are higher than 5 lux then the S output will remain inactive and your
lights will not turn on.
• If the light level in your installation is about 5 lux at night (lights
do not operate), increase the light level at which the S output
starts to operate, by turning the lux pot clockwise towards
24HR.
• To set the S output to detect continuously, day or night,
independent of light level, turn the lux pot all the way to
maximum, marked 24HR.
+
-
+
A
S
+
A
S
12V DC
mini
Opal
GJD
Lighting
Controller
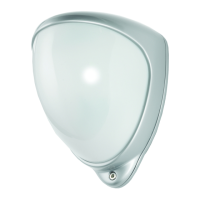
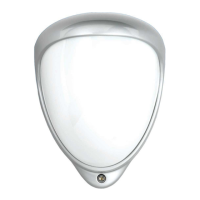
SPECIFICATIONS
Coverage (max) 90° at 30m, equivalent to 625m²
Range Adjustable 8m to 30m
Directional
adjustment
±90° horizontal (180°), ±45° vertical
Area adjustment
(blanking)
Supplied with,1 foil label for near/
far beam blanking and 4 vertical
opaque curtains for zone blanking
Lens 2 rows of 10 beams
Sensor White light lter prevents false
triggering when sunny
Ouput A (Alarm) Open-collector transistor switch.
12V, 25mA alarm current.
Output S (Sen-
sor, daylight)
Open-collector transistor switch,
12V, 25mA alarm current
Output T (Tam-
per)
Volts-free, normally-open switch
output
Tamper switches Case open and removal from wall
Power 9 to 15V DC
Current 4mA at 12V
Operating
Temperature
-20°C to +55°C
Protection IP55, high-impact ABS housing,
Conformal coated electronics
(moisture and UV protection
lacquer)
Dimensions 84 x 106 x 72 mm
Mounting Suggested height 3m
Cabling 0 to 200mm: standard, 4-core,
7.0.2mm alarm cable
200 to 500m: 8-core, 16/0.2mm
(use double cores)
Certications
APPROVALS
The manufacturer declares that the product supplied is compliant
with the provisions of the EMC Directive 89/336/EEC amended
92/31/EEC for Electromagnetic Compatibility, and the Restriction of
Hazardous Substances Directive (RoHS) 2002/95/EC. A Declaration
of Conformity in accordance with the above directives is held on le
with the manufacturer.
Copyright Notice
GJD Reserve the right to amend specications without
notice.
Copyright © 2010 GJD Manufacturing Limited
 Loading...