4
ASSEMBLY INSTRUCTIONS
Tools and Parts
F1 F2 F3 F5
5/16" Hex-
head bolt
(24 required*)
Flange nut
(8 required*)
Phillips-head
screw
(52 required*)
Small ange
nut
(12 required*)
* For your convenience, 1 extra of each fastener has been
provided.
Gather the required tools before starting installation.
Tools Needed:
■ 1/2" Wrench ■ Phillips screwdriver
■ 3/8" Wrench ■ Level
Tool Supplied:
■ Hex key
Part Supplied:
■ Key
Unpack the Cabinet
1. Remove and verify the contents as shown in “Tools and
Parts.”
2. Dispose of/recycle all packaging materials.
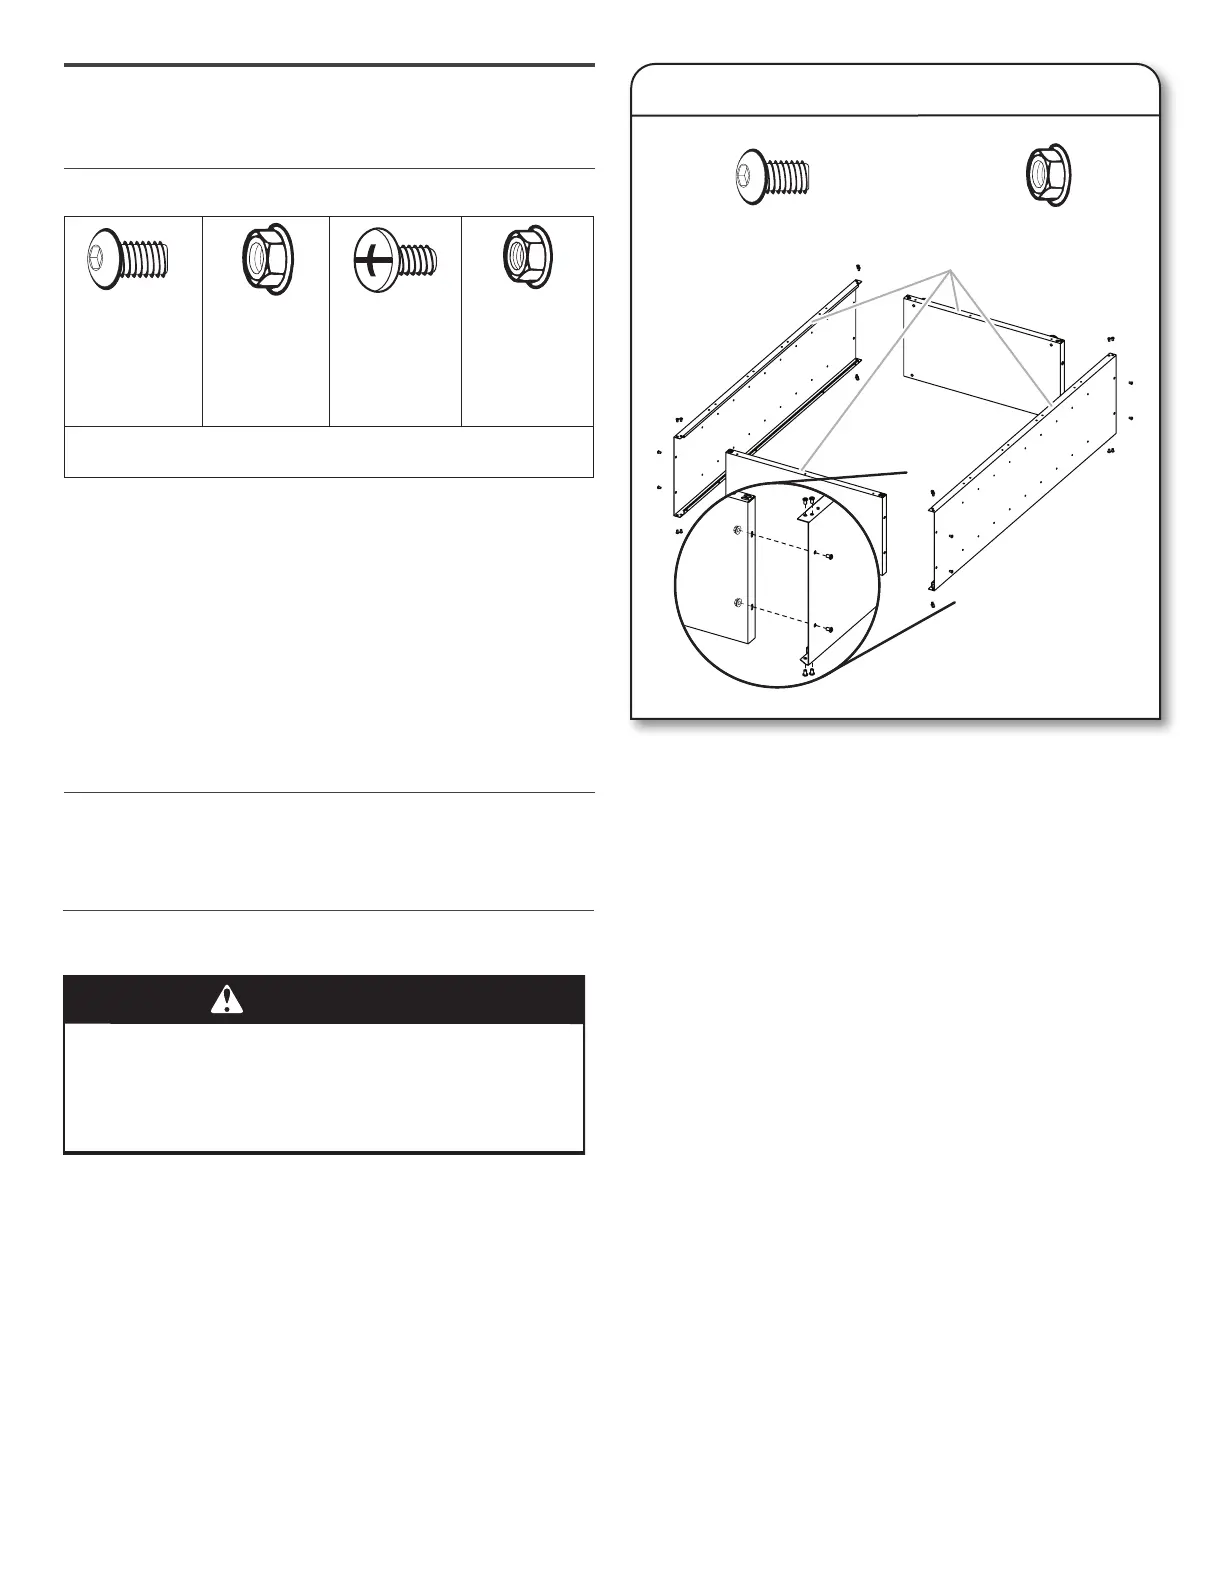
1. Place side panel (P1) on a at, rm surface so that the edge
with the holes facing up as shown.
2. Insert the cabinet top (P2) between the edges of side panel
(P1), with the edge with the holes facing up as shown.
3. Align the holes and attach the top (P2) to side panel (P1) using
4 pcs 5/16" hex-head bolts (F1) and 2 pcs ange nuts (F2) as
shown. Do not tighten completely.
4. Position the other side panel (P1) so that the top (P2) is
between the edges of side panel (P1).
5. Align the holes and attach the top (P2) to the side (P1) using
4 pcs 5/16" hex-head bolts (F1) and 2 pcs ange nuts (F2) as
shown. Do not tighten completely.
6. Insert the cabinet bottom (P3) between the edges of the side
panels (P1), with the edge with the holes facing up as shown.
7. Align the holes and attach the bottom (P3) to the sides (P1)
using 8 pcs 5/16" hex-head bolts (F1) and 4 pcs ange nuts
(F2) as shown. Do not tighten completely.
8. Stand the cabinet upright and fasten the front corners using
8 pcs 5/16" hex-head bolts (F1), 2 pcs at each corner. Do not
tighten completely.
1. Assemble Cabinet Frame
P1
P1
P2
P3
P1
P2
Assemble Cabinet
■ As you assemble the cabinet, make sure the edges with the
holes are facing up.
WARNING
Excessive Weight Hazard
Use two or more people to move, assemble or install
cabinet.
Failure to do so can result in back or other injury.
5/16" Hex-head bolt (24)
F1
F2
Flange nut (8)
A. Edges with holes
 Loading...