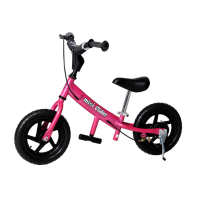
4. To adjust the angle of the handlebars for smaller riders, simply loosen 13 mm nut on the front of the handle
bars and rotate the handles to the desired angle and retighten.
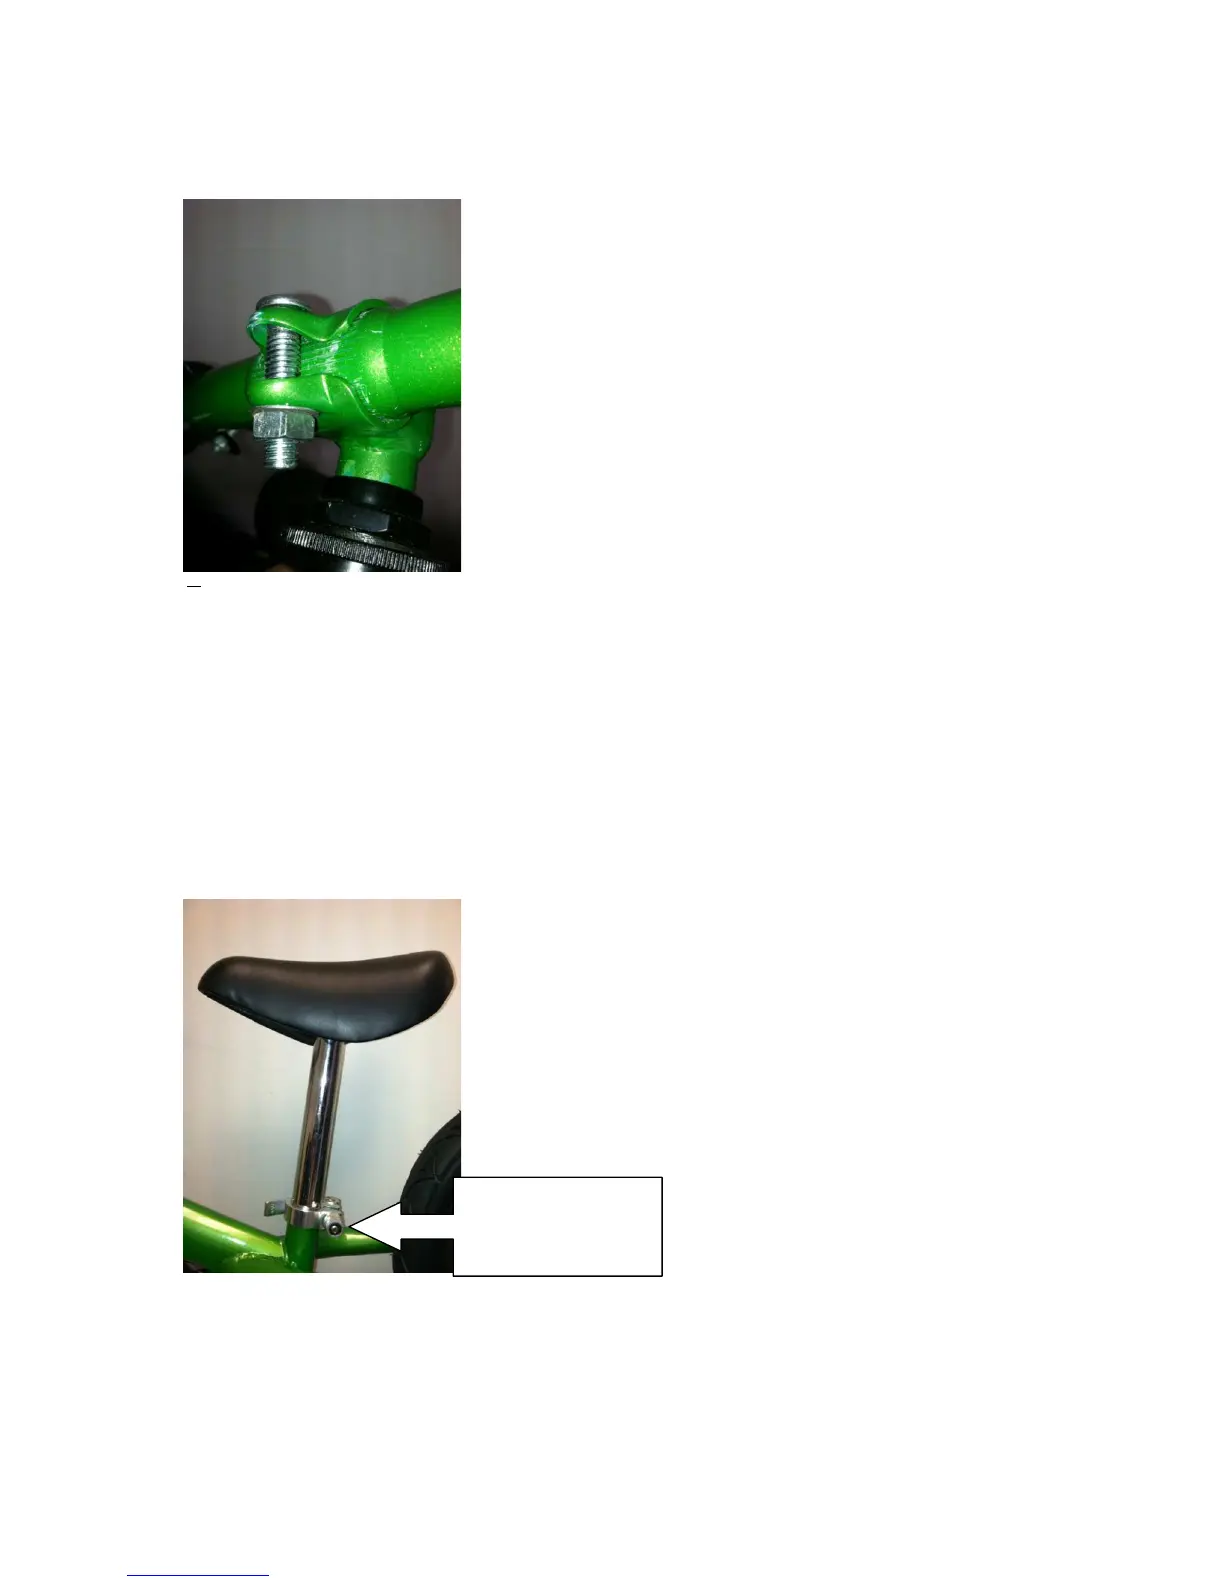
Installing and Adjusting Seat
The proper seat height is achieved when your child can put both feet on the ground at the same time when seated. If
the seat is too high or too low, use the quick-release to loosen the seat clamp bolt, adjust the seat to the proper
height, and retighten quick-release. There is a line on the seat tube describing its highest setting. Do not exceed this
limit, it is dangerous and can damage your bike.
Insert seat post into the seat shaft and align your seat parallel to the frame. Once the seat is positioned to the proper
height and direction, tighten the silver quick-release until the seat won’t rotate or slide up and down.
Installing Front Wheel