5 Assembly
Figures 1 - 6
NOTE!
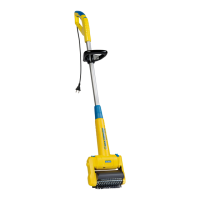
Your device is supplied with the
surface brush pre-assembled.
Loose parts supplied must be
as sembled accordingly when
working with the joint brush.
!
After removing from the packaging,
loosen screw connection (G) .
Next, turn handle (A) 45° as shown in
fig ure and adjust the length of
the telescopic tube (F) according to
your body height, as illustrated.
5 locking positions are available.
In the selected position, turn handle
(A) a further 45° and tighten the
height of the telescopic tube (F) with
the screw connection (G) by hand.
!
As the device should always be
guided and operated with two
hands, fit the additional handle (E) as
shown in the figure , adjust the
height and screw the additional
handle (E) tightly into place .
6 Commissioning
WARNING! BEFORE USE OBSERVE
CHAPTER 2 “FOR YOUR SAFETY”.
ATTENTION! Improper use of the
device poses a risk of damage to
property!
You should therefore observe the
following safety instructions:
!
Clean the roller/joint brush (N/J)
before each cleaning operation.
!
The air inlet openings on the
motor/gear unit (L) must not be
blocked or covered.
!
Check on a small, if possible hidden
area, that the ground to be cleaned
will not be damaged by the brush-
ing action.
!
Never use the device too long on
one spot, always guide at walking
pace.
6.1 Operation
Figures 7 - 11
Slide the loop of the extension cable
into the designated cable strain relief
(B) in the handle (A) and fix it in the
designated clip.
NOTE!
!
The performance of the equipment
may decrease if unnecessarily long
extension cables (>25 m) are used.
!
If cable reels are used, unroll the
en tire cable.
!
The cross-section of the cable used
must be 1.5 mm
2
.
Always place the device parallel on
the ground which is to be cleaned.
Identify the most comfortable but also
most effective working angle for your-
self and then adjust the 5 click-stop
safety guard (O) so that the rubber lip
is just above the ground.
!
Make sure that the surface to be
cleaned is free from debris e.g. stones,
screws etc., which could be flung up.
Use an extension cable to connect the
device to a power outlet (230 V AC).
CAUTION! RISK OF INJURY FROM
ROTATING BRUSHING TOOL!
!
Never start the device in a tilted
position!