SWITCH PLATE AND ROTARY
KNOB REPLACEMENT
4. Separate the main PCB and the switch plate from the top shell (the top shell is
screwed onto the bottom chassis and should come off without any resistance).
5. Unscrew the 18 screws that hold the main PCB and the switch plate together.
6. Replace the switch plate with the desired one and screw it back together
with the main PCB.
7. Reassemble the rest of the keyboard by plugging back in the USB C connector
(check for correct orientation) and replacing the top plate and bottom chassis.
8. Put back the rotary knob by aligning the indent on the bottom with the
stem and reinstall the switches and keycaps using the instructions above.
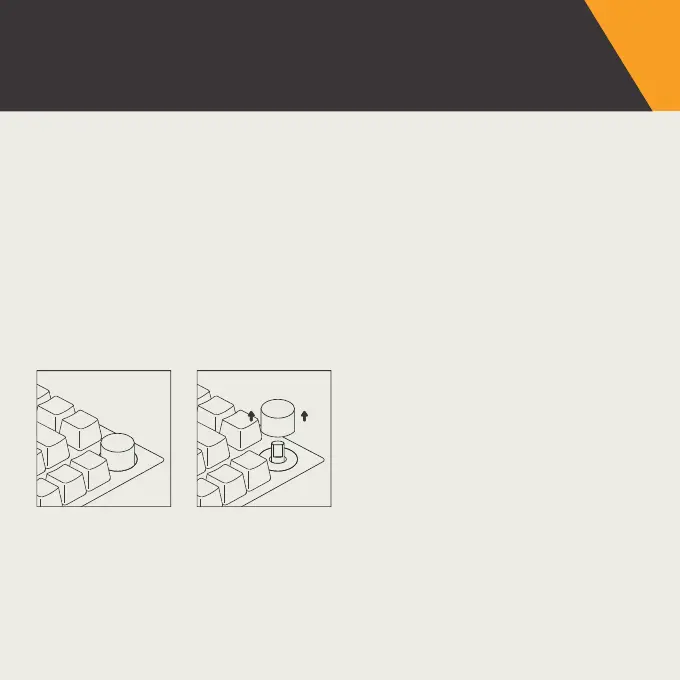
Rotary Knobs:
For aesthetic customization of the GMMK PRO, knobs in different colors are available
for purchase separately.
To change the rotary knob on the GMMK PRO, simply pull out the existing knob and
put in the new one by aligning the indent on the bottom with the stem and pushing
it firmly in place.
The new knob should easily go into place and will not require a great amount of force
to be applied.
12
 Loading...