19
221132B
1 0 B o i l e r F i x i n g
10.1 Mounting the Boiler
After installing the boiler mounting frame, domestic and
heating water systems, making the electrical connections
and preparing the flue components, continue as below:
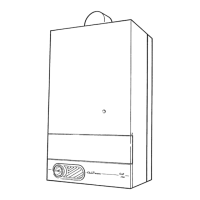
Lift the boiler into position, hooking it onto the boiler
mounting frame at the top, then loosely fit the two boiler
securing screws at the top, see diagram 6.3.
10.2 Gas and Water Connections
Locate the boiler water pipes into the isolation valves
and the gas service cock union halves. Fully push the
boiler back to the mounting frame, locating the studs into
the clips.
Make the compression joint on the isolating valves and
join the gas service cock union. Secure all of the valves
and gas service cock with the clips.
10.3 Boiler Securing
Secure the boiler by tightening the two boiler securing
screws at the top.
10.4 Discharge Pipe
Remove the two control housing screws, see
diagram 10.1.
Remove the control housing and support it on a surface
or by screwing it to the front edge of the base, using one
of the securing screws, see diagram 10.1.
Fit the short discharge pipe to the safety valve using the
nut and olive supplied loose, see diagram 10.2.
Extend the discharge pipe, using only a compression
type fitting to join the discharge extension, refer also to
Section 8.3 “Safety Valve Discharge”.
10.5 Clock/timer (if applicable)
Fit the clock/timer kit following the appropriate sections
of the instructions supplied with it.
10.6 Electrical Connector
Connect the two halves of the electrical connector
together.
Clip the connector into position on the boiler mounting
frame. Secure the cables with cable clamp immediately
behind the connector.
Carryout preliminary electrical system checks as below:
1. Test insulation resistance to earth of mains cables.
2. Test earth continuity and short circuit of all cables
3. Test the polarity of the mains.
FASCIA
FASCIA
SECURING
SCREW (3)
CONTROL HOUSING
SECURING SCREW (2)
SECURING
SCREW
(To support the
control housing if
necessary)
CONTROL HOUSING
COVER SECURING
SCREW
CONTROL
HOUSING
COVER
3894 S
2292
DO NOT
ADJUST
HOT WATER
GAS
PRESSURE
ADJUSTER
CONTROL
BOARD
CENTRAL
HEATING
GAS PRESSURE
ADJUSTER
Diagram 10.1
2795
UNION
CONNECTION
Diagram 10.2
'NOTCH'
DISCHARGE PIPE
 Loading...