22 Installation and maintenance instructions EASICOM 3 0020238431_03
1. Ensure that the product is voltage-free.
2. Connect the cables. (→ Page 20)
3. Connect the individual components depending on the
installation type.
Condition: If installing a multi-circuit control.
▶ Change the pump mode d.18 from Eco (intermittent
pump operation) to Comfort (continuous pump opera-
tion).
Condition: When connecting a control (230 V).
▶ Connect the control to the main plug.
BUSRTB.off
Burner
off
RT
24V =
-
+
BUS
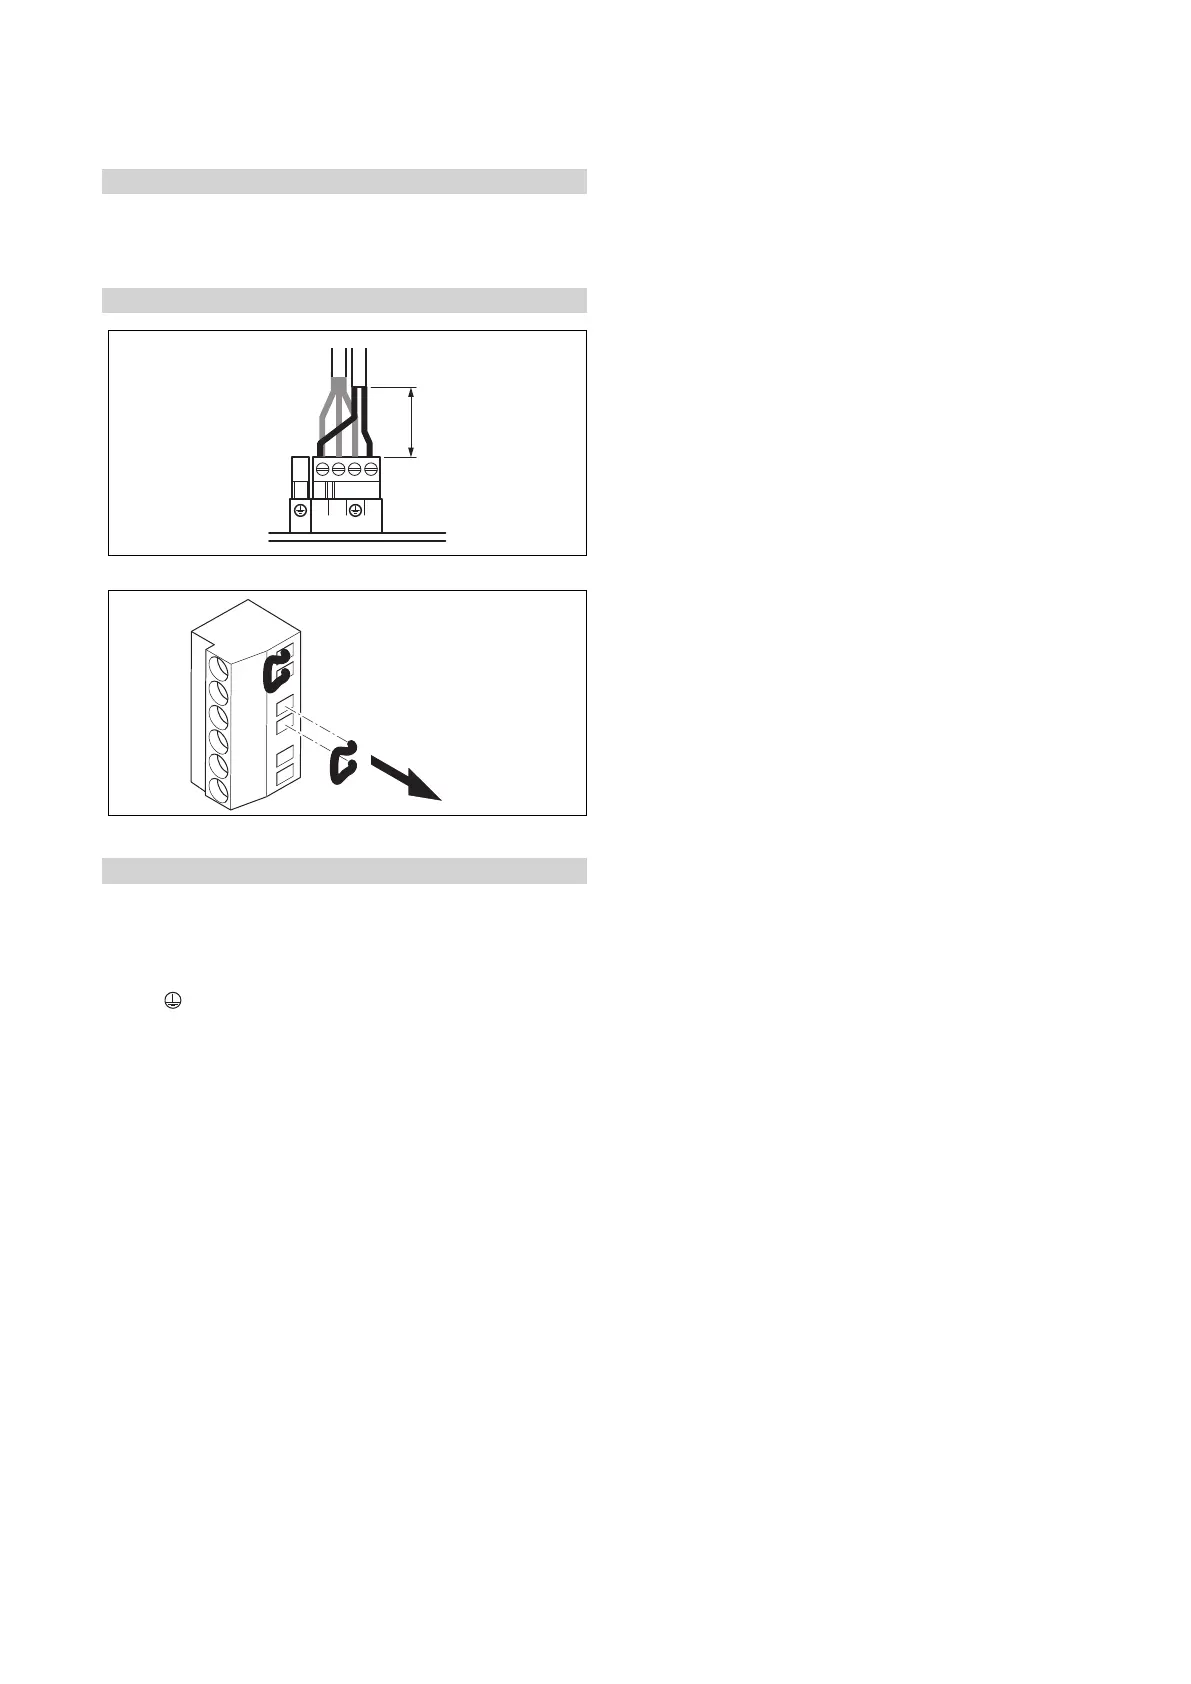
▶ Remove the bridge from the 24V=RT plug.
Condition: 230 V 3-wire connection
▶ Ensure that the control is designed for a maximum nom-
inal current of 7 A.
▶ Connect the control to the main plug X1.
– Terminal assignment: L ‑ line, N ‑ neutral conductor,
‑ earth
▶ Draw the end user's attention to the fact that the follow-
ing features are present with this installation type.
◁ The frost protection function is deactivated. If the
product is installed in a room where there is a risk
of frost and it has not been protected by a room ther-
mostat, install an additional frost protection thermo-
stat.
◁ The pump programmes are not active.
◁ If the product is switched off, the display is switched
off.
◁ Each time the unit is started, the fan runs for
20 seconds.
◁ Residual heat in the heating return may result in the
product blocking the burner for 10 minutes.
4. Close the electronics box.