R 22MAR23
PART No.
SHEET
ALL INFORMATION WITHIN ABOVE
BORDER TO BE PRINTED EXACTLY
AS SHOWN ON 8.5 x 11 WHITE 16
POUND
NON-BOND RECYCLABLE
PAPER.
PRINT ON BOTH SIDES,
EXCLUDING TEMPLATES. TO BE
UNITED IN ACCORDANCE
WITH
GMCCA SPECIFICATIONS.
Date Revision Auth DR
Title
Ultium PowerUP Charge Station
User Manual
13DEC22 Fourth Re l SAR
MB
22MAR23
Fifth Re l
SAR
MB
84922762
29NOV22
Third Re l
SAR
AH
11
EN
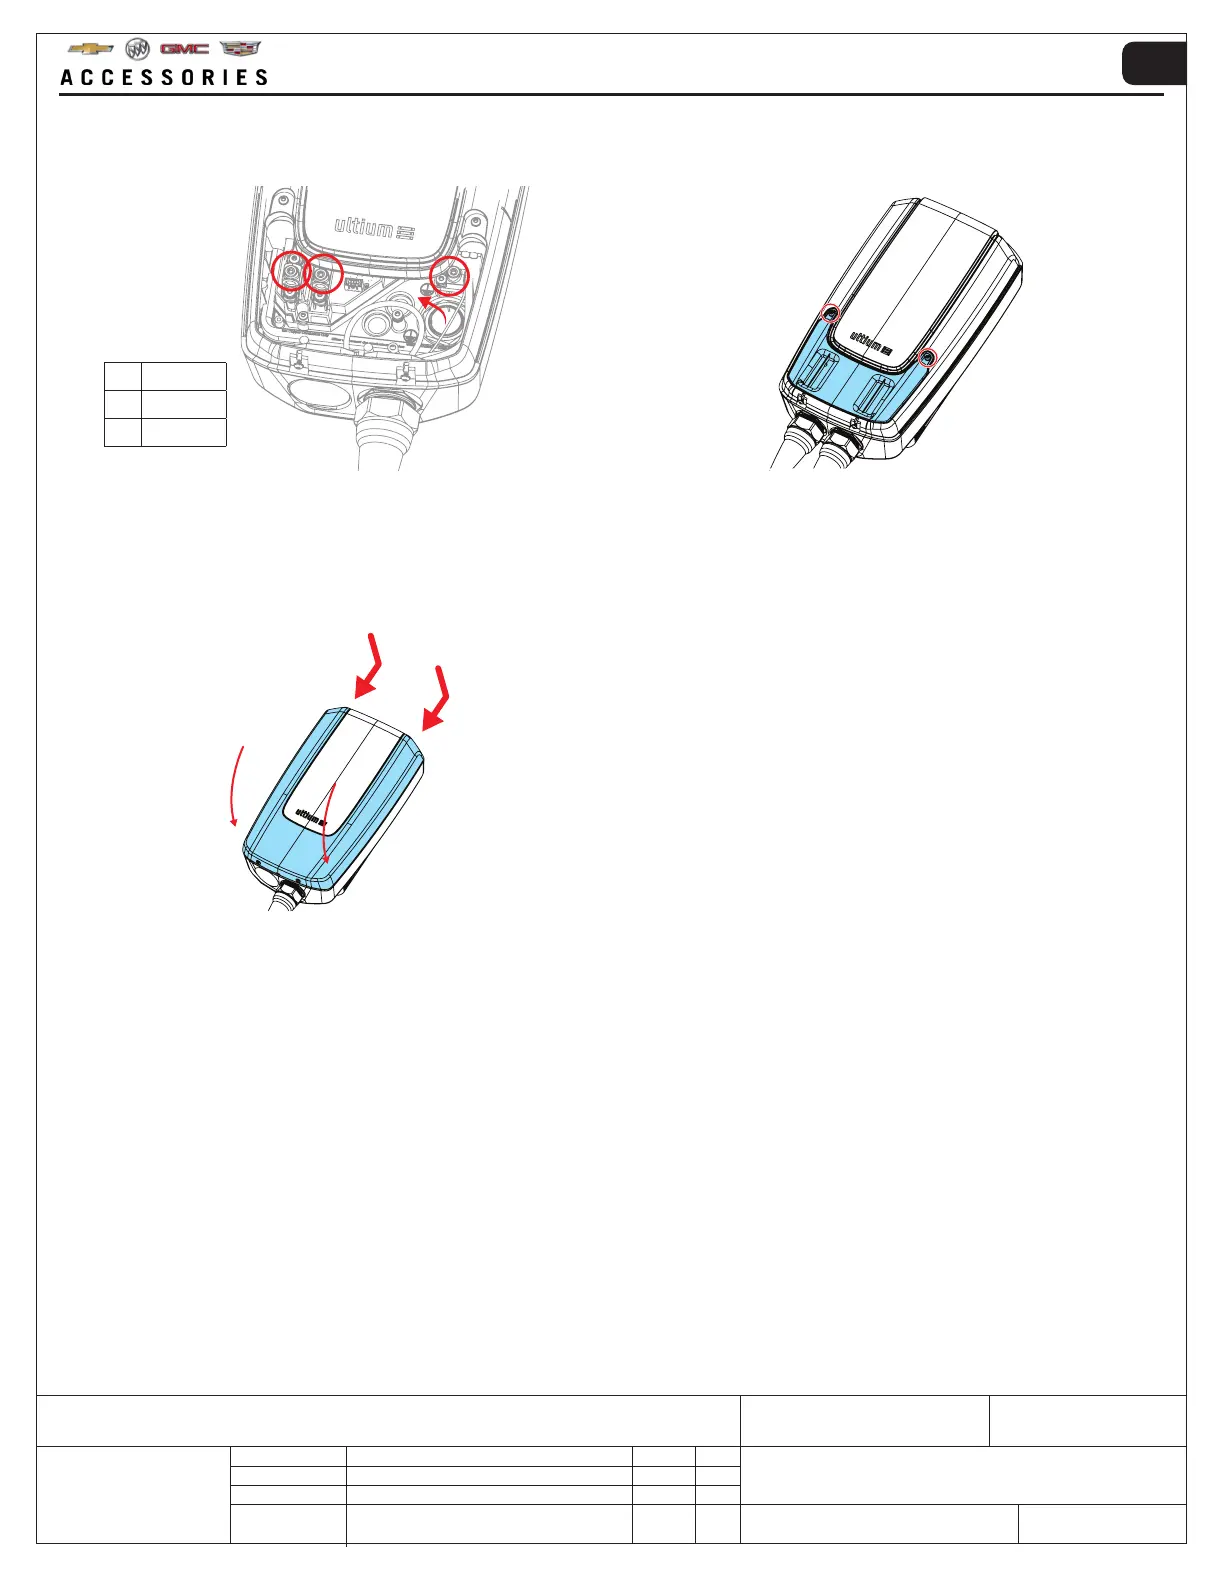
11. Install the cables from the direction shown in the
terminals and tighten the terminal screws to 2.5 ft/
lbs (3.5 Nm).
12. Re-attach the service lid with its two screws and
tighten them to 0.7 ft/lbs (1 Nm).
NOTE: Components may have been removed for image clarity.
1 2
3
1 L1
2 L2
3 GROUND
13. Re-attach the front cover with its two screws and
tighten them to 0.7 ft/lbs (1 Nm). The hardwire
installation is now finished.
14. To continue set-up of the Ultium PowerUP Charge
Station, refer to ‘5. OPERATING INSTRUCTIONS’
to do the following:
- Switching the charge station circuit breaker on/off
- Pairing to Bluetooth
®
- Downloading the GM MyBrand / Ultium app
- Setting-up a GM user account
- Charging an EV
15. NOTE FOR INSTALLATION ELECTRICIAN:
Make sure the correct operating amperage has
been set via the end users GM MyBrand / Ultium
app after set-up and pairing to the Ultium PowerUP
Charge Station (default operating amperage 6
amp).