8
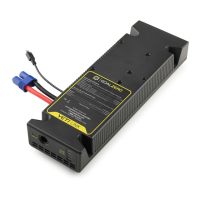
1. Once Link Module is installed into the Yeti you will be able to attach Goal
Zero Yeti Expansion Tanks. To do this take the male EC8 cable from the
Expansion Tank and plug it into the EC8 External Battery Connector on
the Link Module that is installed in the Yeti Power Station.
2. Then take either the included power supply or a Goal Zero Solar Panel
(sold separately) and plug the 8mm barrel connector (blue ring) into the
8mm input port on the Link Module.
Note: Do not plug a tank into itself when multiple tanks are
connected.
3. Power will flow into the battery and then into the Yeti power station.
Once the power station is full the power will then start filling up the
Tank.
NOTE
1. The 8mm port on the Link is the only way to charge both the Yeti and
Tank. Input ports on the Yeti display will only charge the Yeti, not the
Tank.
2. When Link and Tank are properly installed, power passes through the
8mm port to the Tank and then into the Yeti. Thus, without a Tank or
third party battery attached, you cannot charge the Yeti directly using
the 8mm port on the Link.
WARNING: Do not exceed 22V input for the module. Doing
so can cause serious damage to the Yeti and potential bodily
injury. Take note of voltages when using third party solar panels
with the module. Do not chain solar panels in series (positive
to negative, positive to negative, etc.), as this can result in
dangerously high voltages.