6
Ensure cable is fully inserted and tightly in place before use. Check
upon subsequent uses. For questions, contact Solutions Center at
support@goalzero.com or 1-888-794-6250
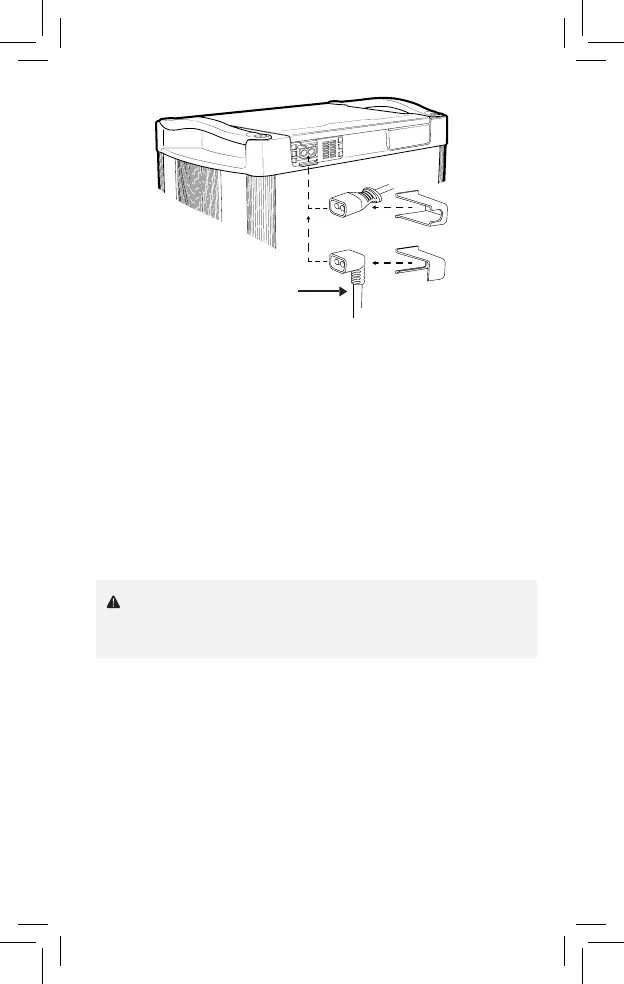
8. Proceed to plug in the EC8 cable and slide either the straight or the
90-degree EC8 cable holder over the cable and into the slots of the Link
Lock. When the power source is correctly plugged in, the Input Charge
Indicator light will turn blue. When the Tank is correctly connected to the
Link and the power source is plugged in, the Lead-Acid State of Charge
Indicator light will begin flashing green. NOTE: Upon plug-in, all LEDs will
turn on, then off before correct lights are displayed. This may take up to
30 seconds.
9. Power source will charge the Yeti first. When the Yeti is fully charged,
power will begin to store in the Tank. NOTE: Power coming in from the
8mm port will flow through the Tank first and then into the Yeti. Without
a Tank or third party battery attached, this port will not charge the Yeti
directly.
EC8 External
Battery Cable
or