7
6 HYDRO POWERED ROBOTIC POOL CLEANER
HYDRO POWERED ROBOTIC POOL CLEANER 7
STEP 3: INSTALLATION
REMOVE AIR FROM HOSE
1. Make sure pool pump is turned OFF.
2. Attach female end of the hose to the pool cleaner head and remove all air from the cleaner and hose.
Tip: Aneasywaytodothisistorstensurethehosesectionsaretightlyttedtogetherandtheclean-
er is attached to one end of the hose. Then switch the pool pump ON. Take the open end of the hose
and hold it over the return lines/inlets (where water returns to the pool). Wait a few seconds so air is
removed through the pool cleaner. Keep the end of the hose underwater so that air does not get back
into the hose. Then switch the pool pump OFF.
WHEN CONNECTING TO THE POOL SKIMMER
When connecting to the pool skimmer, the Flow Control Valve is often used. The Flow Control Valve
ensures your Robo H20 Pool Cleaner receivestheowrequiredforoptimumperformance(see Figure 5
for how to adjust Flow Control Valve if needed). If you have two skimmers, the Flow Control Valve may
not be necessary.**
**Note: For two skimmer application, use the skimmer closest to pool equipment and connect hose using
only the Male Hose end--do not use Female/Female
Hose or Flow Control Valve.
1. Attach Flow Control Valve to the Female/Female
Hose closest to the skimmer. The Flow Control Valve
willautomaticallyregulatetheowtoyourRobo H2O
Cleaner.Iftheowfromthepumpistoohigh,the
spring-loadedapwillopentobypasstheexcess,
soonlythecorrectamountofowgoesthroughthe
cleaner.
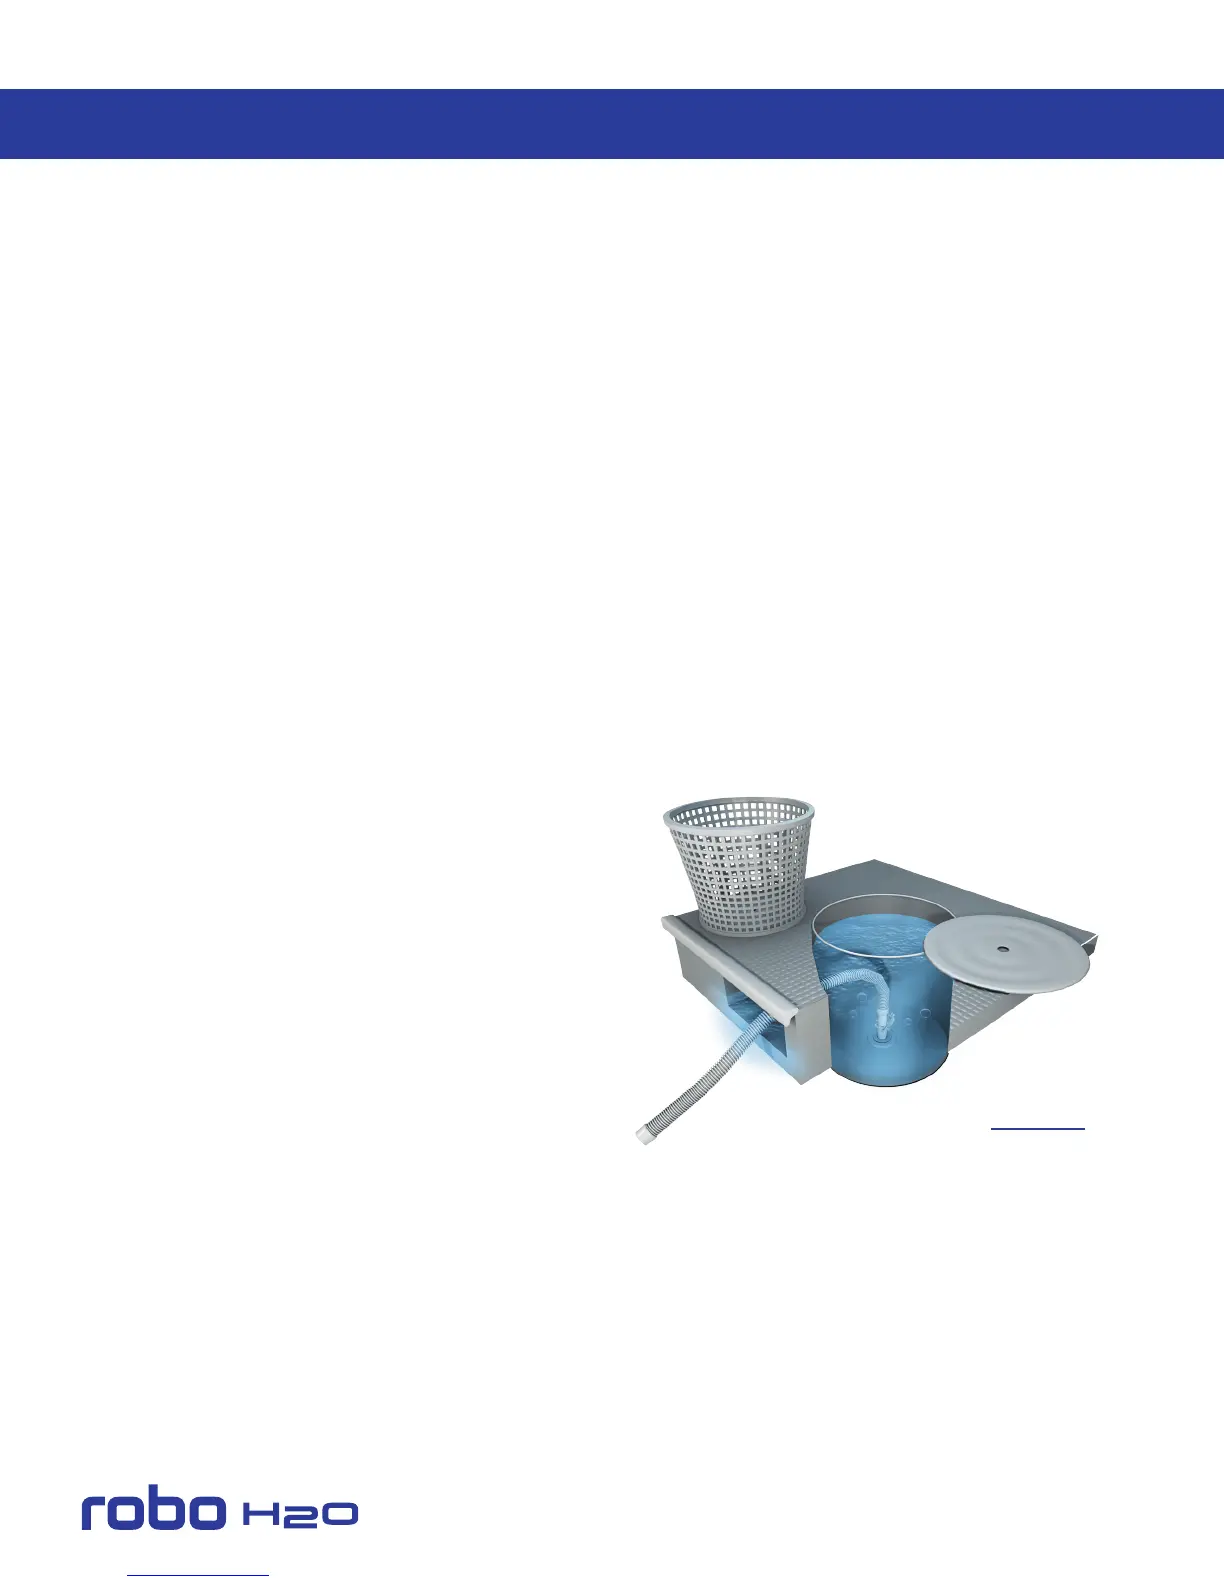
2. Remove the skimmer basket.
3. Insert Control Valve Adaptor to hole in skimmer to
ensureagoodconnection/snugt.Theninsertthe
Flow Control Valve into the Control Valve Adaptor
as shown in Figure 4. If there are two holes at the
bottom of the skimmer, place it into the one at the back (the hole farthest from the opening in the skimmer).
4. Once air has been removed from cleaner and Flow Control Valve has been installed, it is important to
testtheowusingtheFlow Gauge. Remove cleaner head from female end of hose. Attach the Flow
Gauge to the end of the hose that will connect to the cleaner head in order to ensure there is proper
owtothecleaner.TheFlow Gauge should read around 5. If the Flow Gauge does not read around 5,
see section on how to count RPMs (see page 11).
IMPORTANT: IfsufcientowisnotobtainedwiththefactorysettingoftheFlow Control Valve (low), ad-
just as needed using the handles on the side of the valve. There are + and - marks to indicate the direction
toincreaseordecreaseow.Threesettingsarepossible:low,mediumandhigh.See Figure 5.
INSTALLING YOUR ROBO H2O POOL CLEANER
Figure 4
 Loading...