4. OPERATING INSTRUCTIONS
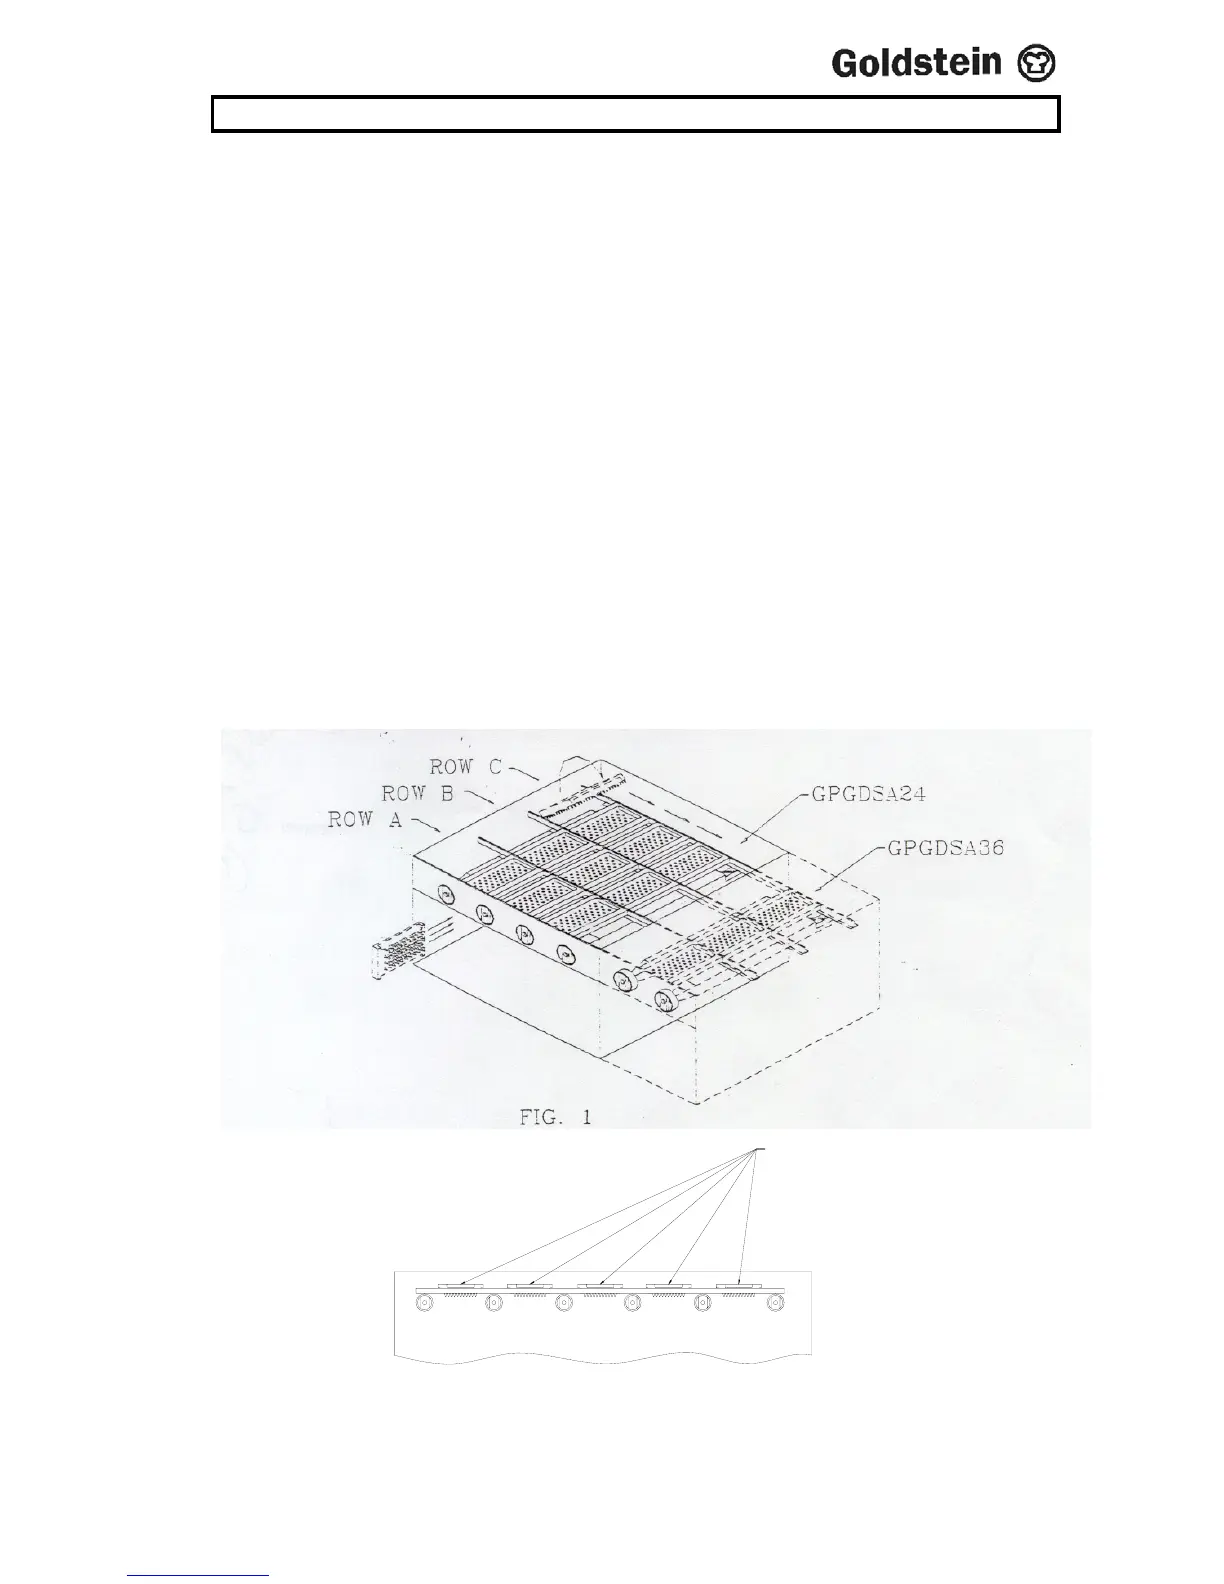
INSTALLING FRETS INTO THE GPGDSA
This procedure is to be followed after the unit has been mounted into desired position.
Note To avoid damage to frets only insert them into a row from the left hand side.
Note The first fret that you put into each row should be the far right hand fret. All
other frets follow, so that the frets are put into position from the right to the left.
Step 1 Turn fret onto its side with points facing to the right (refer Fig 1)>
Step 2 Holding the fret in your left hand move to below the left hand side of the
desired row (refer Fig 1)
Step 3 Lift fret up between the left hand burner and the side of the unit. Tilting fret
slightly, slide fret onto rails above burners, ensuring that the fret has the points
facing down (refer Fig 1).
Step 4Using your right and your left hand in conjunction, slide the fret to the right
hand side. The first fret that you put into each row should be the right hand fret,
which will be positioned above the space between the 2 far right burners. The
next fret put into the row should be positioned in the space to the left of the
previous fret. This should be repeated until the specified amount of frets are put
into each row. (Refer Fig.2).
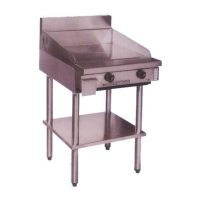
Note Each fret should be located above the space between each burner:
For the GPGDSA-24 there will be 3 frets in each row.
For the GPGDSA-36 there will be 5 frets in each row.
Frets to be
placed points down
FRONT VIEW
FIG.2
IM027B2/p6